Control Valve Upper Body: Disassembly
- valves at parallel pins.
- Do not use a magnetic hand.
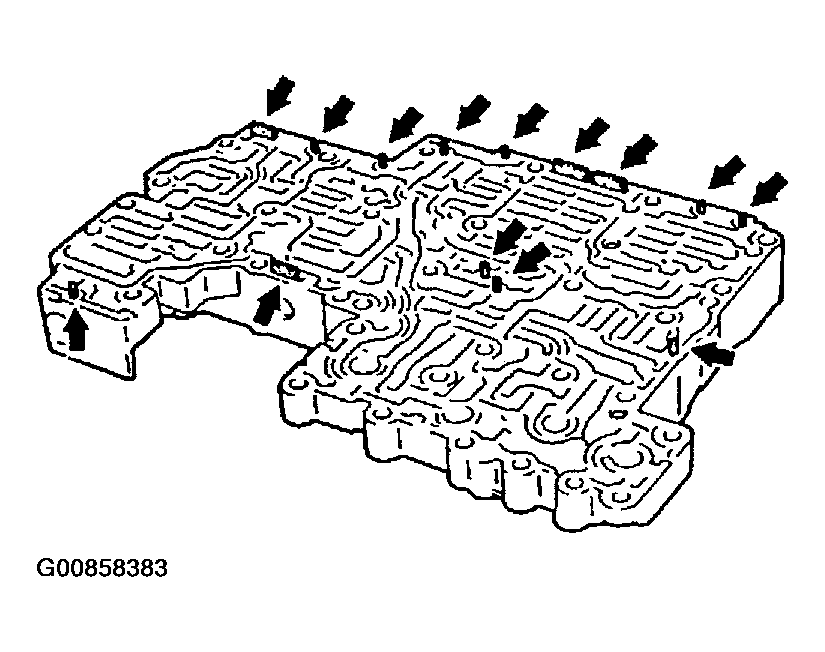 Courtesy of NISSAN MOTOR CO., U.S.A.
- use a wire paper clip to push out parallel pins.
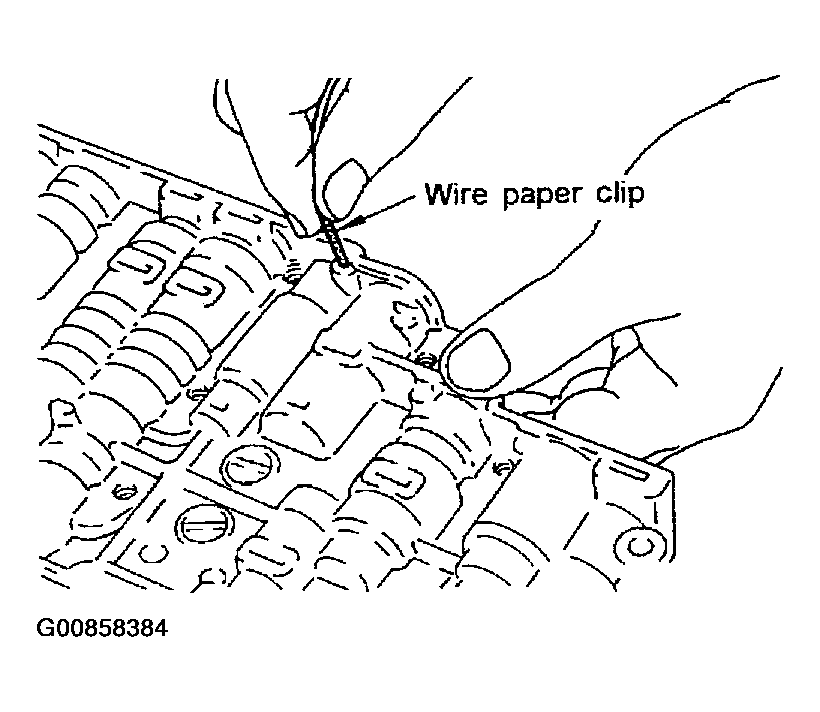 Courtesy of NISSAN MOTOR CO., U.S.A.
- Remove parallel pins while pressing their corresponding plugs and sleeves.
- Remove plug slowly to prevent internal parts from jumping out.
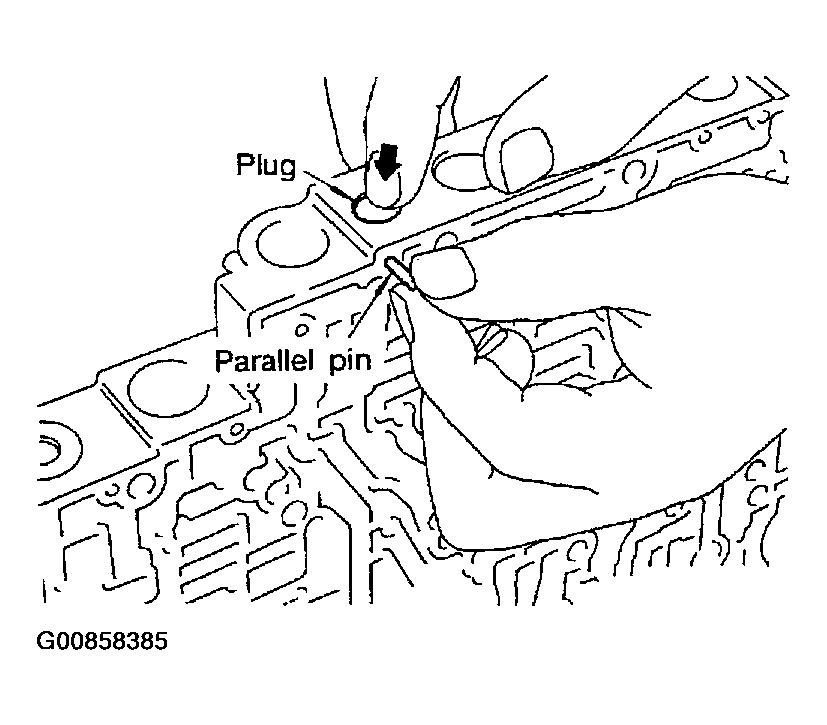 Courtesy of NISSAN MOTOR CO., U.S.A.
- place mating surface of valve facedown, and remove internal parts.
- If a valve is hard to remove, place valve body facedown and lightly tap it with a soft hammer.
- Be careful not to drop or damage valves and sleeves.
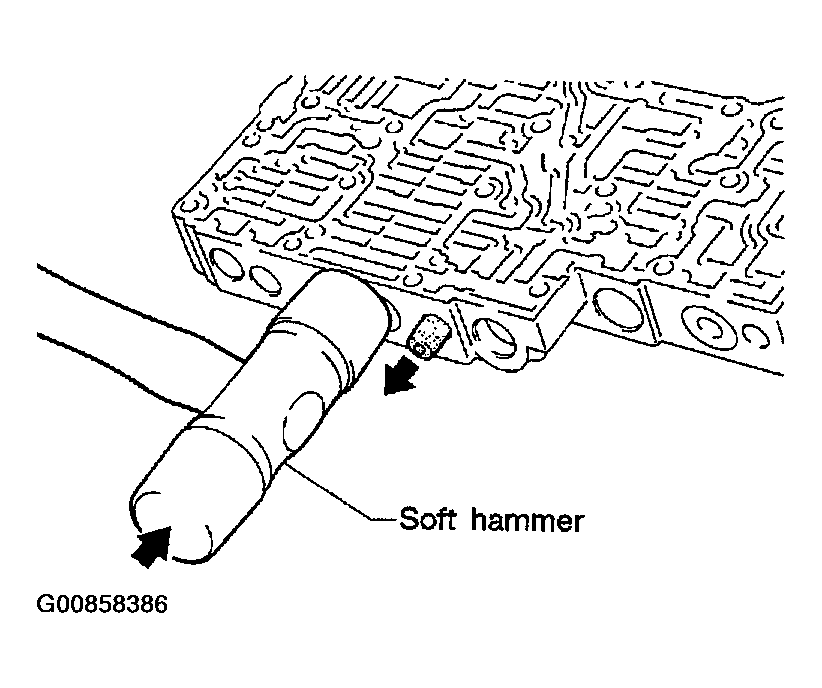 Courtesy of NISSAN MOTOR CO., U.S.A.
- Remove valves at retainer plates.
- Pry out retainer plate with wire paper clip.
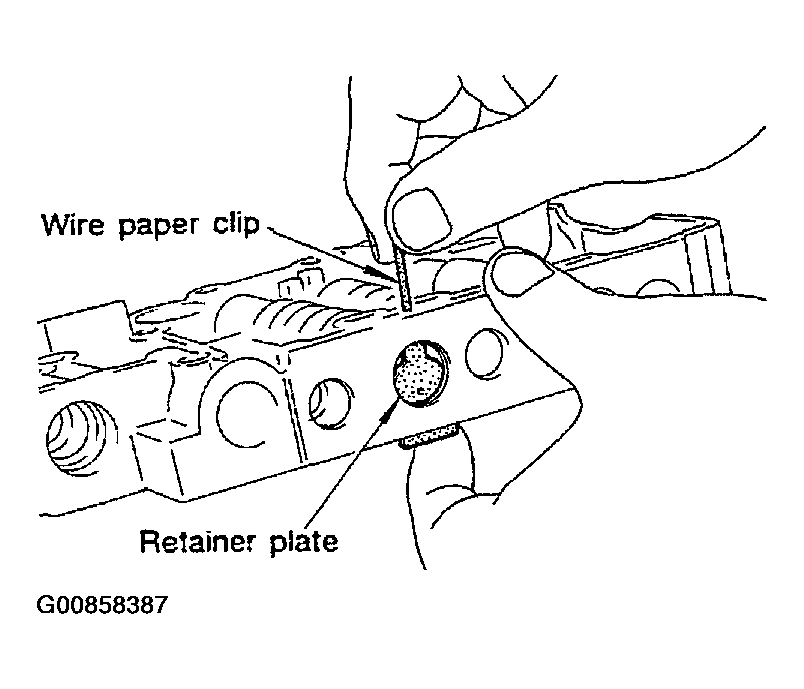 Courtesy of NISSAN MOTOR CO., U.S.A.
- Remove retainer plates while holding spring.
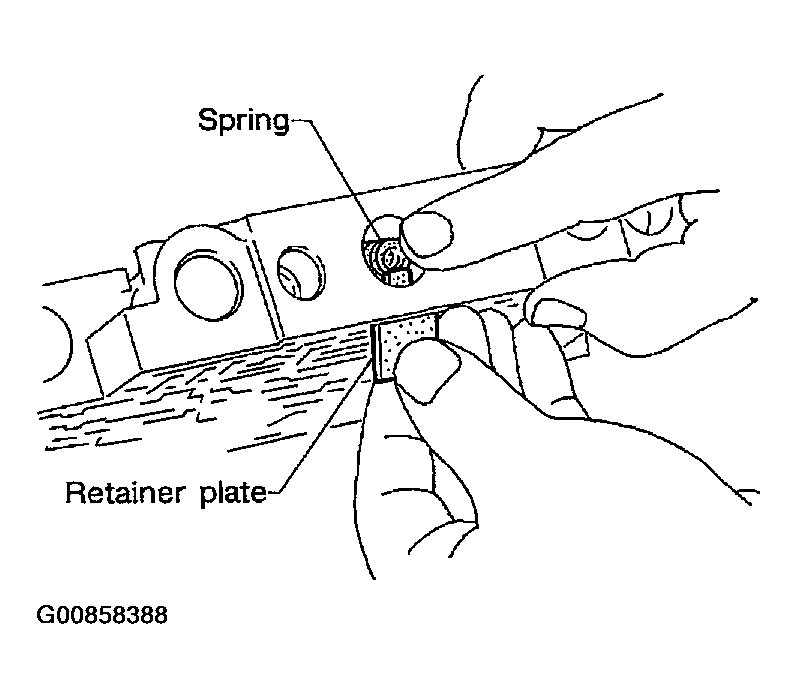 Courtesy of NISSAN MOTOR CO., U.S.A.
- Place mating surface of valve facedown, and remove internal parts.
- If a valve is hard to remove, lightly tap valve body with a soft hammer.
- Be careful not to drop or damage valves, sleeves, etc.
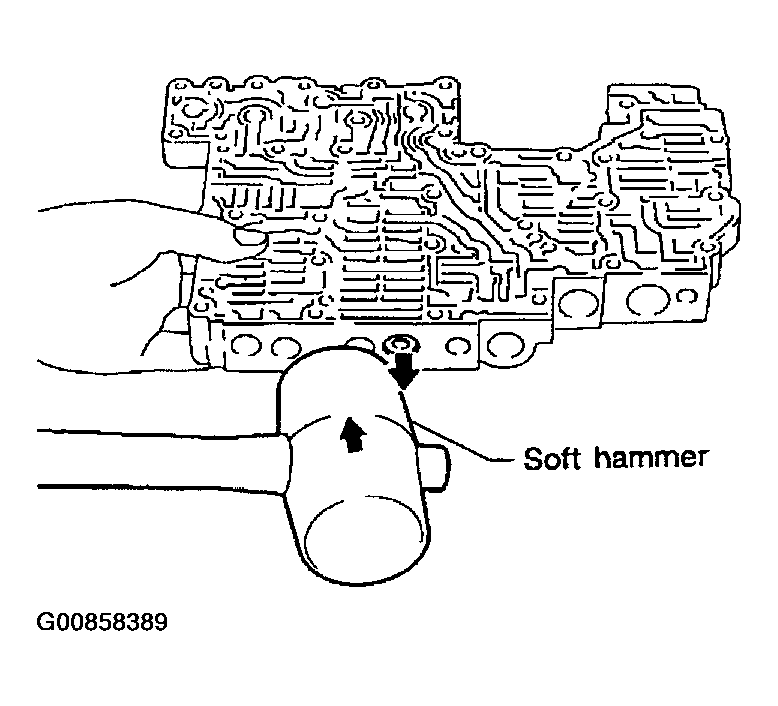 Courtesy of NISSAN MOTOR CO., U.S.A.
- 4-2 sequence valve and relay valve are located far back in upper body. If they are hard to remove, carefully push them out using stiff wire.
- Be careful not to scratch sliding surface of valve with wire.
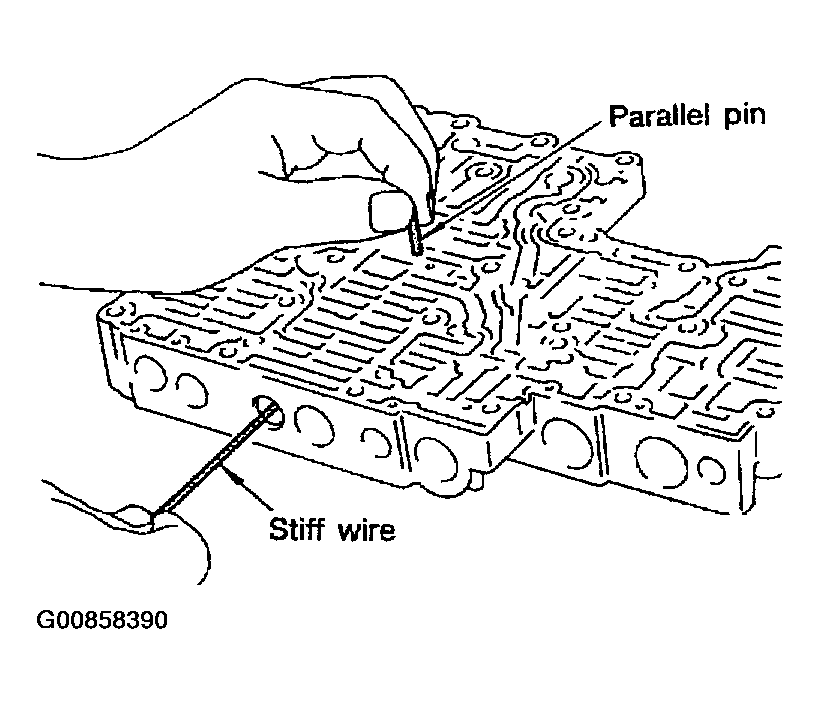 Courtesy of NISSAN MOTOR CO., U.S.A.