Oil Pump: Assembly
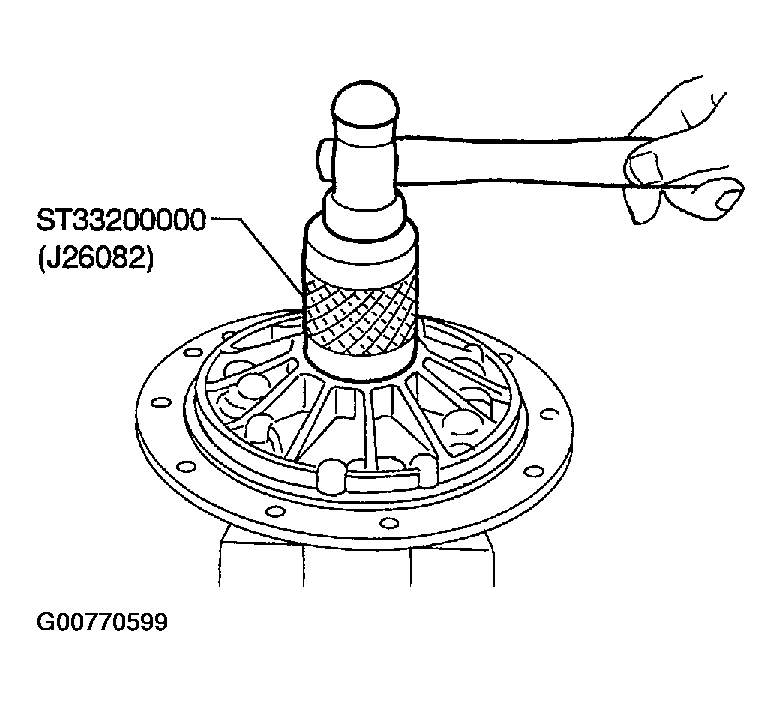
- Drive oil seal into oil pump housing.
- Apply ATF to outer periphery and lip surface.
 Courtesy of NISSAN MOTOR CO., U.S.A.
- Install cam ring in oil pump housing as follows:
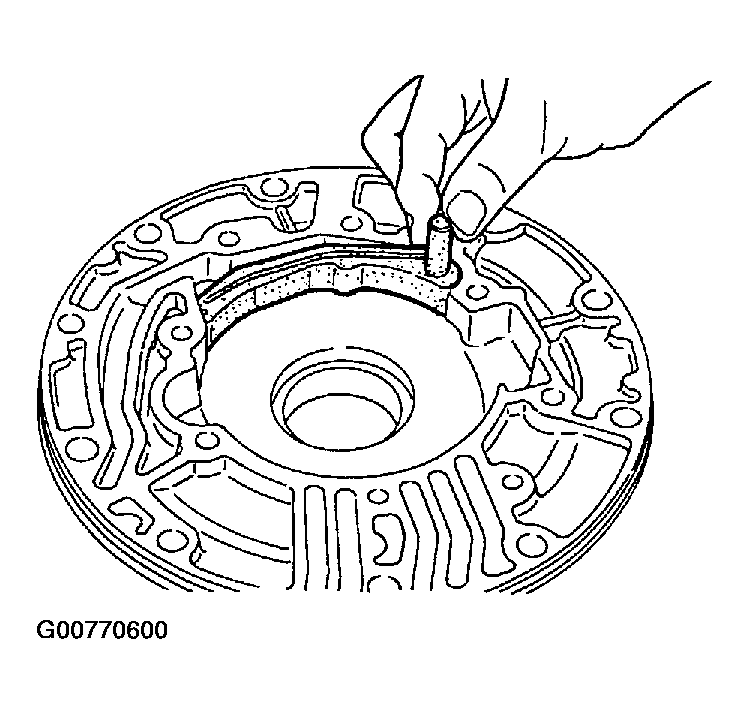
- Install side seal on control piston.
- Pay attention to its direction - black surface faces toward control piston.
- Apply petroleum jelly to side seal.
 Courtesy of NISSAN MOTOR CO., U.S.A.
- Install control piston on oil pump.
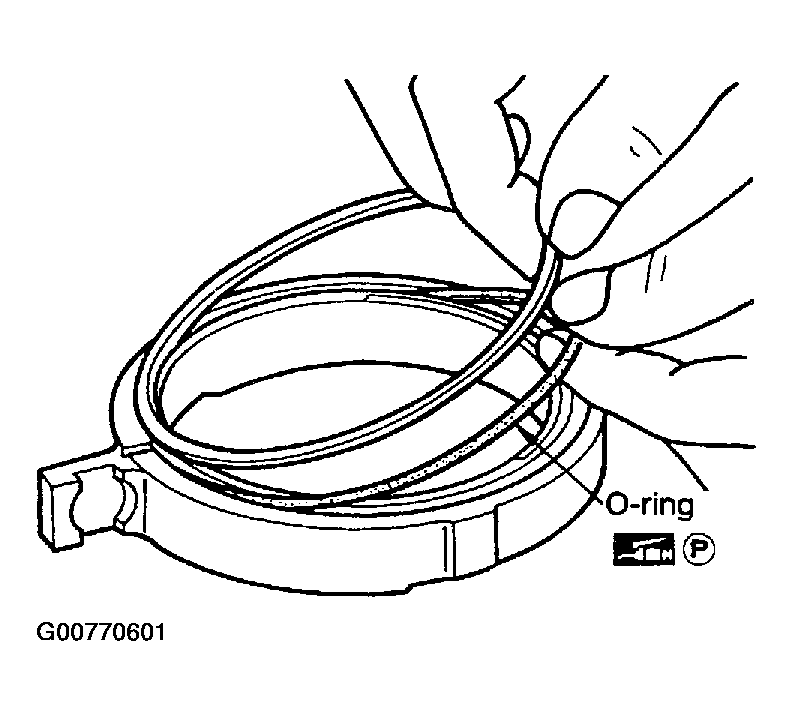
- Install O-ring and friction ring on cam ring.
- Apply petroleum jelly to O-ring.
 Courtesy of NISSAN MOTOR CO., U.S.A.
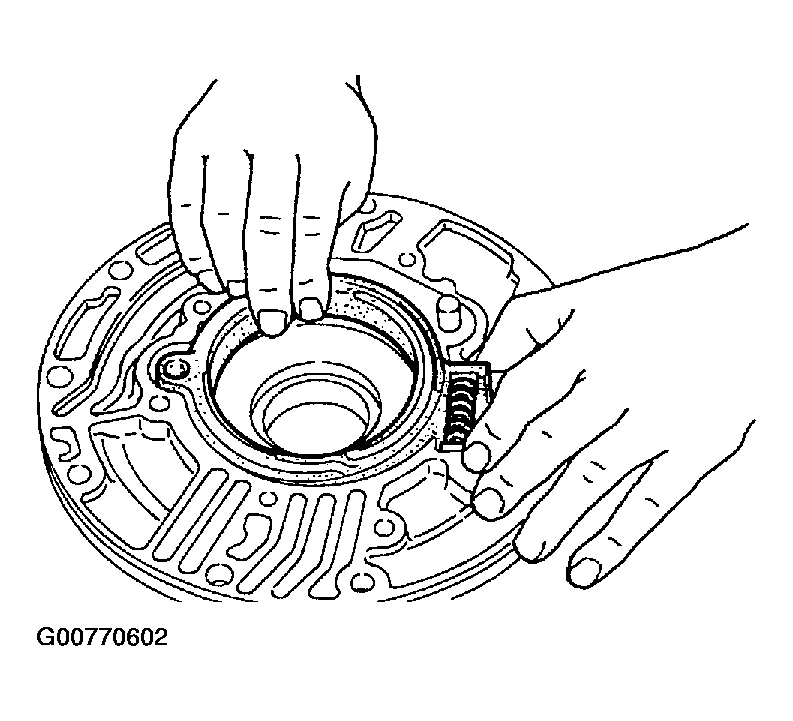
- Assemble cam ring, cam ring return spring and spring seat. Install spring by pushing it against pump housing.
 Courtesy of NISSAN MOTOR CO., U.S.A.
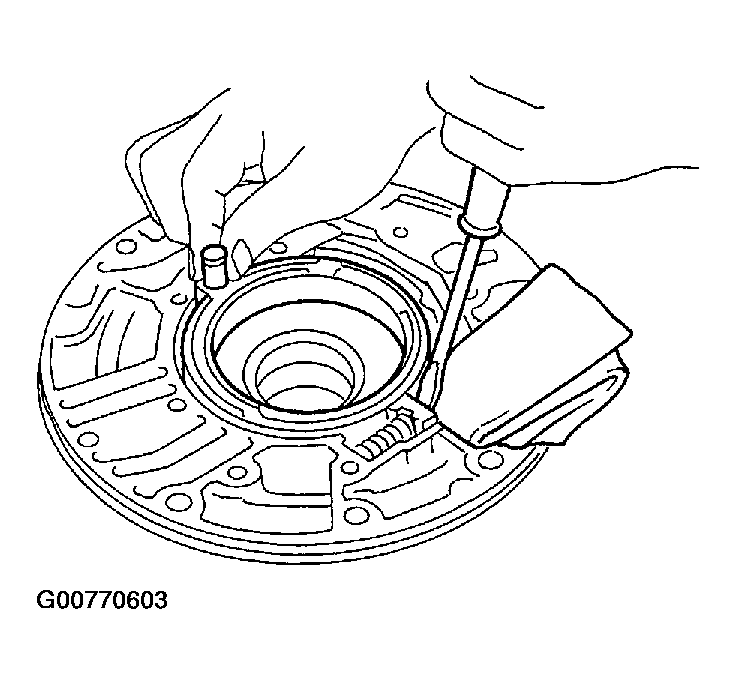
- While pushing on cam ring, install pivot pin.
 Courtesy of NISSAN MOTOR CO., U.S.A.
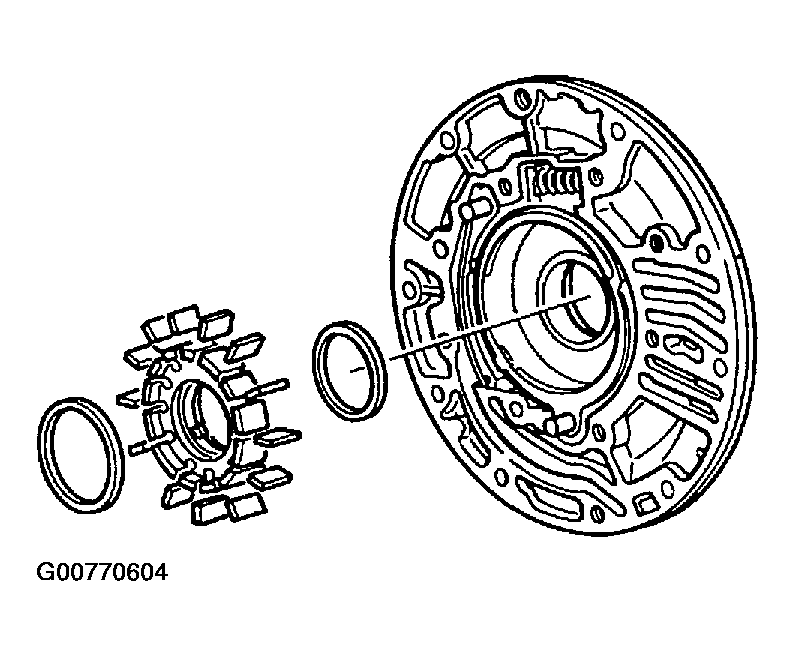
- Install rotor, vanes and vane rings.
- Pay attention to direction of rotor.
 Courtesy of NISSAN MOTOR CO., U.S.A.
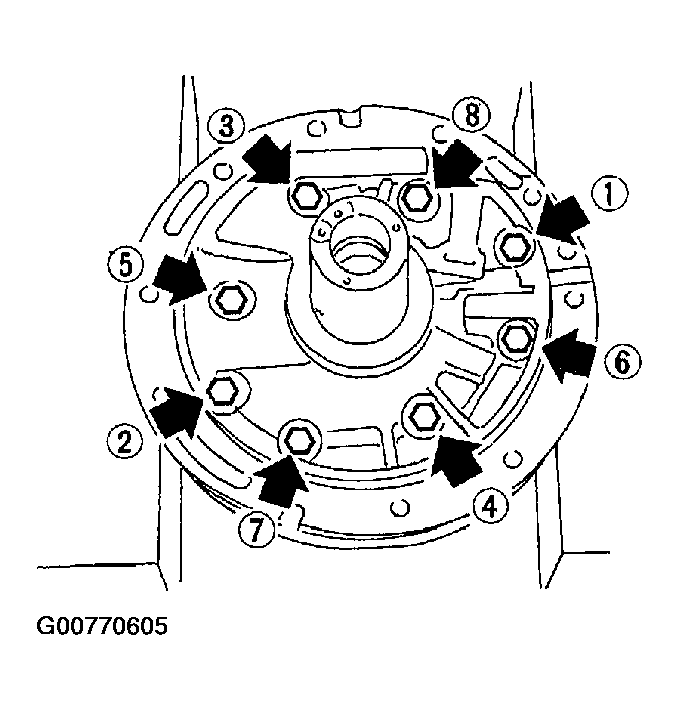
- Install oil pump housing and oil pump cover.
- Wrap masking tape around splines of oil pump cover assembly to protect seal. Position oil pump cover assembly in oil pump housing assembly, then remove masking tape.
- Tighten bolts in numerical order as shown in Fig 7.
 Courtesy of NISSAN MOTOR CO., U.S.A.
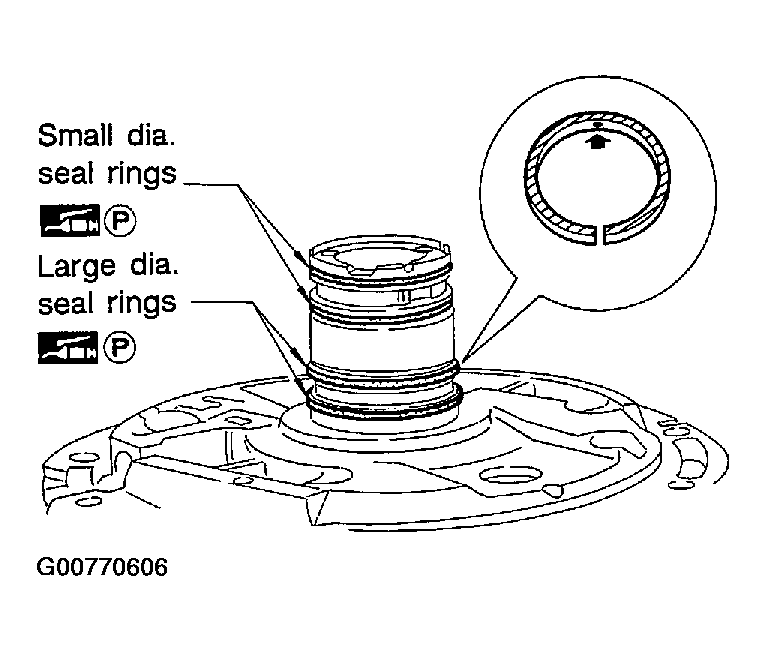
- Install seal rings carefully after packing ring grooves with petroleum jelly. Press rings down into jelly for a close fit.
- Seal rings come in two different diameters. Check fit carefully in each groove.
- Small dia. seal ring : No mark
- Large dia. seal ring : Yellow mark in area shown in Fig 8 by arrow
 Courtesy of NISSAN MOTOR CO., U.S.A.
- Do not spread gap of seal ring excessively while installing. It may deform ring.