Automatic Transmission (RL4R01A): Overhaul: Disassembly
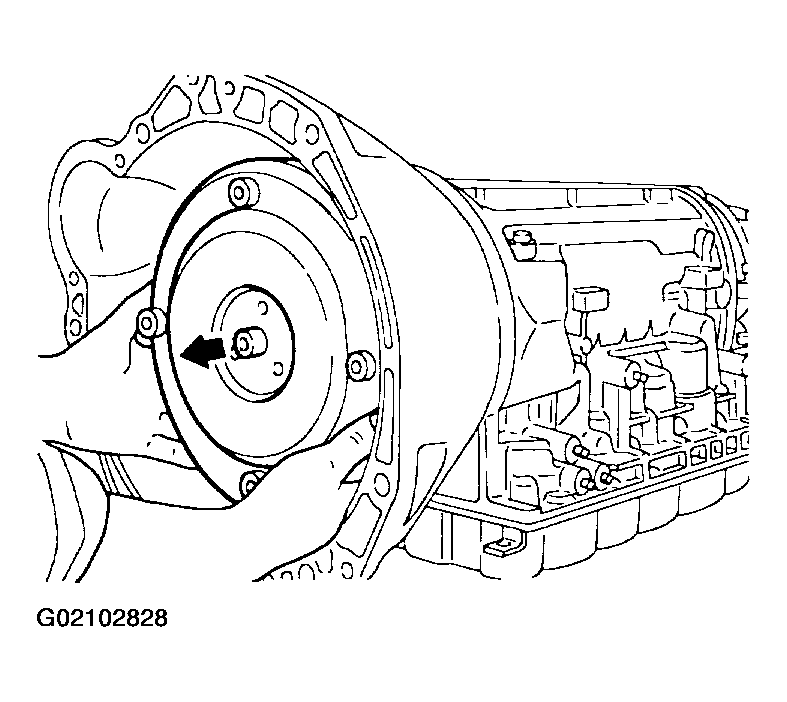
- Removing torque converter by holding it firmly and turning while pulling straight out.
 Courtesy of NISSAN MOTOR CO., U.S.A.
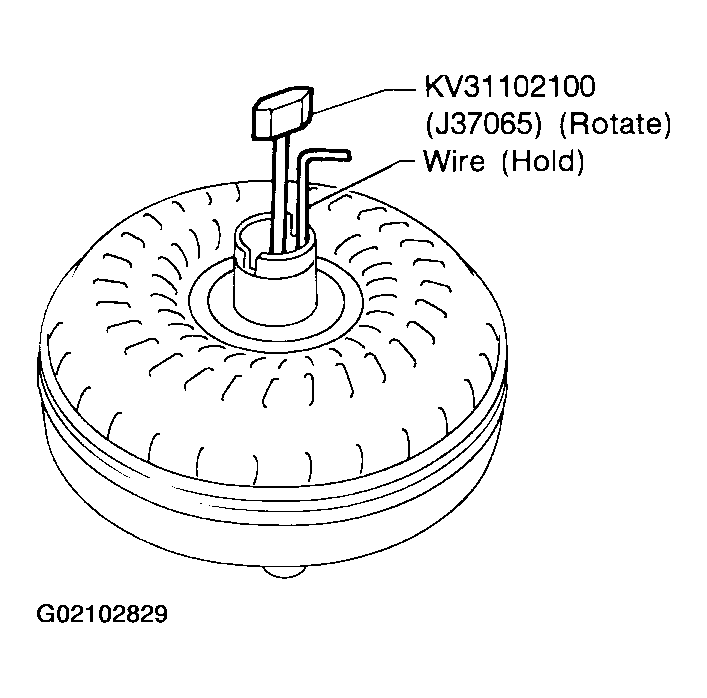
- Check torque converter one-way clutch.
- Insert Tool into spline of one-way clutch inner race.
- Hook bearing support unitized with one-way clutch outer race with suitable wire.
- Check that one-way clutch inner race rotates only clockwise with Tool while holding bearing support with wire.
 Courtesy of NISSAN MOTOR CO., U.S.A.
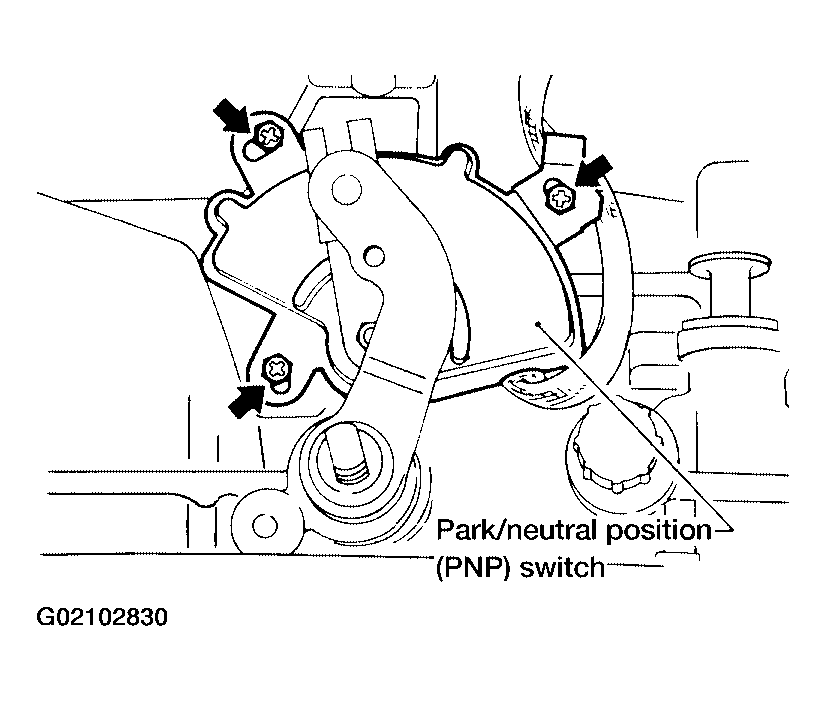
- Remove PNP switch from transmission case.
 Courtesy of NISSAN MOTOR CO., U.S.A.
- Separate the oil pan and transmission case.
- Drain ATF from drain plug.
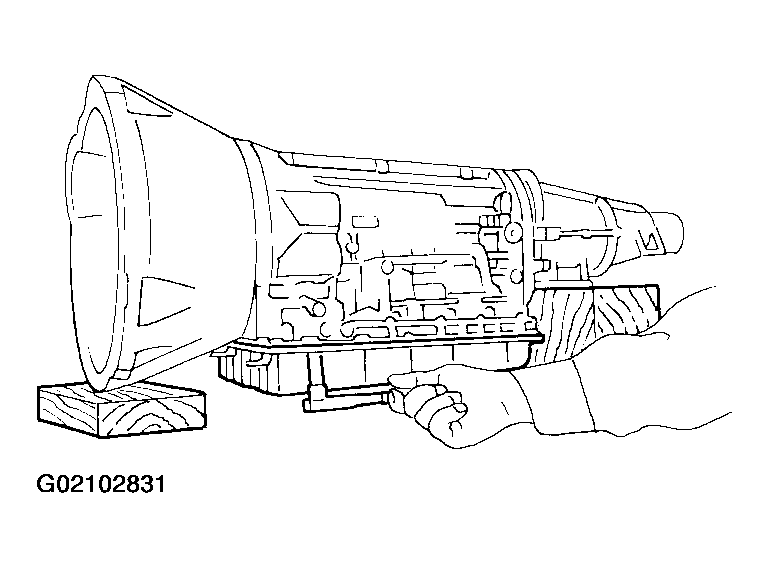
- Raise oil pan by placing wooden blocks under converter housing and adapter case.
- Remove oil pan and gasket.
- Always place oil pan straight down so that foreign particles inside will not move.
- Always replace oil pan bolts as they are self-sealing bolts.
 Courtesy of NISSAN MOTOR CO., U.S.A.
- Check foreign materials in oil pan to help determine cause of malfunction. If the fluid is very dark, smells burned, or contains foreign particles, the frictional material (clutches, band) may need replacement. A tacky film that will not wipe clean indicates varnish buildup. Varnish can cause valves, servo, and clutches to stick and may inhibit pump pressure.
- If frictional material is detected, replace radiator after repair of A/T. Refer to
" RADIATOR
".
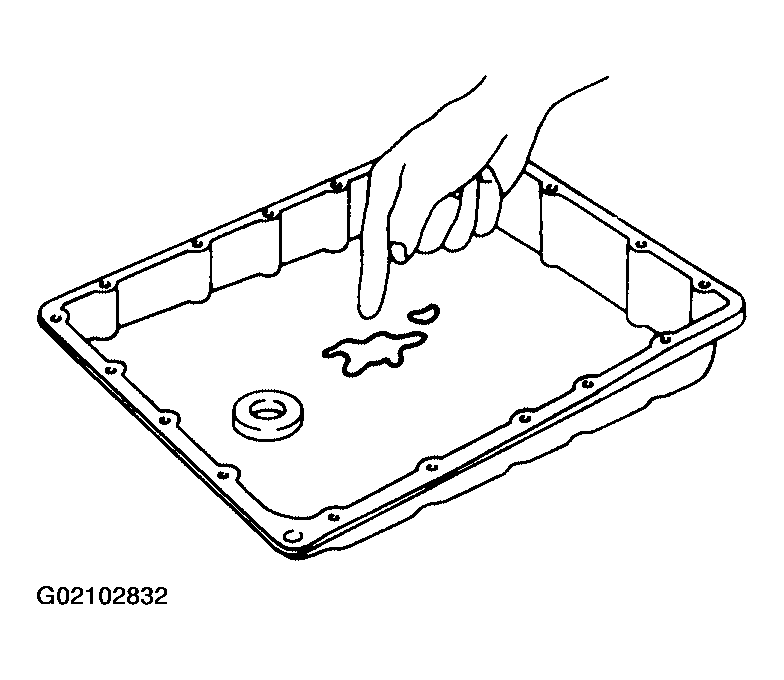 Courtesy of NISSAN MOTOR CO., U.S.A.
- Place transmission into Tool with the control valve facing up.
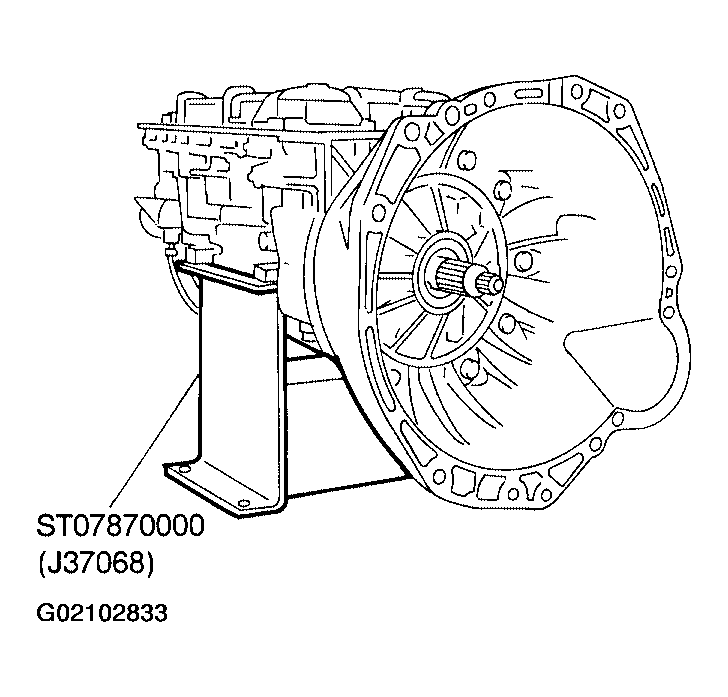 Courtesy of NISSAN MOTOR CO., U.S.A.
- Remove torque converter clutch solenoid valve and overdrive cancel solenoid valve connectors.
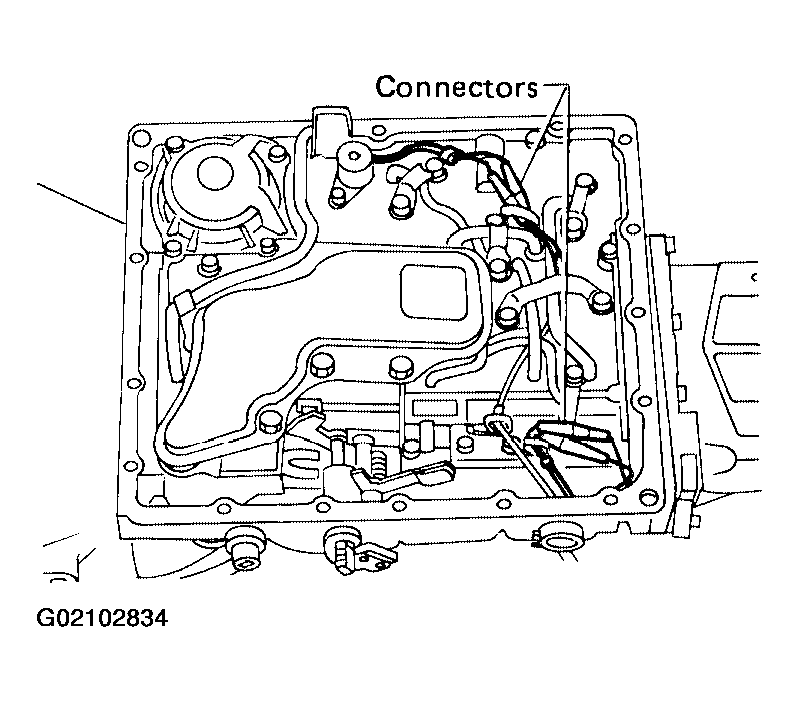 Courtesy of NISSAN MOTOR CO., U.S.A.
- Remove oil strainer.
- Remove oil strainer from control valve assembly. Then remove O-ring from oil strainer.
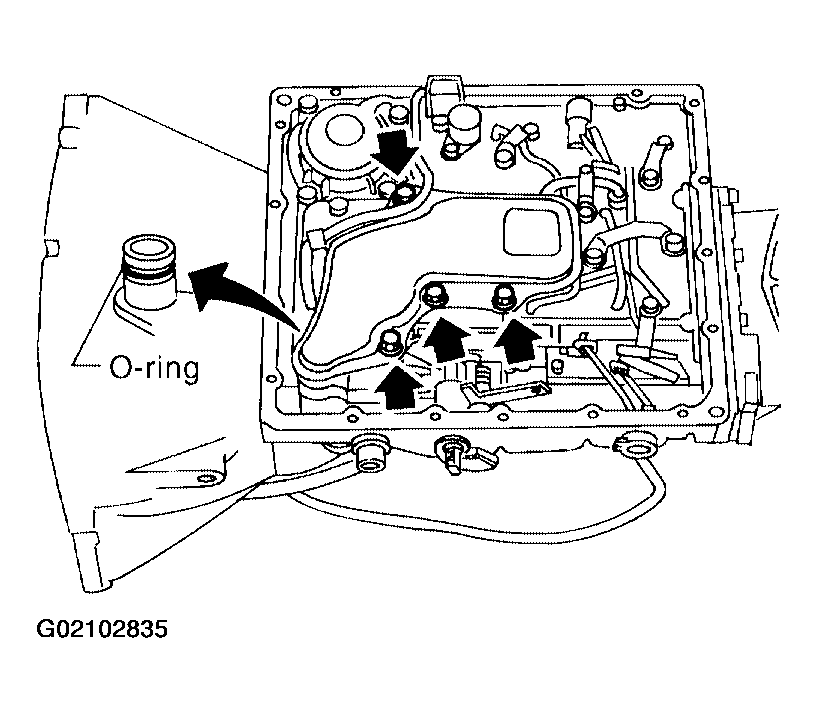 Courtesy of NISSAN MOTOR CO., U.S.A.
- Check oil strainer screen for damage.
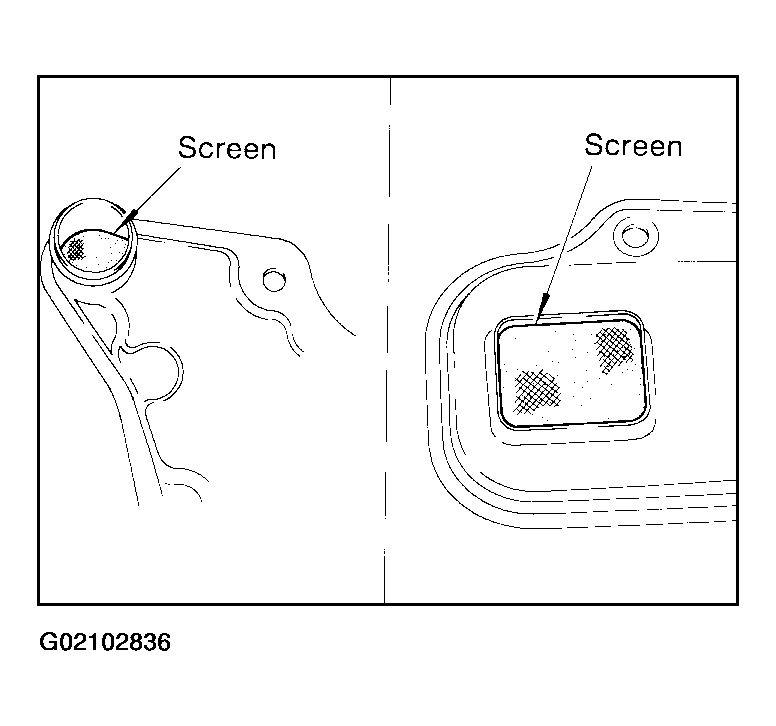 Courtesy of NISSAN MOTOR CO., U.S.A.
- Remove control valve assembly.
- Straighten terminal clips to free terminal cords, then remove terminal clips.
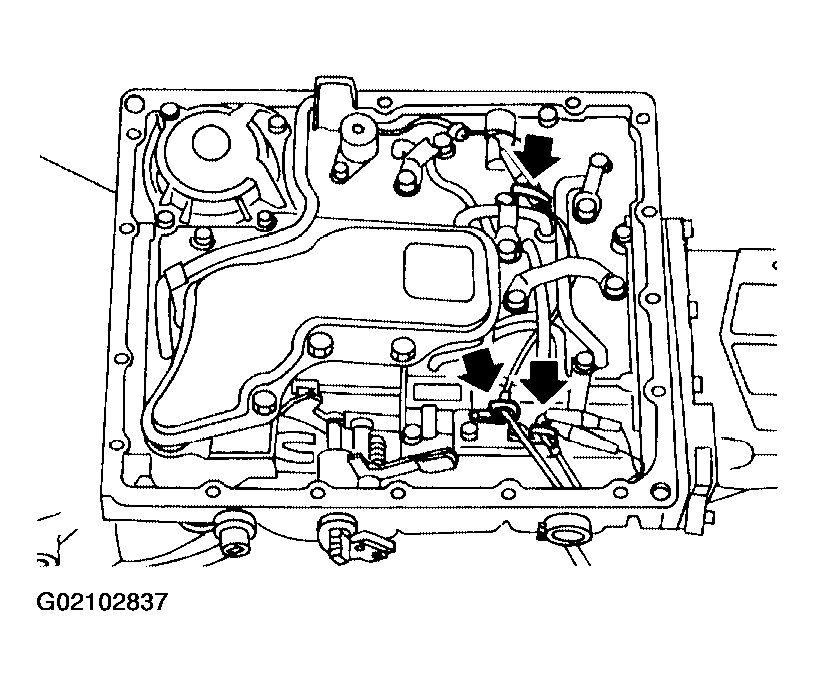 Courtesy of NISSAN MOTOR CO., U.S.A.
- Remove bolts A
and B
, and remove control valve assembly from transmission.
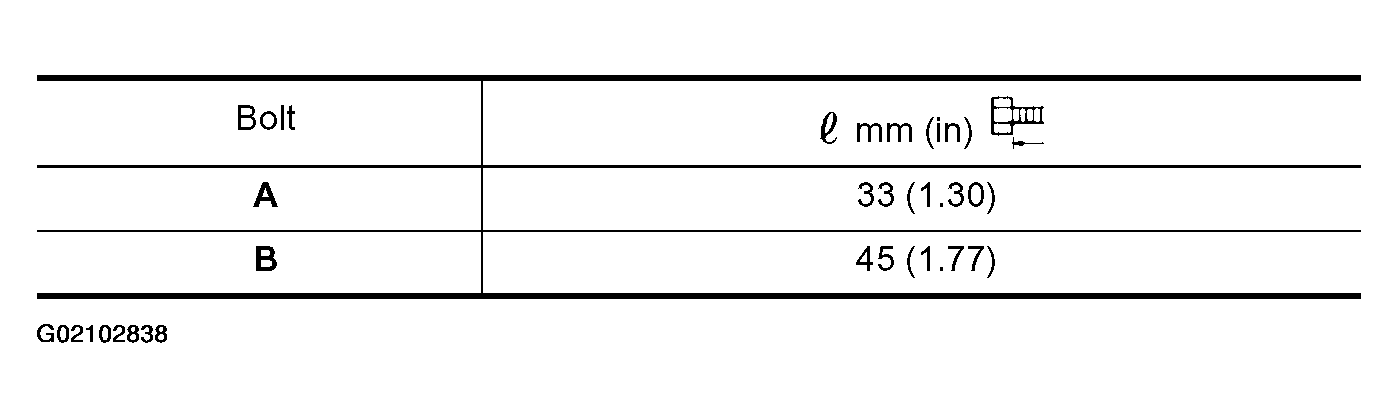 Courtesy of NISSAN MOTOR CO., U.S.A.
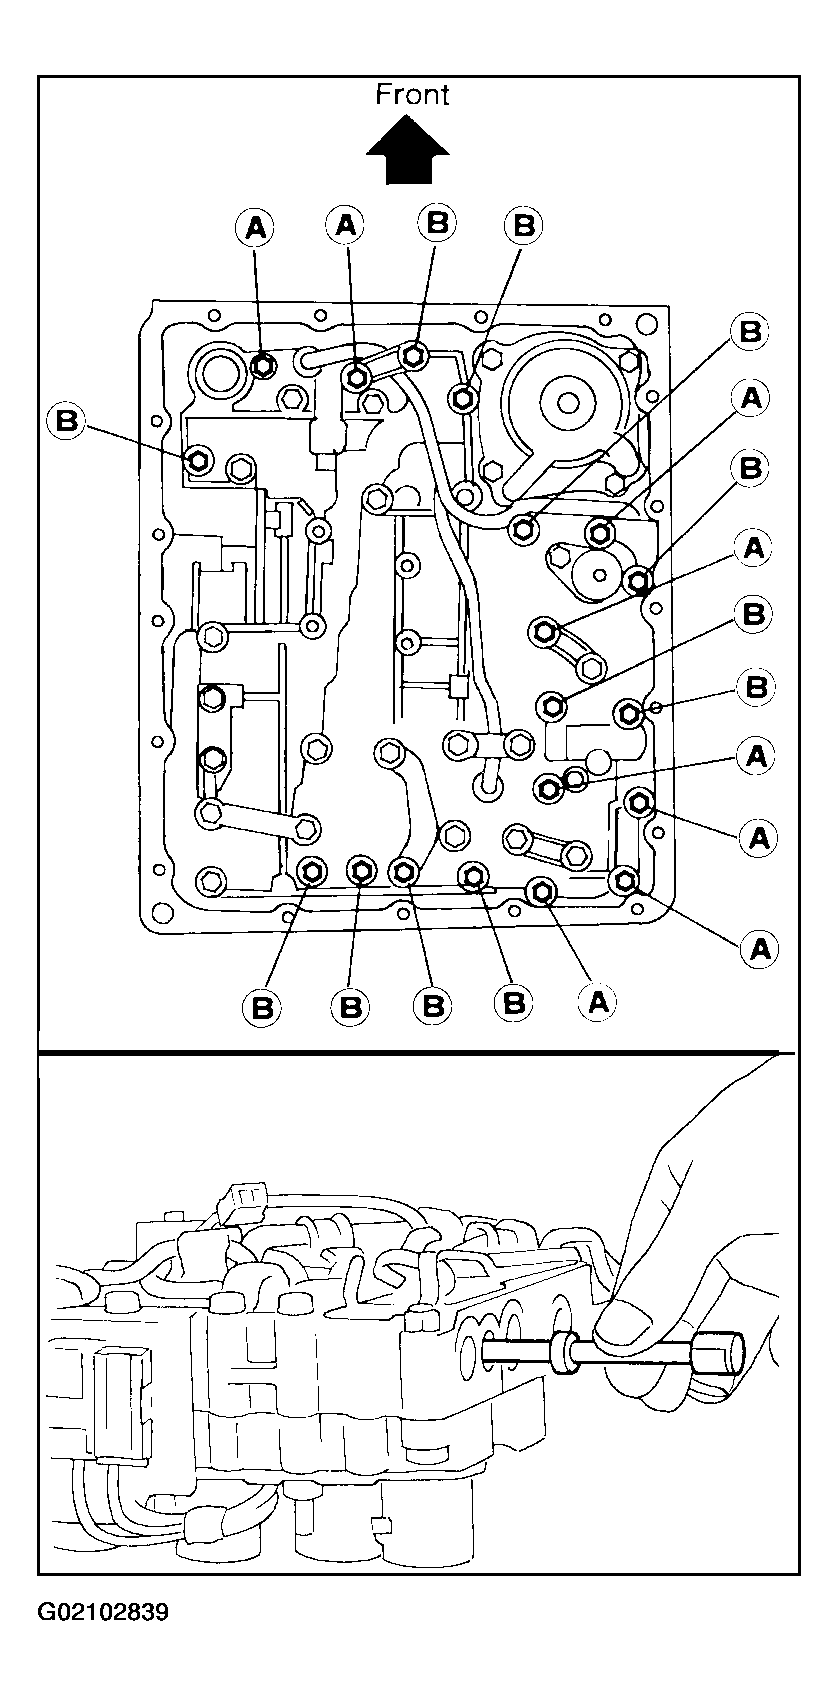 Courtesy of NISSAN MOTOR CO., U.S.A.
- Remove manual valve from control valve assembly.
- Remove terminal cord assembly from transmission case while pushing on stopper.
- Be careful not to damage cord.
- Do not remove terminal cord assembly unless it is damaged.
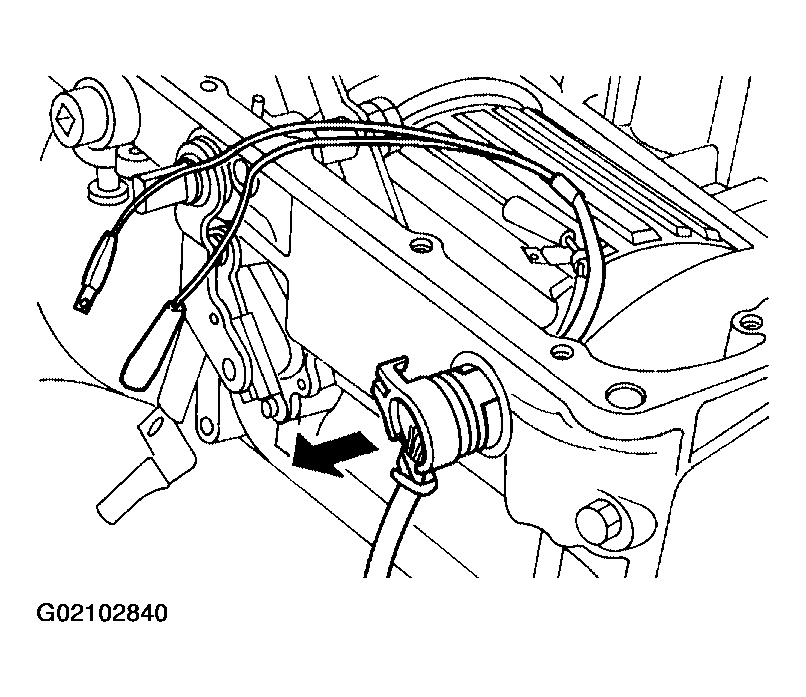 Courtesy of NISSAN MOTOR CO., U.S.A.
- Remove converter housing.
- Remove converter housing bolts
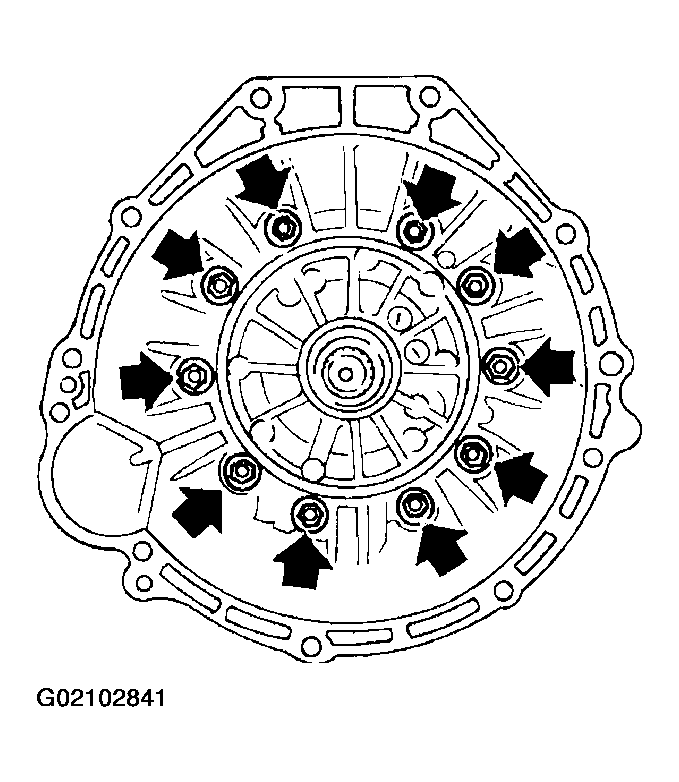 Courtesy of NISSAN MOTOR CO., U.S.A.
- Remove traces of sealant.
- Be careful not to scratch converter housing.
- Remove O-ring from input shaft.
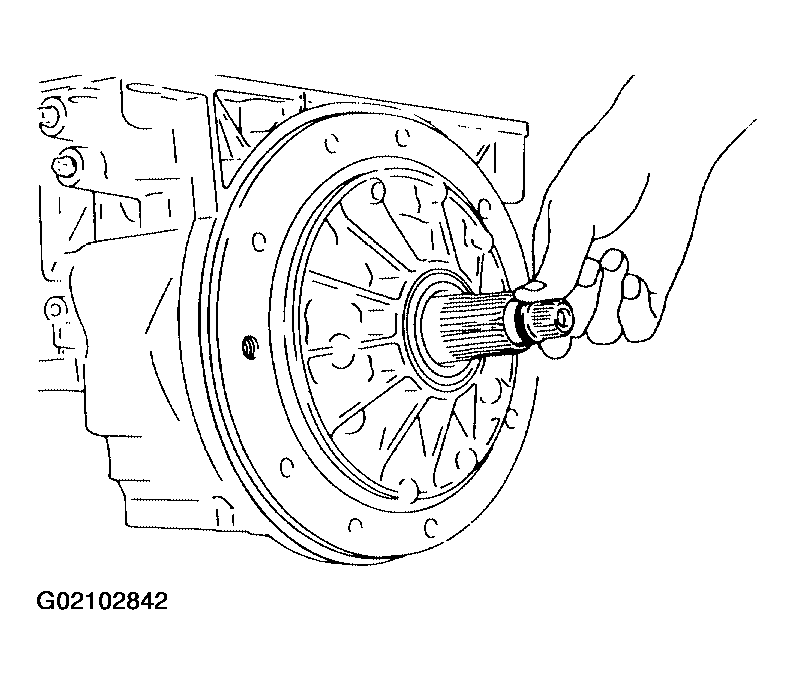 Courtesy of NISSAN MOTOR CO., U.S.A.
- Remove oil pump assembly.
- Attach Tool to oil pump assembly and extract it evenly from transmission case.
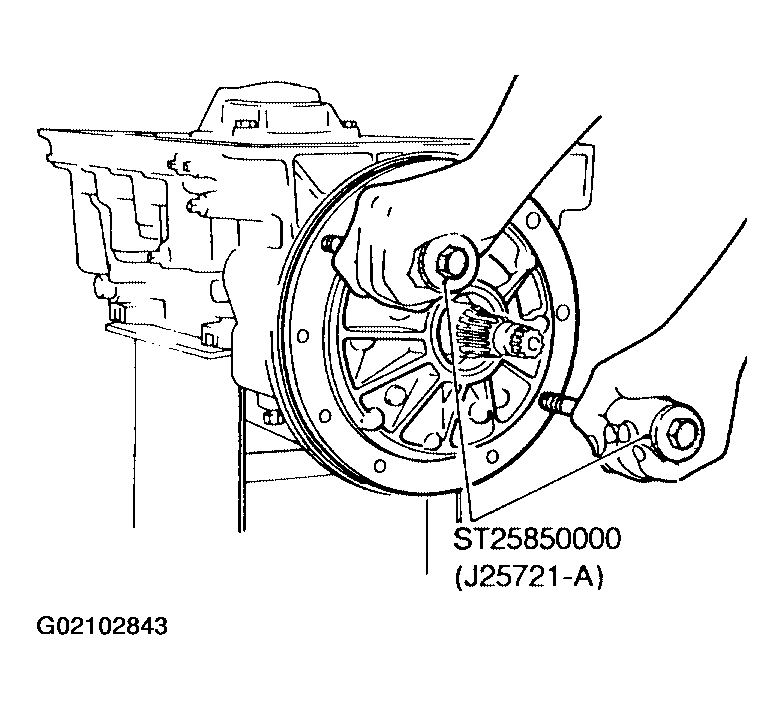 Courtesy of NISSAN MOTOR CO., U.S.A.
- Remove O-ring from oil pump assembly.
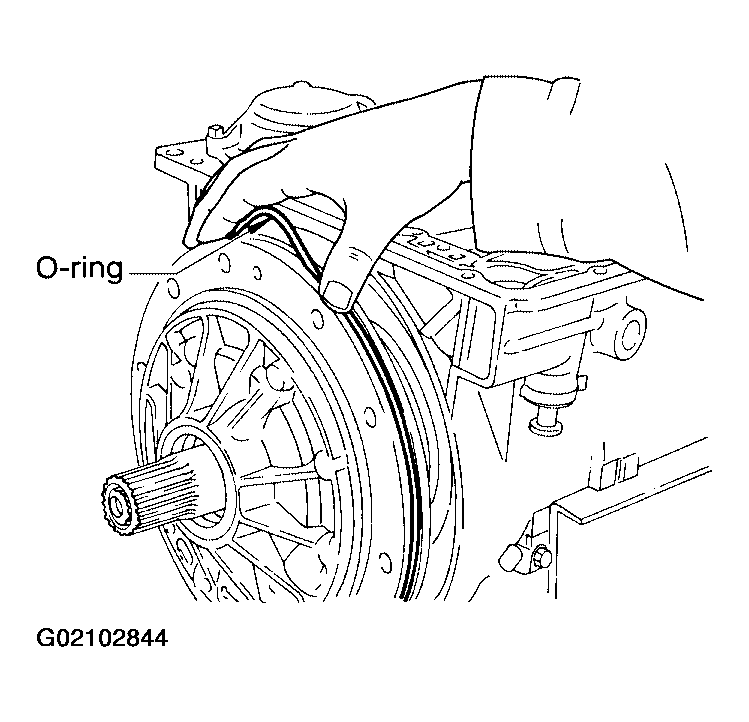 Courtesy of NISSAN MOTOR CO., U.S.A.
- Remove traces of sealant from oil pump housing.
- Be careful not to scratch pump housing.
- Remove needle bearing and thrust washer from oil pump assembly.
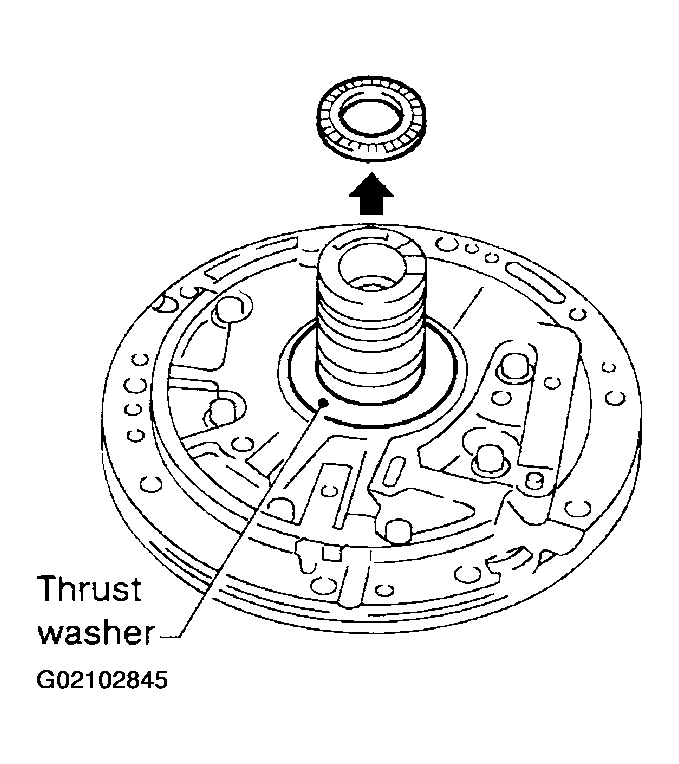 Courtesy of NISSAN MOTOR CO., U.S.A.
- Remove input shaft and oil pump gasket.
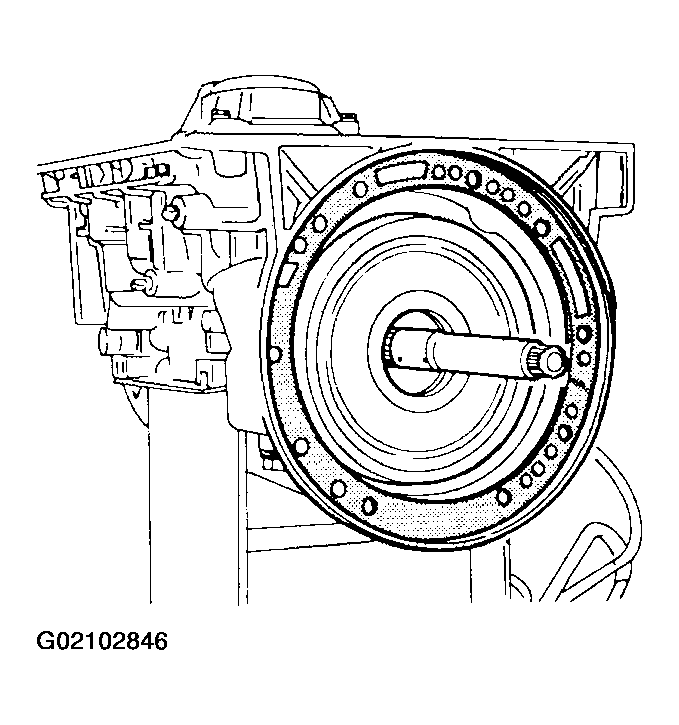 Courtesy of NISSAN MOTOR CO., U.S.A.
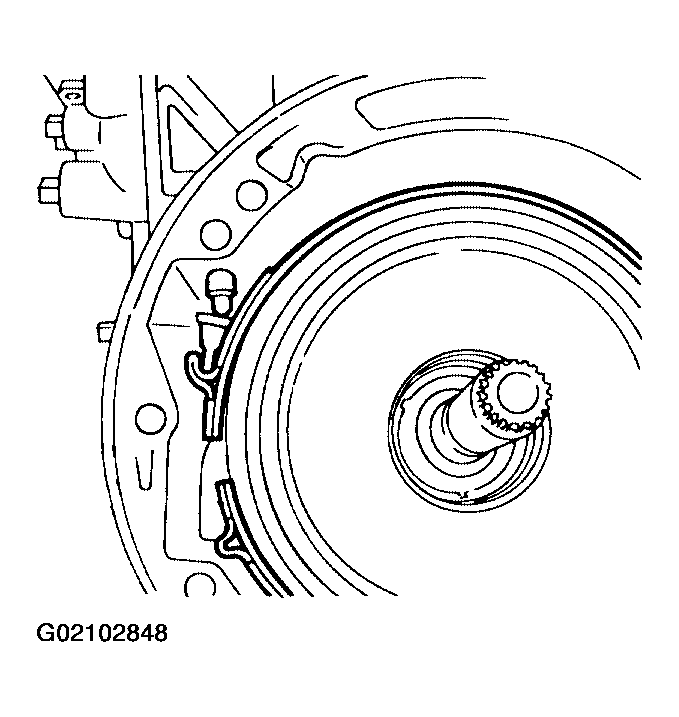
- Remove brake band and band strut.
- Loosen lock nut and remove band servo anchor end pin from transmission case.
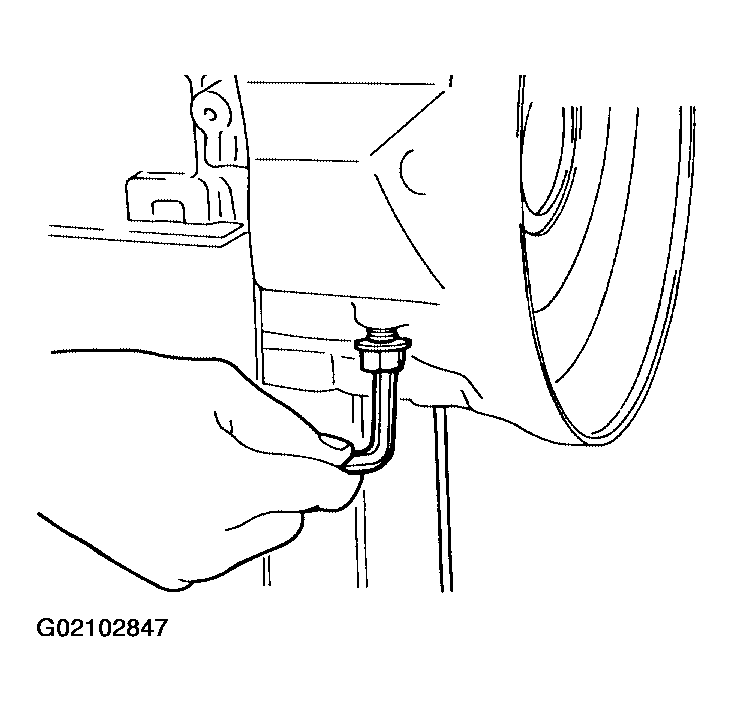 Courtesy of NISSAN MOTOR CO., U.S.A.
- Remove brake band and band strut from transmission case.
 Courtesy of NISSAN MOTOR CO., U.S.A.
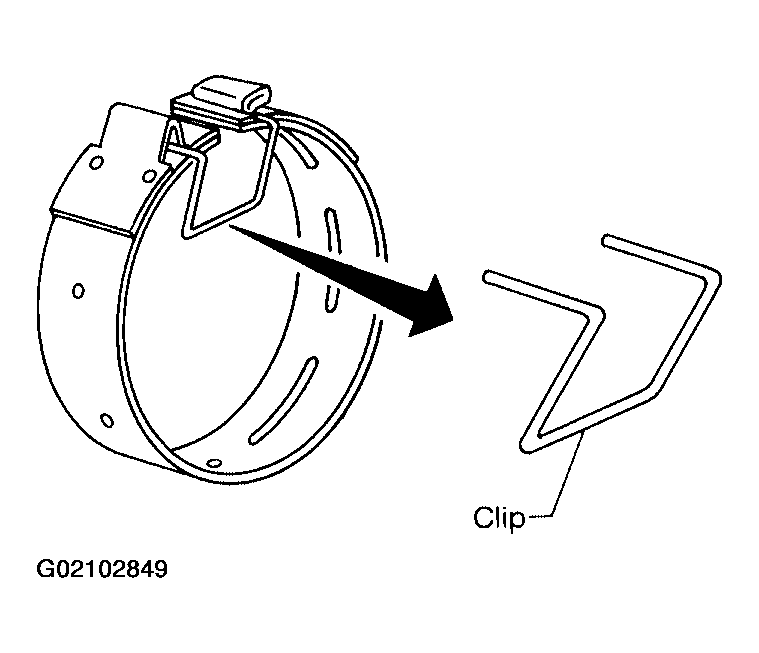
- To prevent brake linings from cracking or peeling, do not stretch the flexible band unnecessarily. When removing the brake band, always secure it with a clip as shown in the figure at left. Leave the clip in position after removing the brake band.
 Courtesy of NISSAN MOTOR CO., U.S.A.
- Check brake band facing for damage, cracks, wear and burns.
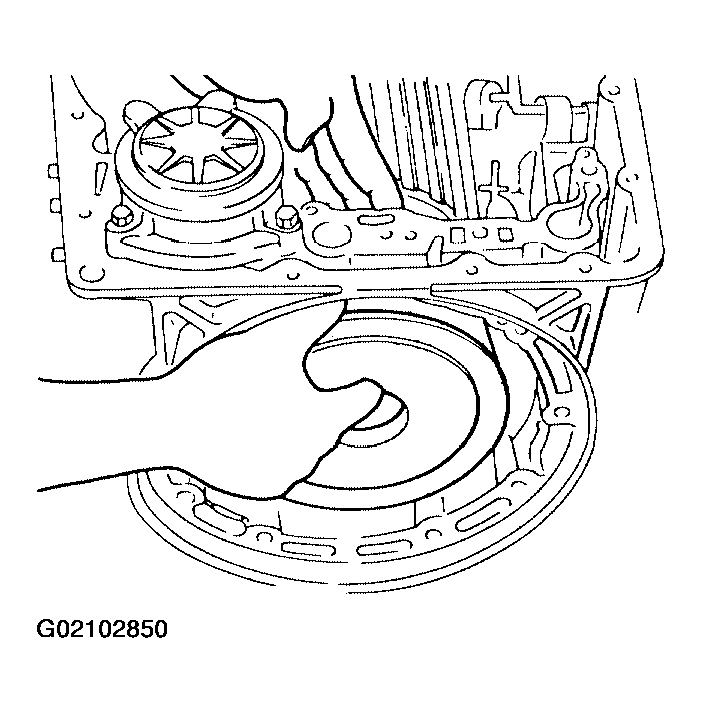
- Remove front side clutch and gear components.
- Remove clutch pack (reverse clutch, high clutch and front sun gear) from transmission case.
 Courtesy of NISSAN MOTOR CO., U.S.A.
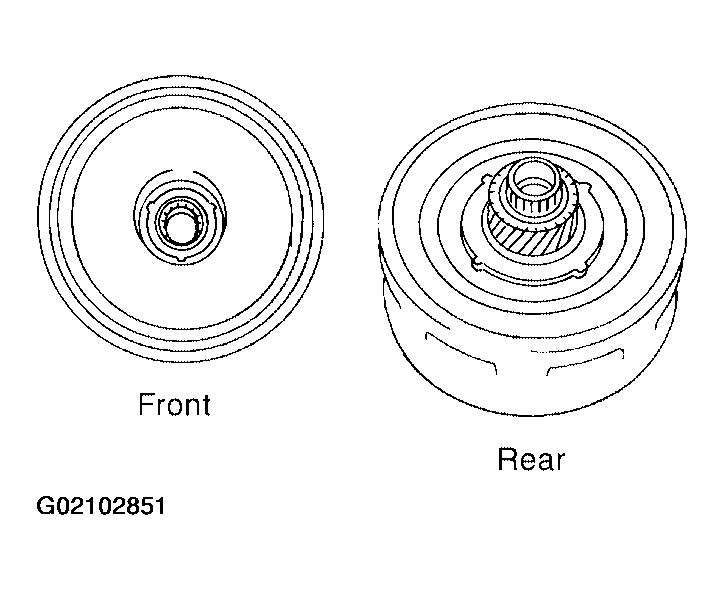
- Remove front bearing race from clutch pack.
- Remove rear bearing race from clutch pack.
 Courtesy of NISSAN MOTOR CO., U.S.A.
- Remove front planetary carrier from transmission case.
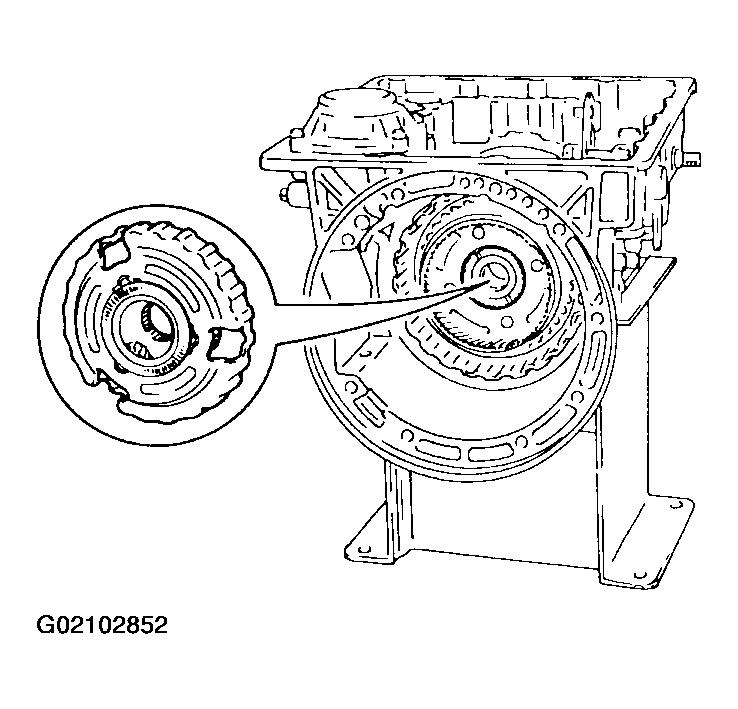 Courtesy of NISSAN MOTOR CO., U.S.A.
- Remove front needle bearing from front planetary carrier.
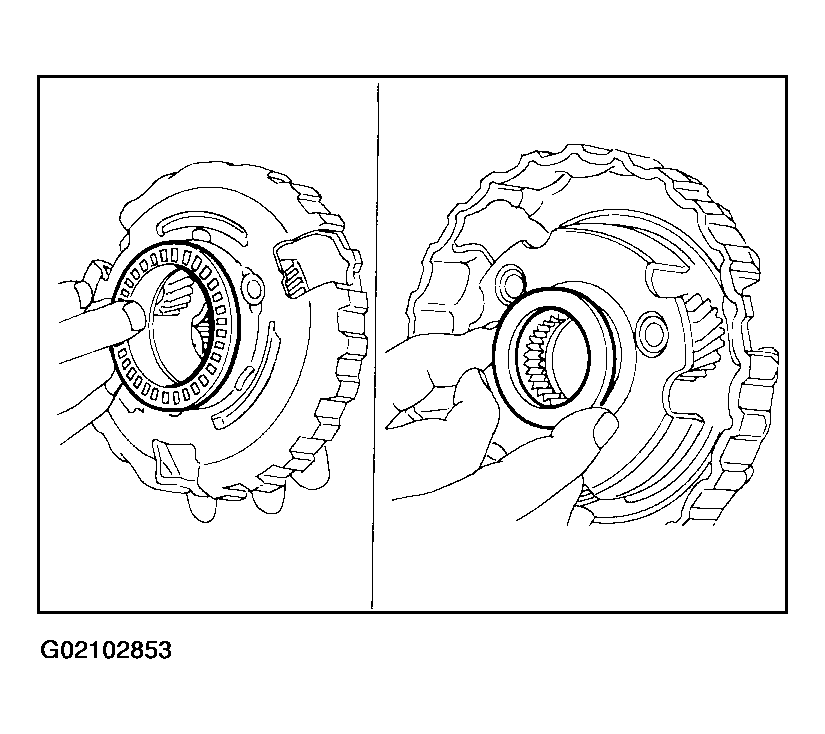 Courtesy of NISSAN MOTOR CO., U.S.A.
- Remove rear bearing from front planetary carrier.
- Remove rear sun gear from transmission case.
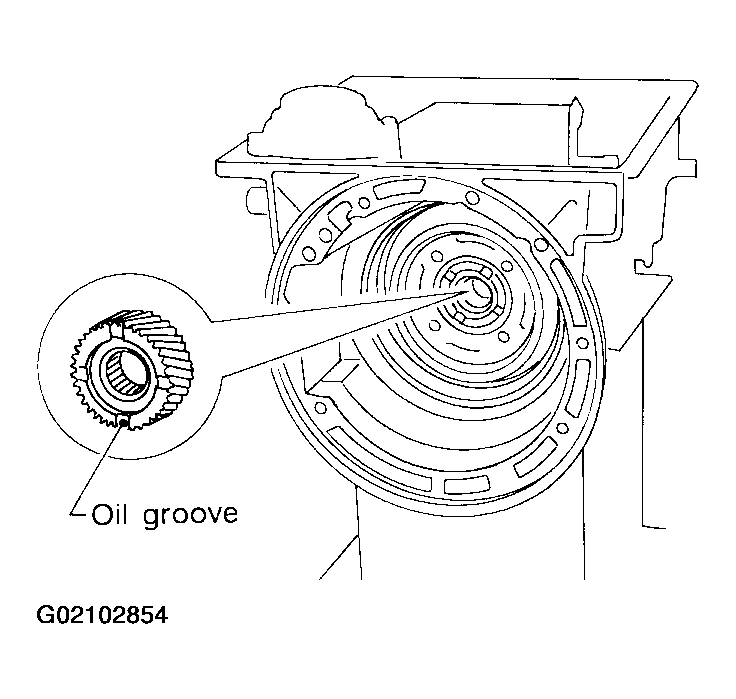 Courtesy of NISSAN MOTOR CO., U.S.A.
- Remove rear extension case.
- Remove rear extension case from transmission case.
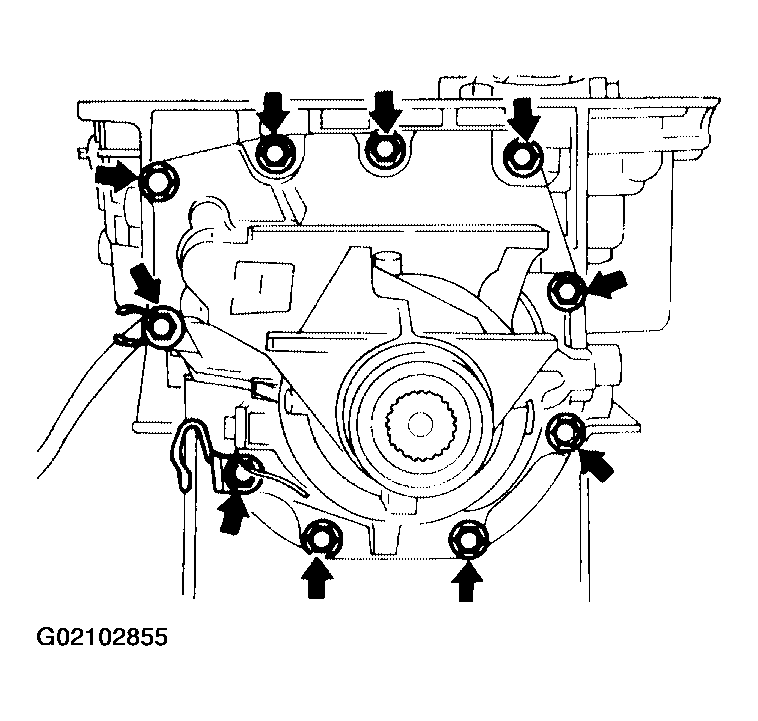 Courtesy of NISSAN MOTOR CO., U.S.A.
- Remove rear extension gasket from transmission case.
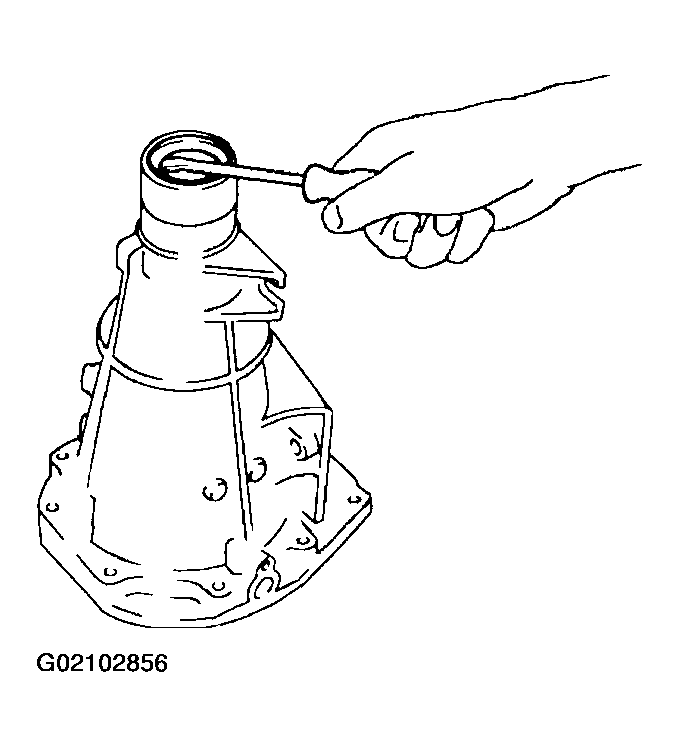
- Remove oil seal from rear extension case.
- Do not remove oil seal unless it is to be replaced.
 Courtesy of NISSAN MOTOR CO., U.S.A.
- Remove output shaft and parking gear.
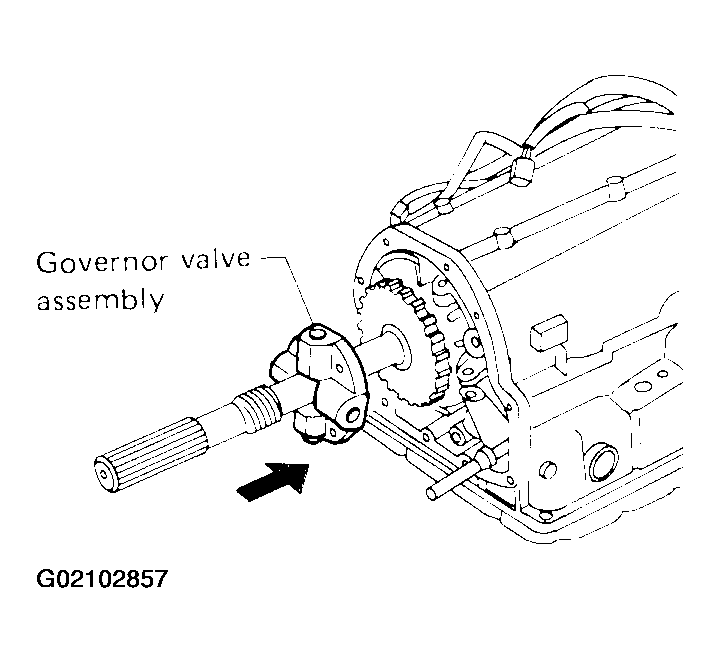
- Remove governor valve assembly.
 Courtesy of NISSAN MOTOR CO., U.S.A.
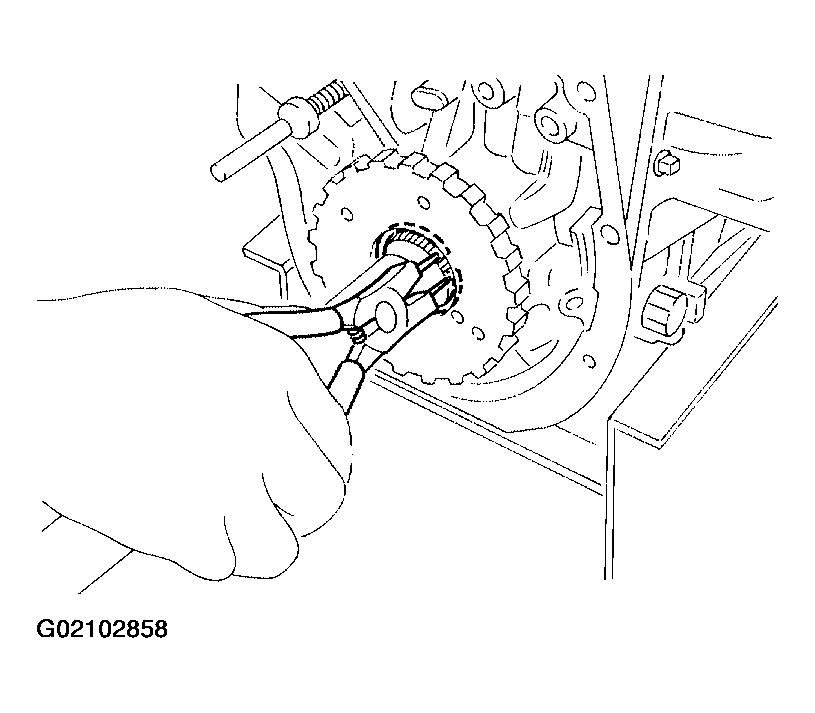
- Remove rear snap ring from output shaft.
 Courtesy of NISSAN MOTOR CO., U.S.A.
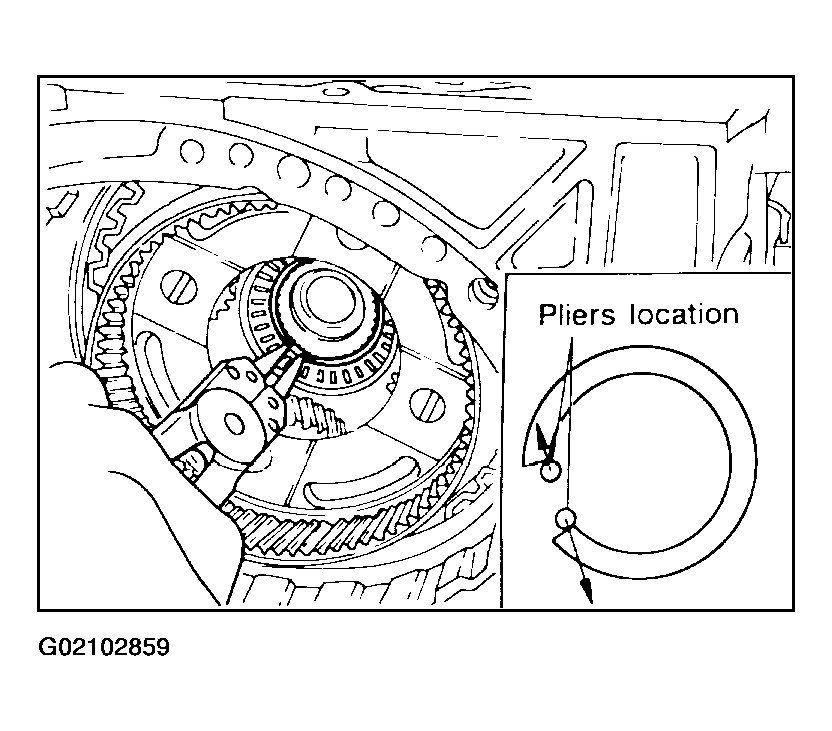
- Slowly push output shaft all the way forward.
- Do not use excessive force.
- Remove snap ring from output shaft.
 Courtesy of NISSAN MOTOR CO., U.S.A.
- Remove output shaft and parking gear as a unit from transmission case.
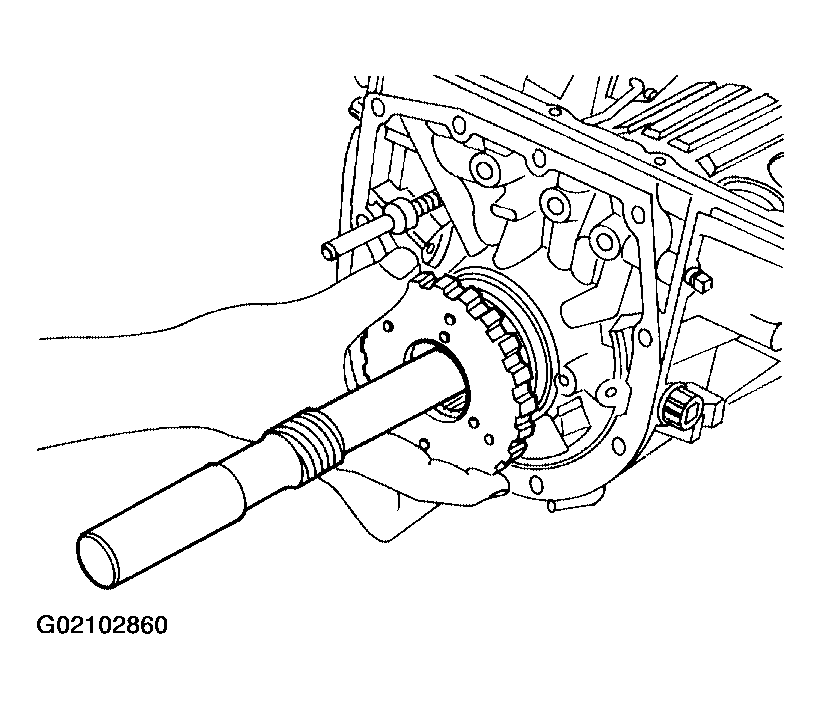 Courtesy of NISSAN MOTOR CO., U.S.A.
- Remove parking gear from output shaft.
- Remove needle bearing from transmission case.
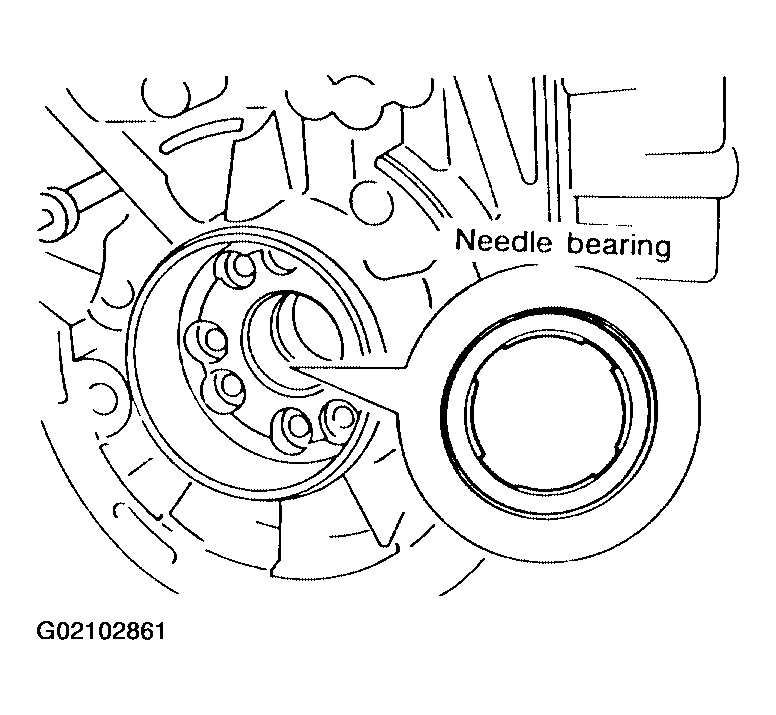 Courtesy of NISSAN MOTOR CO., U.S.A.
- Remove rear side clutch and gear components.
- Remove front internal gear.
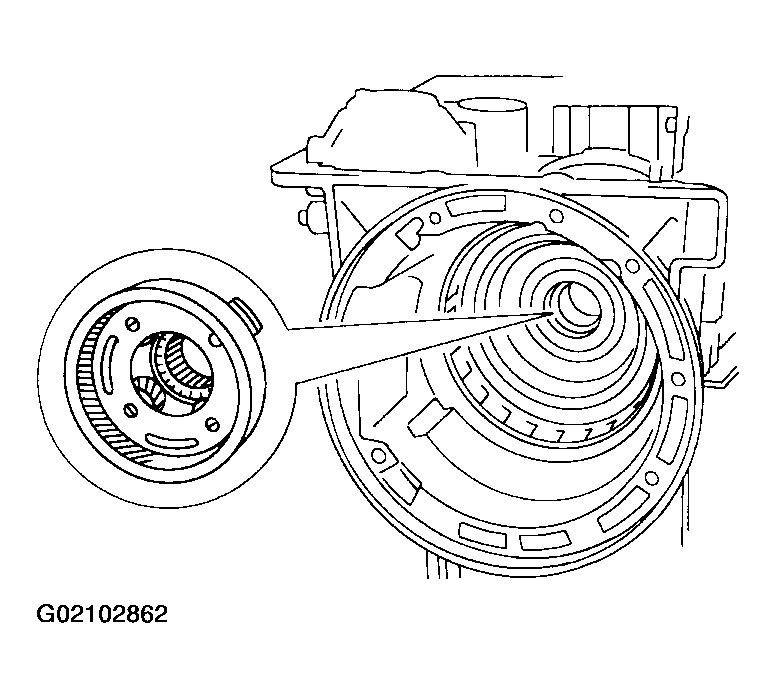 Courtesy of NISSAN MOTOR CO., U.S.A.
- Remove bearing race from front internal gear.
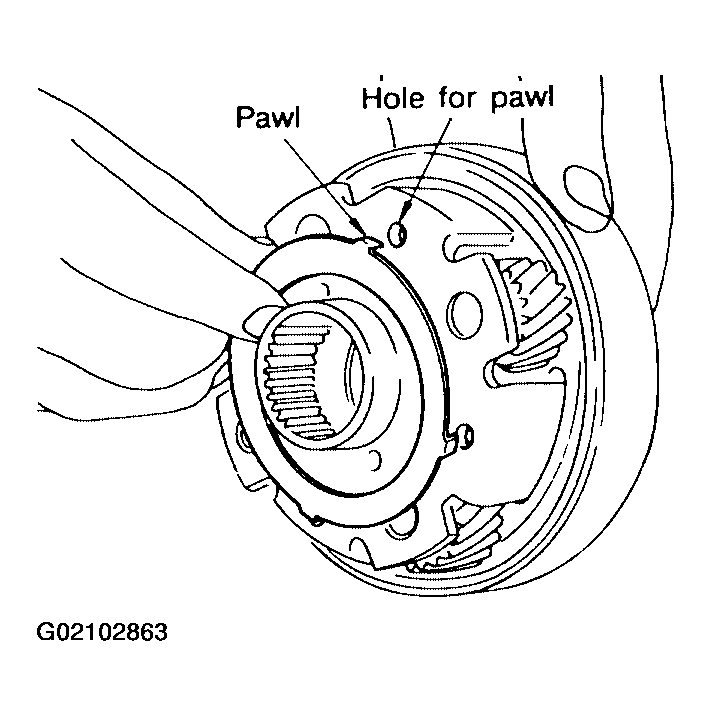 Courtesy of NISSAN MOTOR CO., U.S.A.
- Remove needle bearing from rear internal gear.
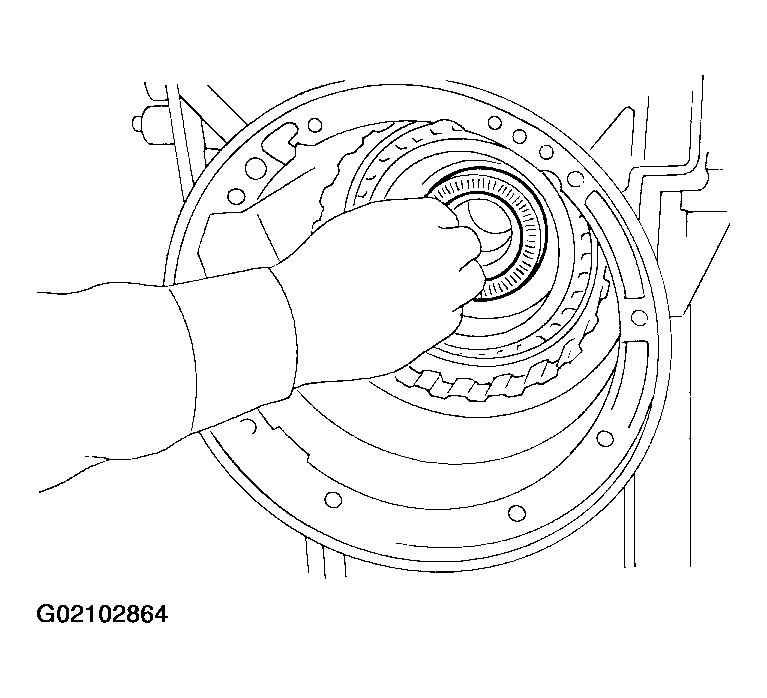 Courtesy of NISSAN MOTOR CO., U.S.A.
- Remove rear internal gear, forward clutch hub and overrun clutch hub as a set from transmission case.
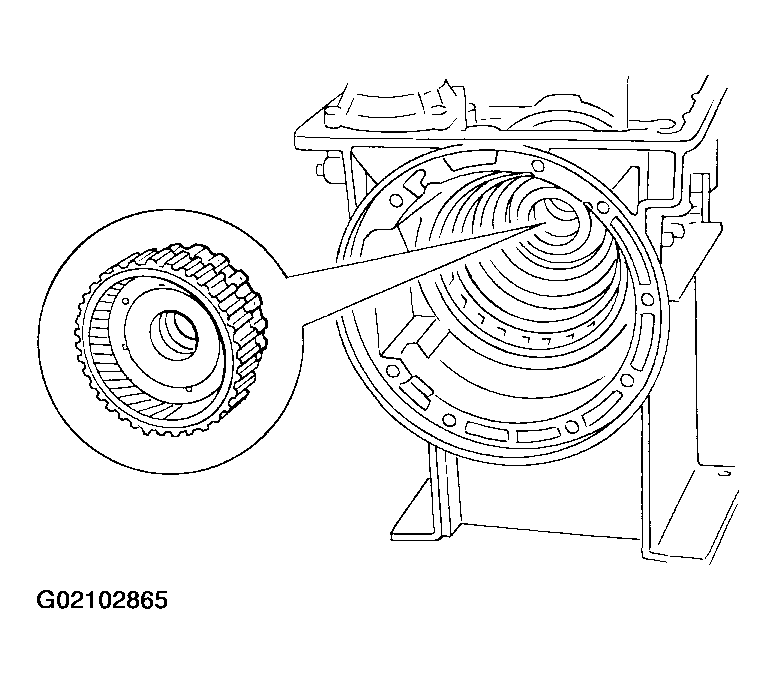 Courtesy of NISSAN MOTOR CO., U.S.A.
- Remove needle bearing from overrun clutch hub.
- Remove overrun clutch hub from rear internal gear and forward clutch hub.
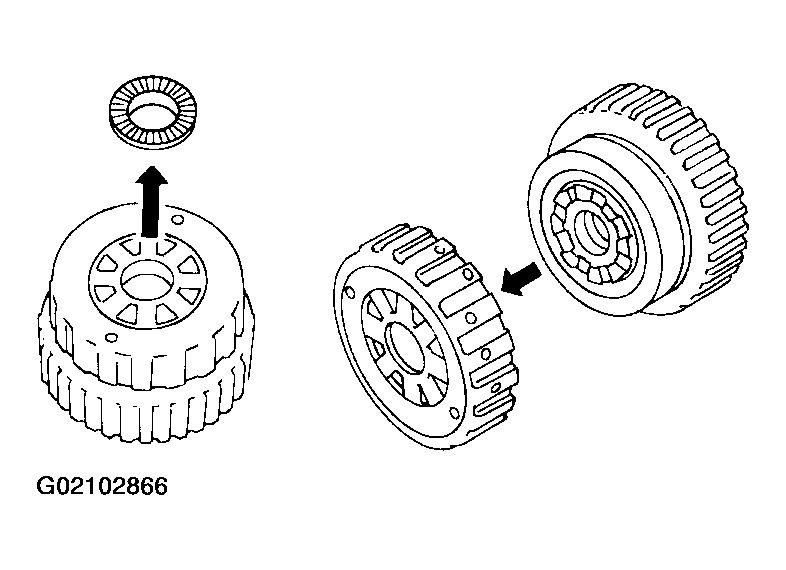 Courtesy of NISSAN MOTOR CO., U.S.A.
- Remove thrust washer from overrun clutch hub.
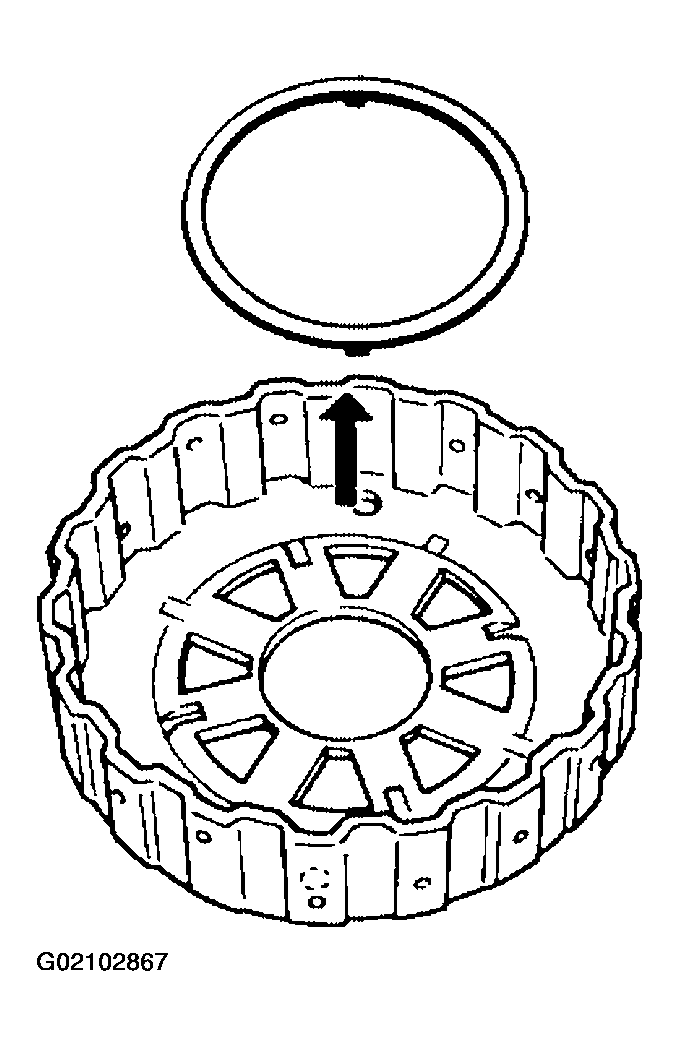 Courtesy of NISSAN MOTOR CO., U.S.A.
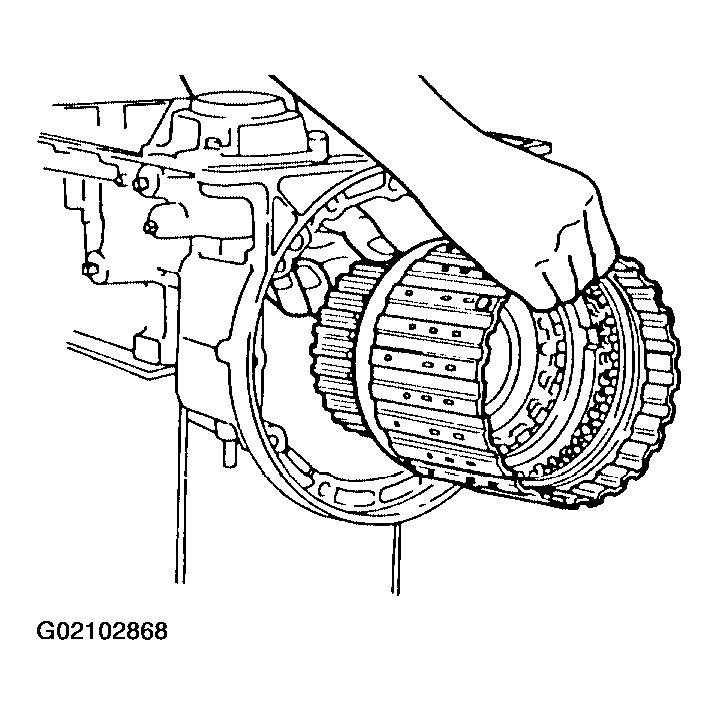
- Remove forward clutch assembly from transmission case.
 Courtesy of NISSAN MOTOR CO., U.S.A.
- Remove band servo and accumulator components.
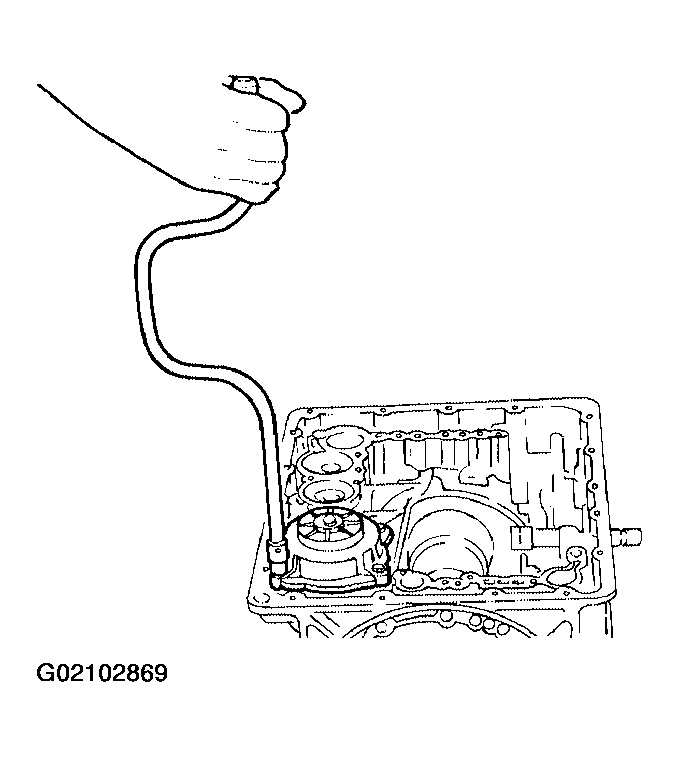
- Remove band servo retainer from transmission case.
 Courtesy of NISSAN MOTOR CO., U.S.A.
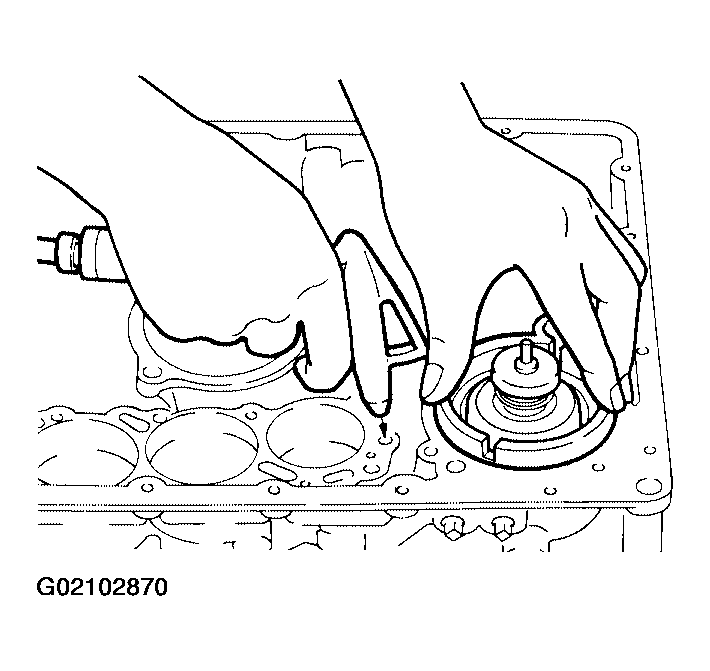
- Apply compressed air to oil hole until band servo piston comes out of transmission case.
- Hold piston with a rag and gradually direct air to oil hole.
 Courtesy of NISSAN MOTOR CO., U.S.A.
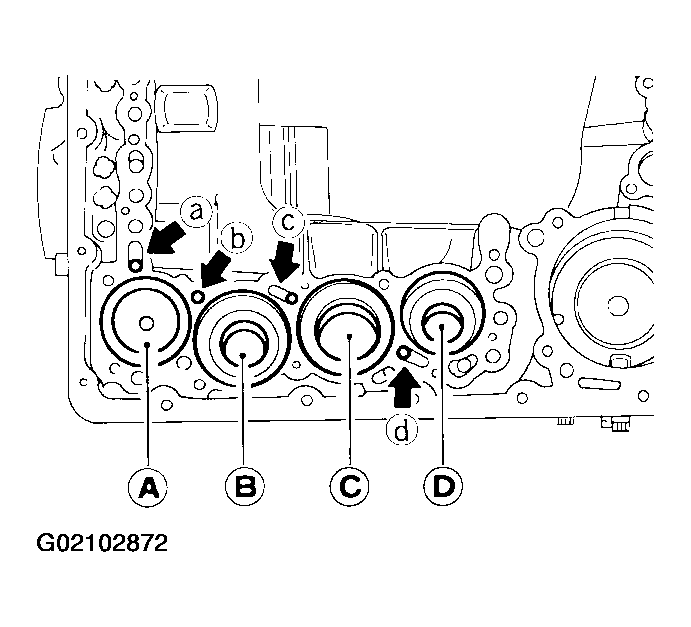
- Remove return springs.
- Remove springs from accumulator pistons A, B, C
and D
.
- Apply compressed air to each oil hole until piston comes out.
- Hold piston with a rag and gradually direct air to oil hole.
 Courtesy of NISSAN MOTOR CO., U.S.A.
 Courtesy of NISSAN MOTOR CO., U.S.A.
- Remove O-ring from each piston.
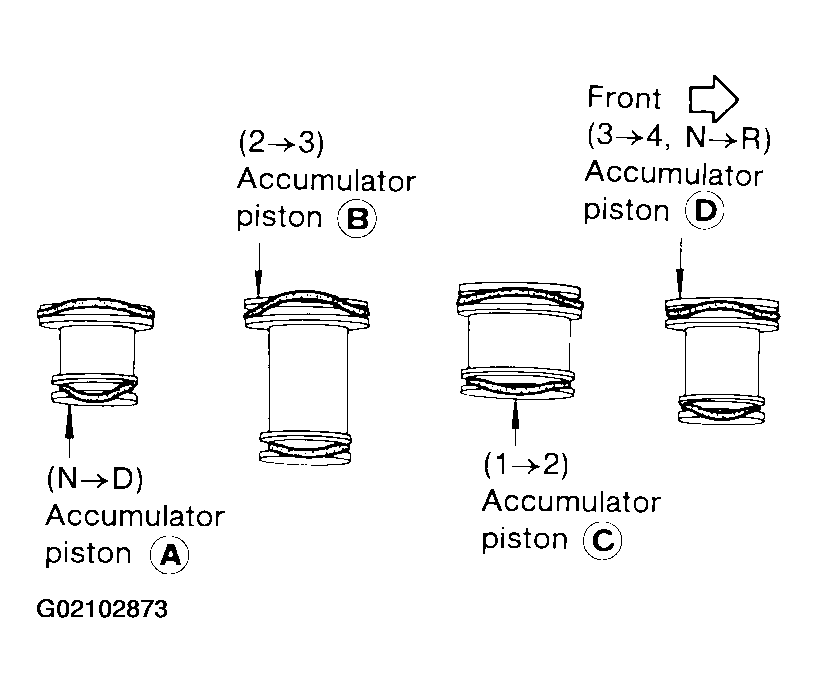 Courtesy of NISSAN MOTOR CO., U.S.A.
- Remove throttle wire components if necessary.
- Remove throttle wire from A/T assembly.
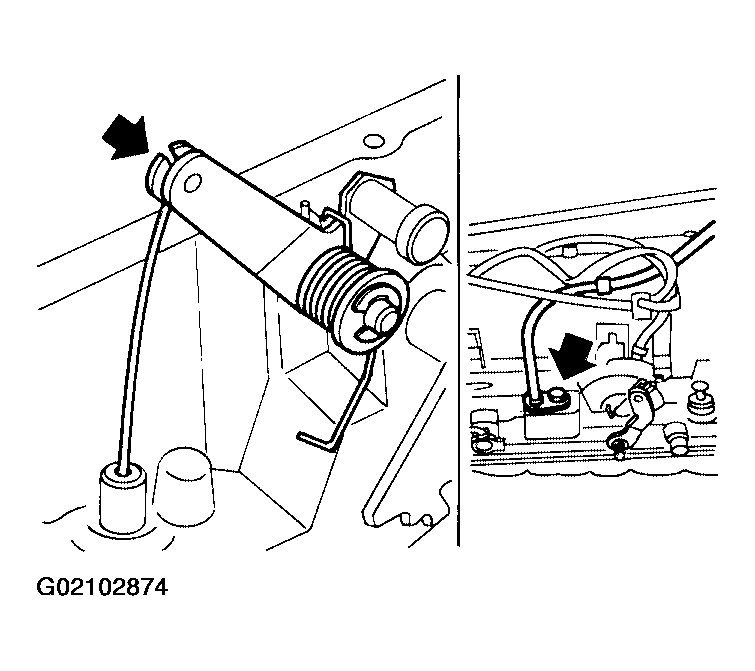 Courtesy of NISSAN MOTOR CO., U.S.A.
- Remove throttle lever shaft E-ring.
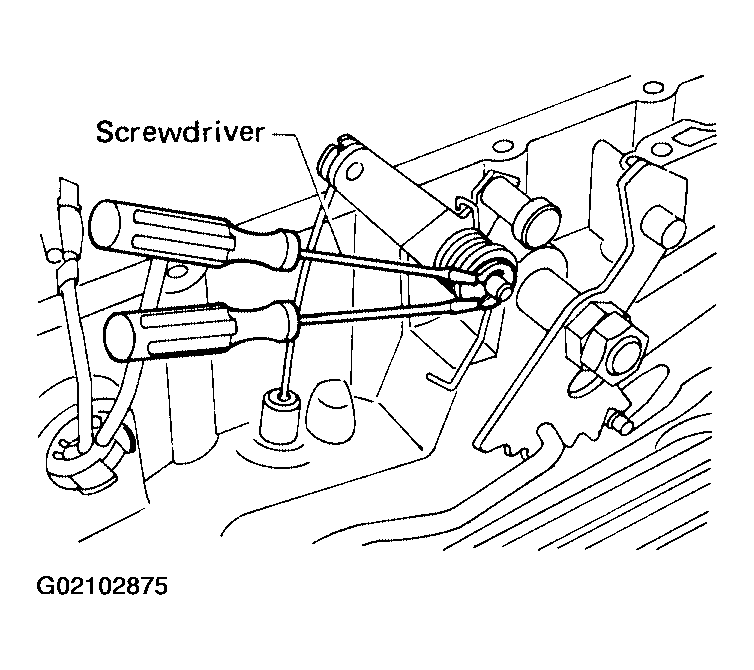 Courtesy of NISSAN MOTOR CO., U.S.A.
- Remove return spring.
- Remove throttle lever.
- Remove throttle lever shaft retaining pin and throttle lever shaft.
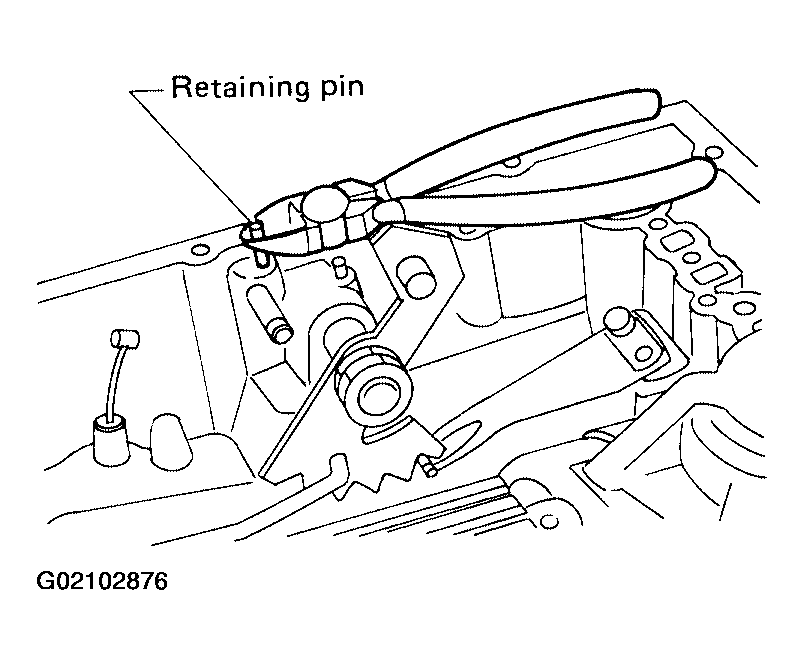 Courtesy of NISSAN MOTOR CO., U.S.A.
- Remove manual shaft components, if necessary.
- Hold width across flats of manual shaft (outside the transmission case) and remove lock nut from shaft.
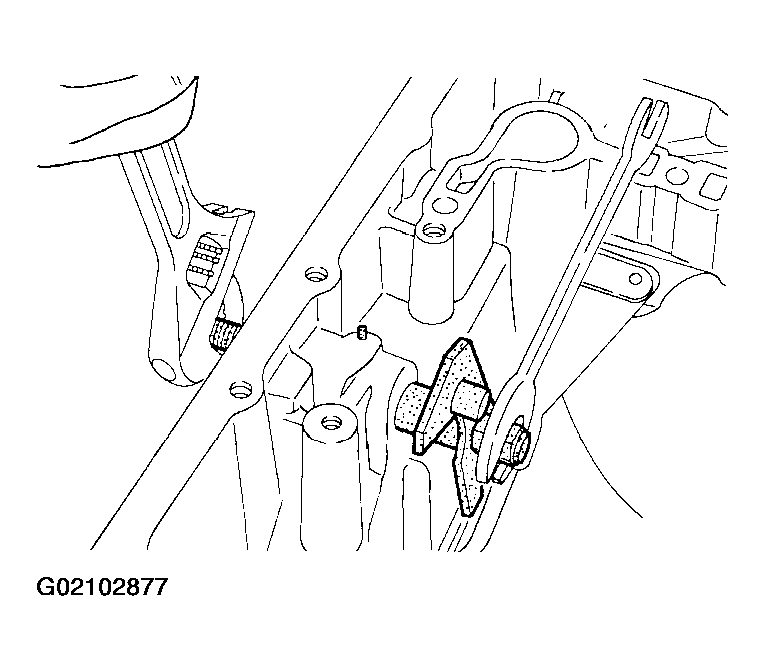 Courtesy of NISSAN MOTOR CO., U.S.A.
- Remove retaining pin from transmission case.
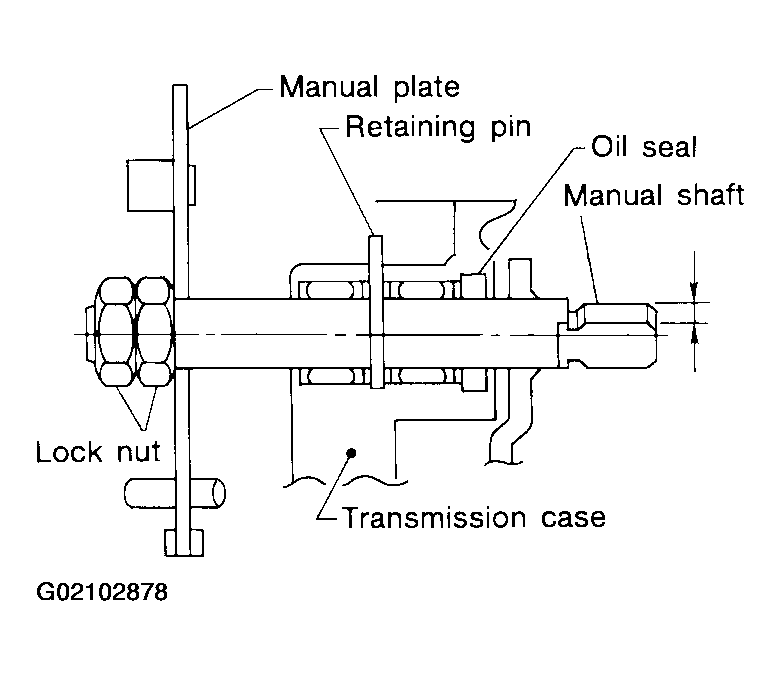 Courtesy of NISSAN MOTOR CO., U.S.A.
- While pushing detent spring down, remove manual plate and parking rod from transmission case.
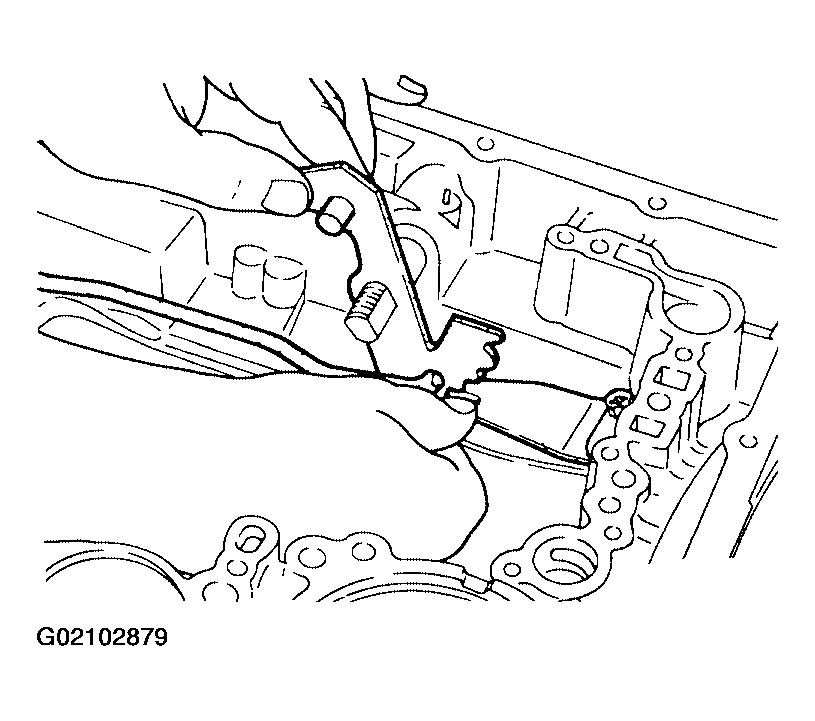 Courtesy of NISSAN MOTOR CO., U.S.A.
- Remove manual shaft from transmission case.
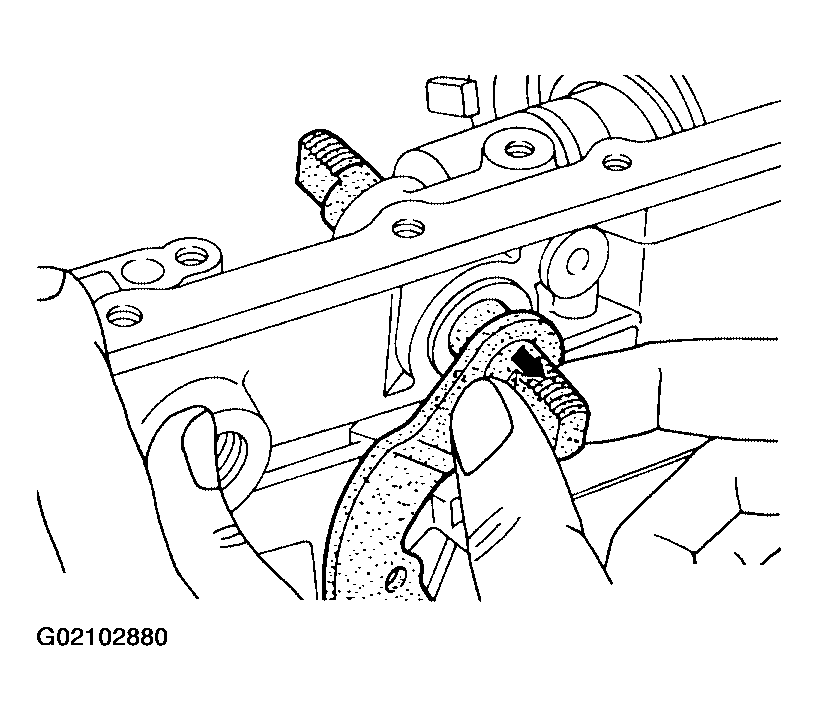 Courtesy of NISSAN MOTOR CO., U.S.A.
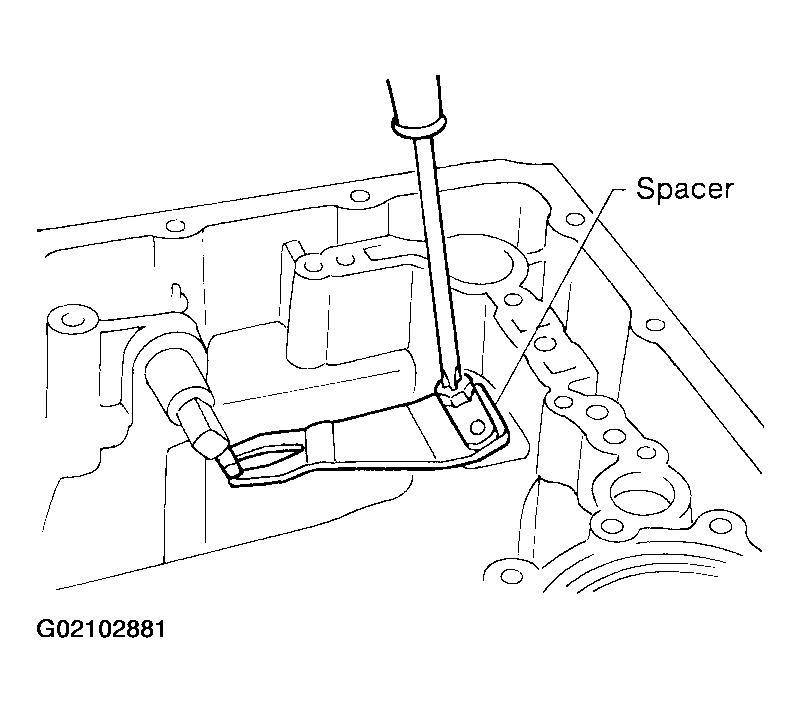
- Remove spacer and detent spring from transmission case.
 Courtesy of NISSAN MOTOR CO., U.S.A.
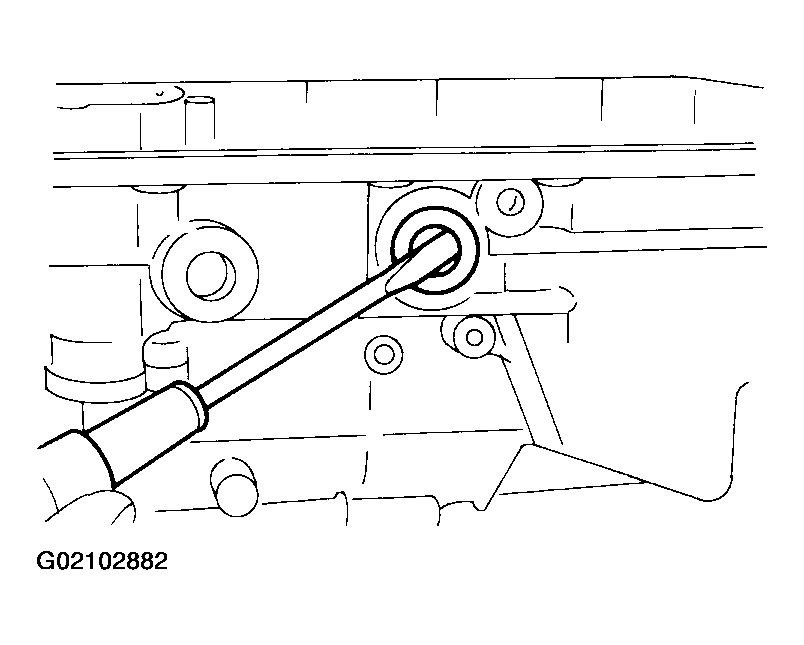
- Remove oil seal from transmission case.
 Courtesy of NISSAN MOTOR CO., U.S.A.