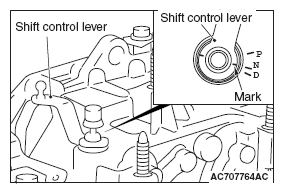
>>C<< Transaxle Control Cable Installation
- Operate the lever so that the shift control lever positioning mark is set to the N position.
 Courtesy of MITSUBISHI MOTOR SALES OF AMERICA.
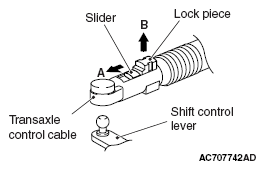
- Move the slider of the transaxle control cable (transaxle side) tip to the direction A to pull up the lock piece to the direction B.
 Courtesy of MITSUBISHI MOTOR SALES OF AMERICA.
- Install the transaxle control cable (transaxle side) in the transaxle control cable bracket at the top of transaxle.
- Move the shift lever to the N<==>D position three times or more, and shift to the N position.
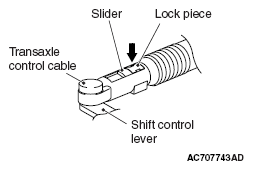
- Connect the transaxle control cable to the shift control lever, and firmly push down the lock piece of transaxle control cable to lock it.
NOTE:
- The slider automatically returns to the fixed position by the spring.
- The lock position of transaxle control cable is automatically adjusted by a spring.
 Courtesy of MITSUBISHI MOTOR SALES OF AMERICA.