Float Level Adjustment
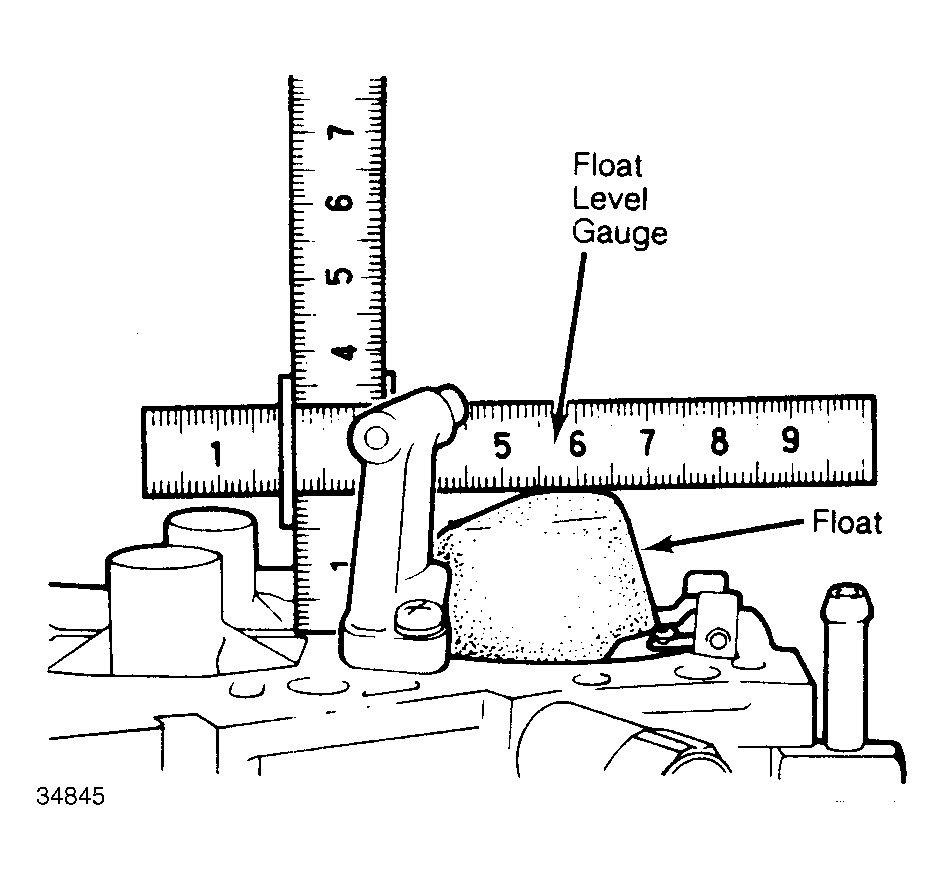
- Invert float chamber cover assembly without gasket. Using a universal float level gauge, measure distance from bottom of float to surface of float chamber cover. Distance should be .748-8.26 (19-21 mm). See Fig 1
.
 Courtesy of CHRYSLER MOTORS.
- If float lever is not within specified range, adjust by increasing or decreasing the number of thickness of needle valve shims. Adding or subtracting a shim will change fuel lever about 3 times the thickness of the shim.
- Adding shims lowers float level. Shims are available in a set of 3 thicknesses: .012" (0.3 mm), .016" (0.4 mm) and .020" (0.5 mm).
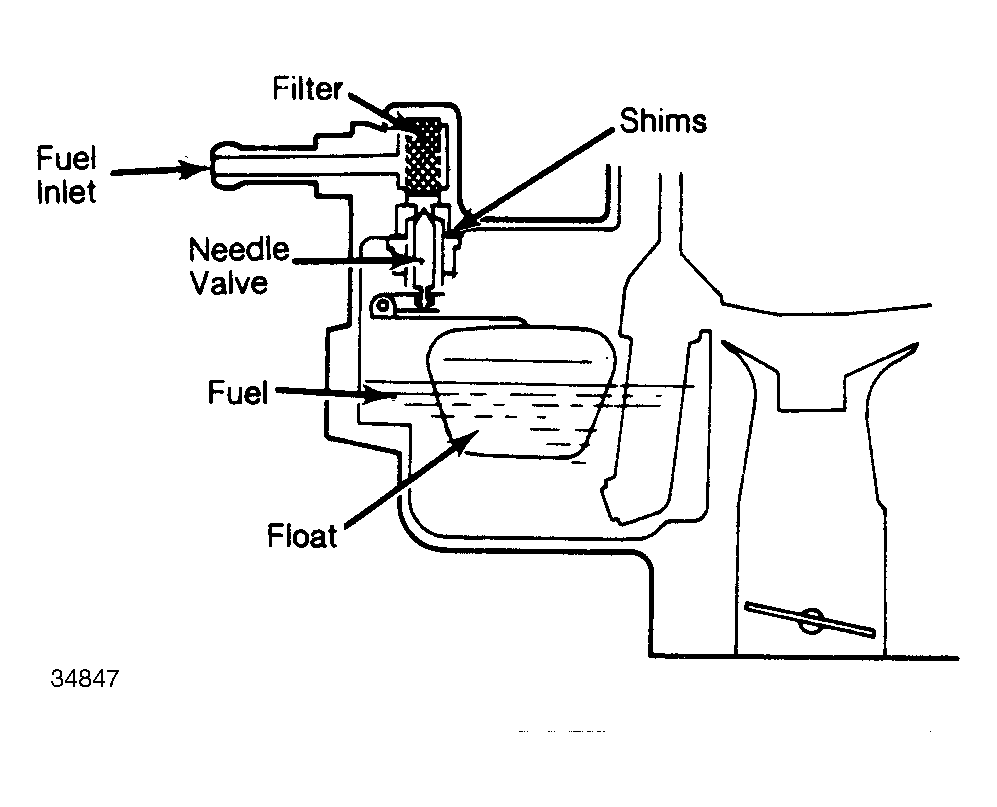
- To install shim, remove the float, needle and needle seat. Check filter for clogging or damage. Install new "O" ring to needle seat. Install shim and filter to needle seat. See Fig 2
. Install assembly into float chamber cover.
 Courtesy of CHRYSLER MOTORS.
- Install seat retainer. Tighten screws firmly. Insert needle into seat. Install float. Recheck float lever using procedure in step 1).