- Pull the gearshift cables through the bulkhead into the exterior.
NOTE:
When inserting the gearshift cables through the bulkhead, use care and do not damage the heat shielding.
NOTE:
When inserting the gearshift cables through the bulkhead, make sure the arrow on the grommet is pointing upward.
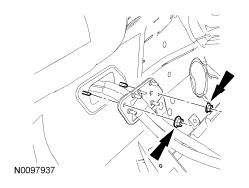
- Install the 2 gearshift cable grommet nuts and attach the gearshift cables to the floor.
- Tighten to 8 Nm (71 lb-in).
 Courtesy of FORD MOTOR CO.
- Install the wiring harness onto the studs.
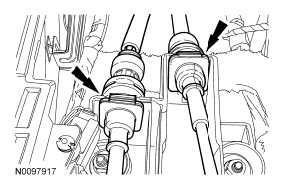
- Connect the gearshift cables to the gearshift lever base.
NOTE:
Make sure the gearshift cables are fully seated into the gearshift lever base or damage may occur.
 Courtesy of FORD MOTOR CO.
- Connect the select cable and the shift cable to the gearshift lever.
 Courtesy of FORD MOTOR CO.
- Position the insulation blanket into place.
- Install the RCM
. For additional information, refer to INSTALLATION
.
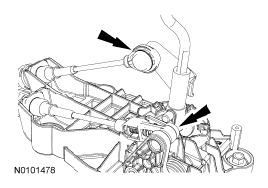
- Connect the gearshift cables to the transaxle bracket.
NOTE:
Make sure the gearshift cables are fully seated into the transaxle bracket or damage may occur.
NOTE:
The gearshift cable ends and transaxle bracket slots are unique. They can only be fully seated in the correct slot.
NOTE:
The top cable will have id tape.
 Courtesy of FORD MOTOR CO.
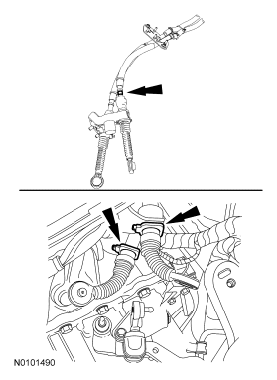
- Connect the gearshift cables to the transaxle shift control lever.
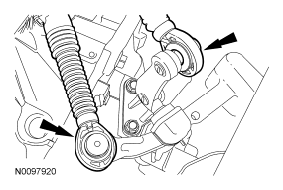 Courtesy of FORD MOTOR CO.
- Adjust the gearshift cables. For additional information, refer to GEARSHIFT CABLE ADJUSTMENT
.
- Install the battery tray. For additional information, refer to REMOVAL AND INSTALLATION
.
- Install the heater core and evaporator core housing. For additional information, refer to REMOVAL AND INSTALLATION
.