Front Scuff Plate Removal/Installation: Installation
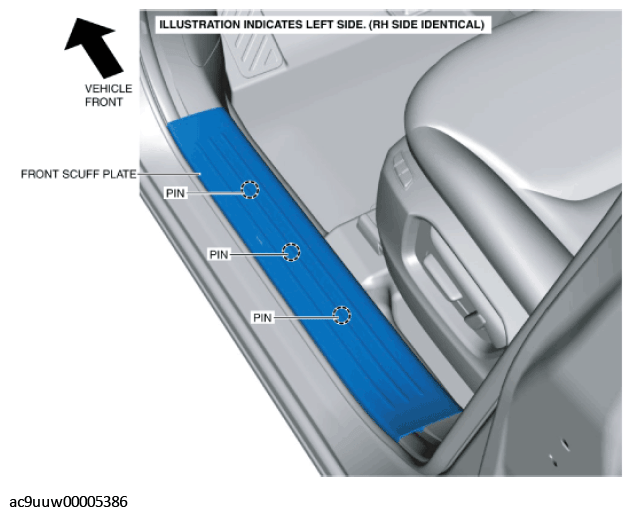
- Align the inner panel with the front scuff plate pins shown in the figure.
 Courtesy of MAZDA MOTORS CORP.
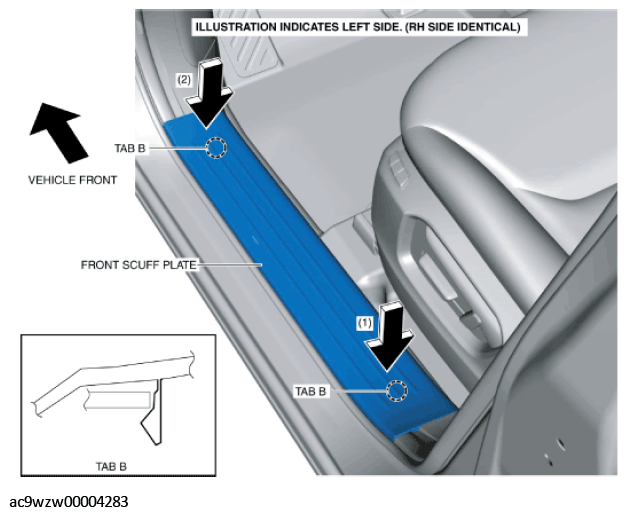
- Press the front scuff plate in the direction of arrow (1) shown in the figure and install tab B to the B-pillar lower trim.
 Courtesy of MAZDA MOTORS CORP.
- Press the front scuff plate in the direction of arrow (2) shown in the figure and install tab B to the front side trim.
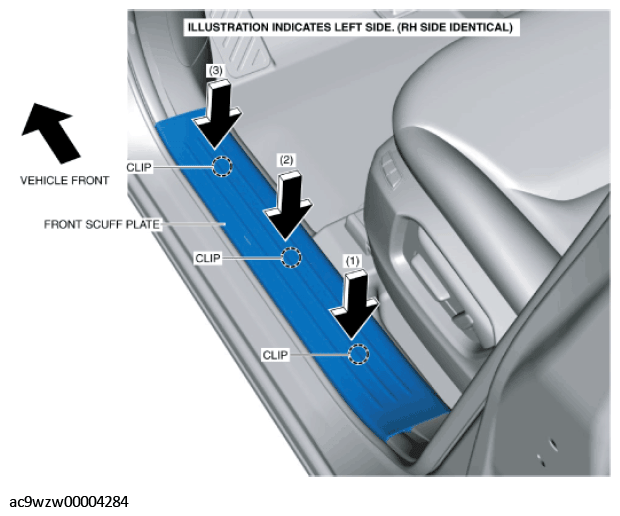
- Press the front scuff plate in the direction of arrows (1), (2) and (3) shown in the figure and install the clips to the inner panel.
 Courtesy of MAZDA MOTORS CORP.
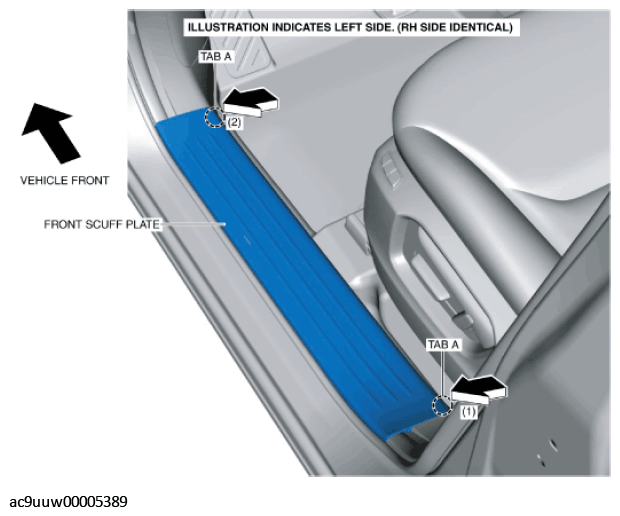
- Press the front scuff plate in the direction of arrow (1) shown in the figure and install tab A to the B-pillar lower trim.
 Courtesy of MAZDA MOTORS CORP.
- Press the front scuff plate in the direction of arrow (2) shown in the figure and install tab A to the front side trim.