Cluster Switch Removal/Installation
- Disconnect the negative battery terminal. (See NEGATIVE BATTERY TERMINAL DISCONNECTION/CONNECTION
.)
- Remove the driver-side front scuff plate. (Se FRONT SCUFF PLATE REMOVAL/INSTALLATION.)
- Remove the driver-side front side trim. (Se FRONT SIDE TRIM REMOVAL/INSTALLATION.)
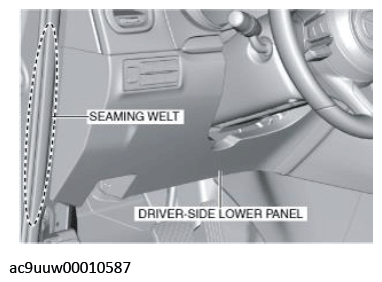
- Partially peel back the seaming welt.
 Courtesy of MAZDA MOTORS CORP.
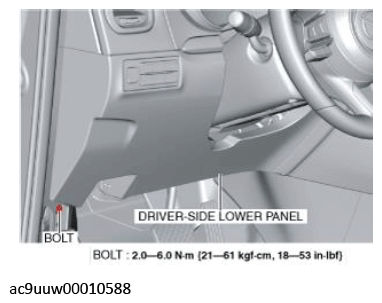
- Remove the bolt.
 Courtesy of MAZDA MOTORS CORP.
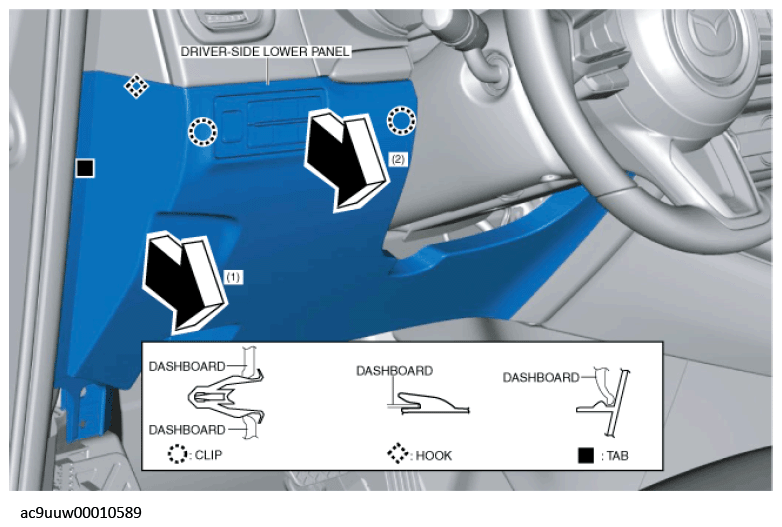
- Pull the driver-side lower panel in the direction of the arrow in the order of (1), (2) while detaching the hook, clips and tab.
 Courtesy of MAZDA MOTORS CORP.
- Set the driver-side lower panel aside.
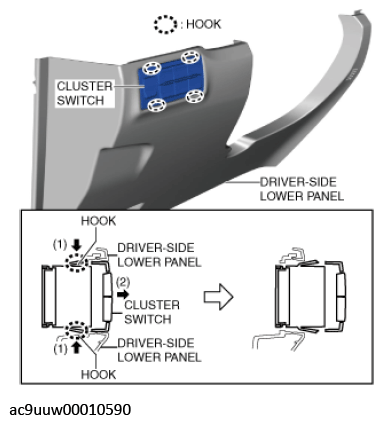
- Remove the hooks in the direction of the arrow in the order of (1), (2) shown in the figure.
 Courtesy of MAZDA MOTORS CORP.
- Disconnect the cluster switch connector.
- Install in the reverse order of removal.