Battery Tray and PCM Component Installation Note
- Install the battery tray and PCM component as a single unit.
- Connect the PCM connector using the following procedure:
CAUTION:
- Do not touch the PCM connector terminal. The terminal is extremely thin and can be damaged by touching it.
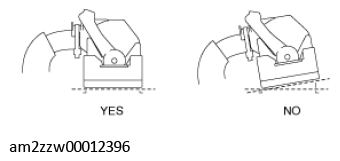
- If the PCM connector is inserted at an angle and the lever is moved, the connector could be damaged. Verify that the PCM connector is inserted straight.
 Courtesy of MAZDA MOTORS CORP.
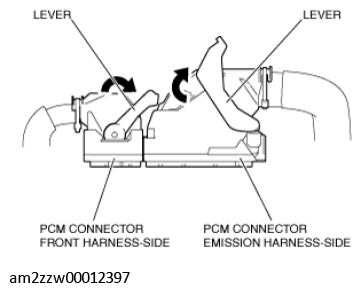
- Set the PCM connector lever to the position shown in the figure.
 Courtesy of MAZDA MOTORS CORP.
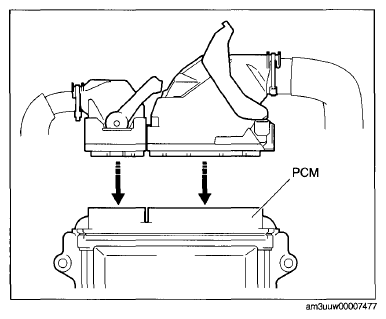
- Align the PCM connector straight against the connection surface.
 Courtesy of MAZDA MOTORS CORP.
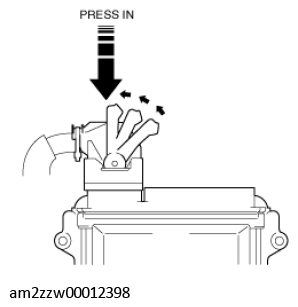
- Insert the PCM connector straight and press it in until the lever moves up naturally. (Front harness-side connector)
 Courtesy of MAZDA MOTORS CORP.
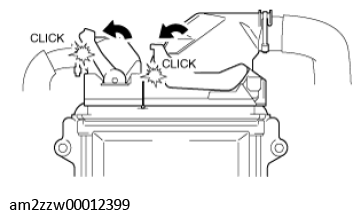
- Press the PCM connector lever until a click sound is heard.
 Courtesy of MAZDA MOTORS CORP.
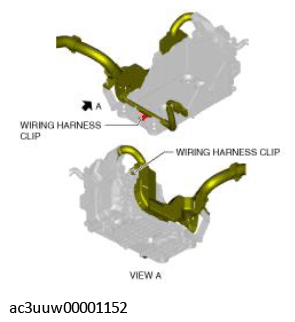
- Install the wiring harness clips in the two locations shown in the figure.
 Courtesy of MAZDA MOTORS CORP.
- Install the nut securing the wiring harness protector to the battery tray.
 Courtesy of MAZDA MOTORS CORP.
- Install the air cleaner, air hose and fresh air duct component. (See INTAKE-AIR SYSTEM REMOVAL/INSTALLATION
.)