Driver's Side
- Disconnect the negative battery terminal and wait for 1 min or more. (Without power seat system) (See NEGATIVE BATTERY TERMINAL DISCONNECTION/CONNECTION
.)
- Remove the head restraint.
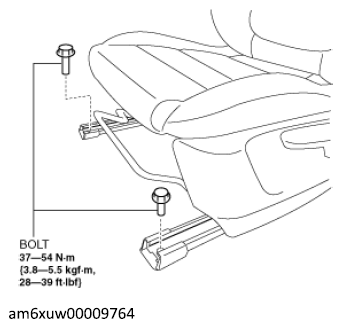
- Slide the front seat to the positions where the bolts shown in the figure below can be removed.
- Remove the bolts.
 Courtesy of MAZDA MOTORS CORP.
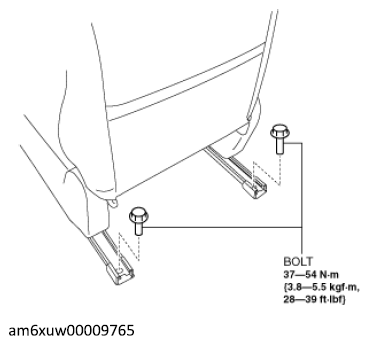
- Slide the front seat to the positions where the bolts shown in the figure below can be removed.
- Remove the bolts.
 Courtesy of MAZDA MOTORS CORP.
- Disconnect the negative battery terminal and wait for 1 min. or more. (With power seat system) (See NEGATIVE BATTERY TERMINAL DISCONNECTION/CONNECTION
.)
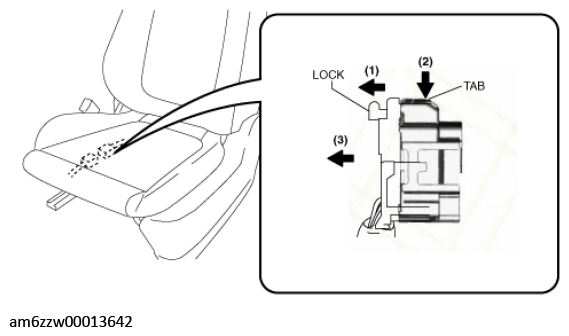
- Slide the lock in the direction of arrow (1) shown in the figure below, and while pressing the tab in the direction of arrow (2), disconnect the connector in the direction of arrow (3).
 Courtesy of MAZDA MOTORS CORP.
- Remove the front seat.
- Install in the reverse order of removal.