Trunk Lid Garnish Removal/Installation: Notes
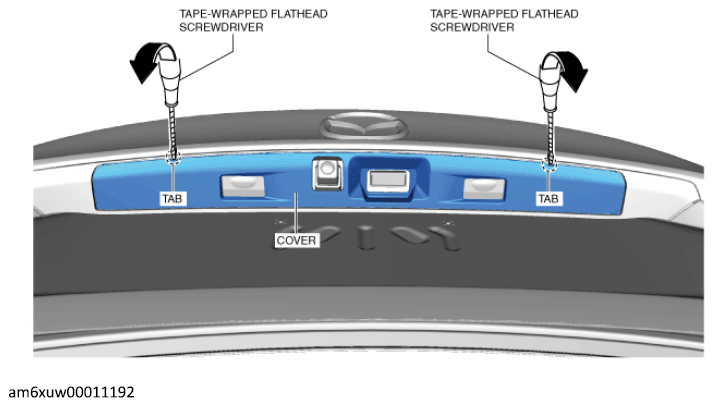
- Insert a tape-wrapped flathead screwdriver shown in the figure below.
 Courtesy of MAZDA MOTORS CORP.
- Move the tape-wrapped flathead screwdriver in the direction of the arrow shown in the figure above and detach the tabs.
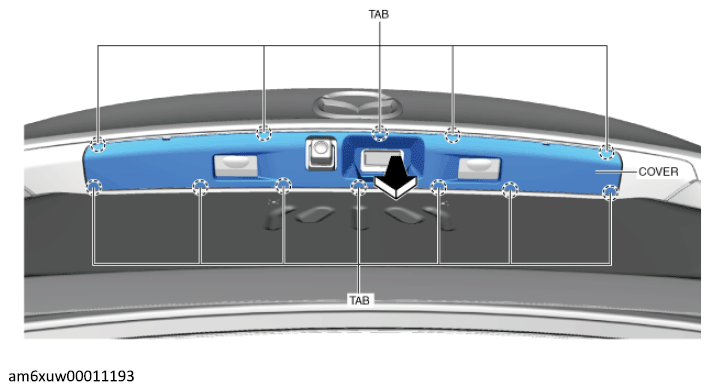
- Remove the cover in the direction of the arrow shown in the figure below while detaching the tabs.
 Courtesy of MAZDA MOTORS CORP.
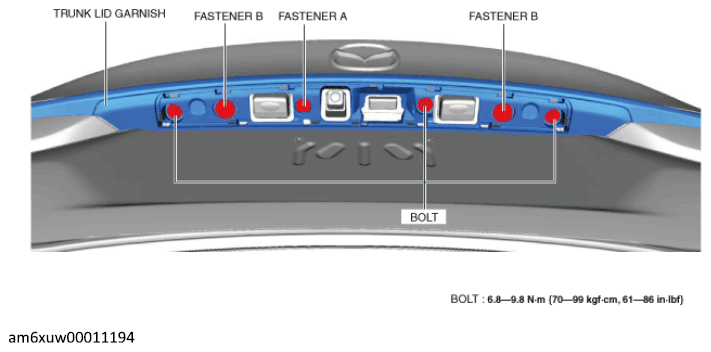
- Remove the fasteners A and B.
 Courtesy of MAZDA MOTORS CORP.
- Remove the bolts.
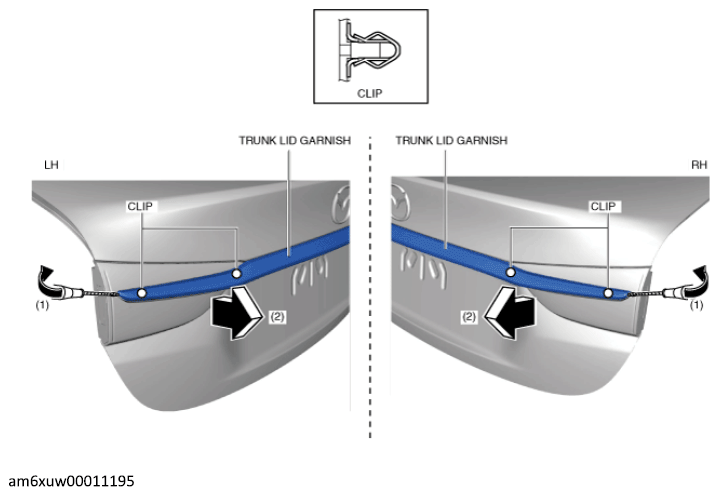
- Insert a tape-wrapped flathead screwdriver into the clips shown in the figure below and remove the clips in the direction of the arrows in the order of (1), (2).
 Courtesy of MAZDA MOTORS CORP.
- Move the tape-wrapped flathead screwdriver in the direction of arrow (1) shown in the figure above and detach the clip.
- Remove the trunk lid garnish in the direction of arrow (2).
- Remove the hole cover. (without rear mount camera)
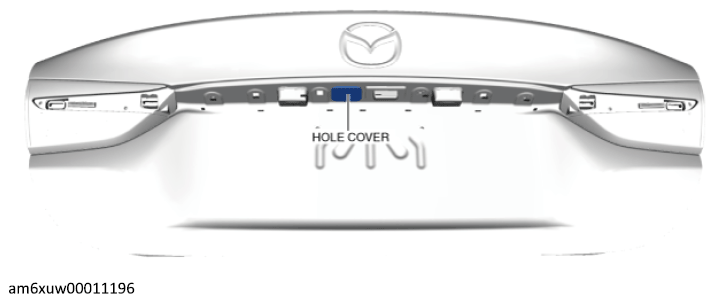 Courtesy of MAZDA MOTORS CORP.
- When removing the molding, perform the following procedure.
- Remove the screws.
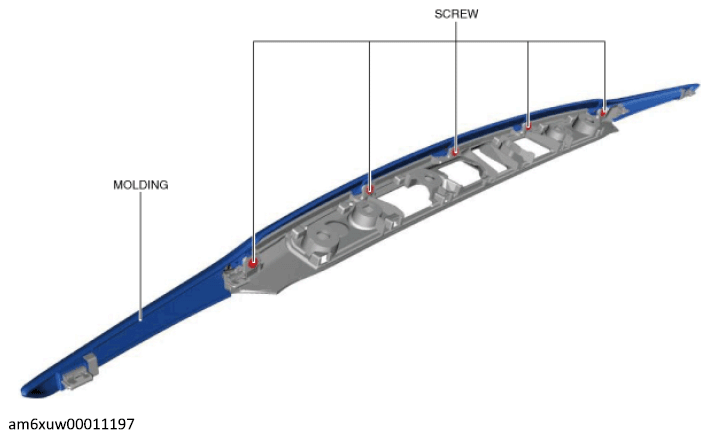 Courtesy of MAZDA MOTORS CORP.
- Remove the molding.
- Install in the reverse order of removal. (See TRUNK LID GARNISH INSTALLATION NOTE )