Front Seat Back Trim Removal/Installation: Installation
- Install the C-rings by aligning the C-ring installation holes of the front seat back trim and the front seat back pad.
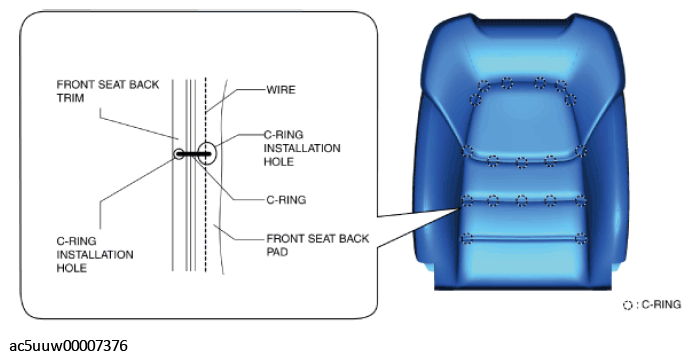 Courtesy of MAZDA MOTORS CORP.
CAUTION:
- If a C-ring is damaged while removing or installing the front seat back trim and front seat back pad, it may not be possible to install the front seat back trim and front seat back pad normally. When removing or installing the front seat back trim and front seat back pad, be careful not to damage the C-rings.
- If a C-ring is damaged, replace it with a new one.
NOTE:
- The position and number of C-rings differ depending on the type of seat.
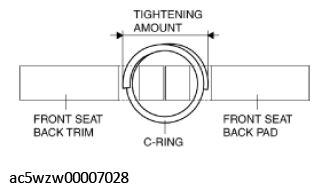 Courtesy of MAZDA MOTORS CORP.
- Wrinkling can be easily prevented by installing the C-rings with a certain amount of tightening.
- Press the front seat back pad inward while pulling the front seat back trim outward.
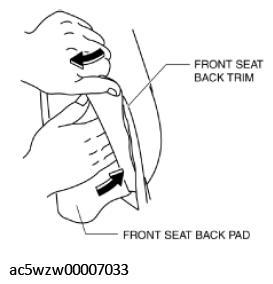 Courtesy of MAZDA MOTORS CORP.
- Install the front seat back trim and the front seat back pad as a single unit to the front seat back frame.
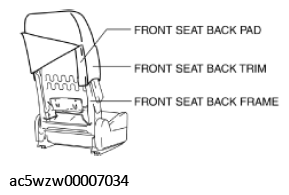 Courtesy of MAZDA MOTORS CORP.
- Pull out the front seat back pad, front seat back trim, and front seat back warmer wiring harness (with seat warmer system) rearward of the front seat.
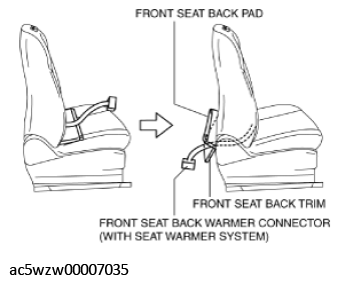 Courtesy of MAZDA MOTORS CORP.
- Pass the wiring harnesses shown in the figure through the holes in the front seat back pad.
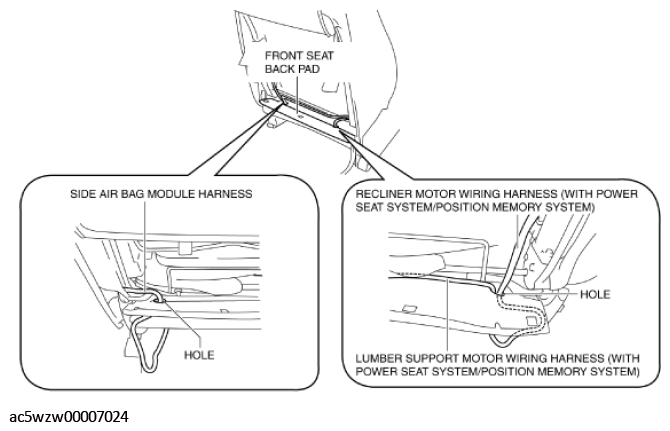 Courtesy of MAZDA MOTORS CORP.
- Move the clip in the direction of arrow (1) shown in the figure and install the side air bag module securing belt to the front seat back frame.
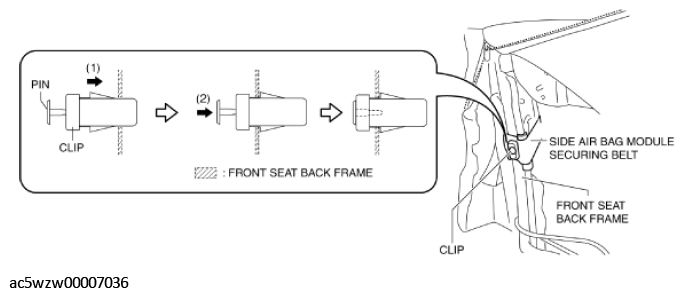 Courtesy of MAZDA MOTORS CORP.
- Press the pin in the direction of arrow (2) shown in the figure.
- Install the pole guides to the front seat back frame.
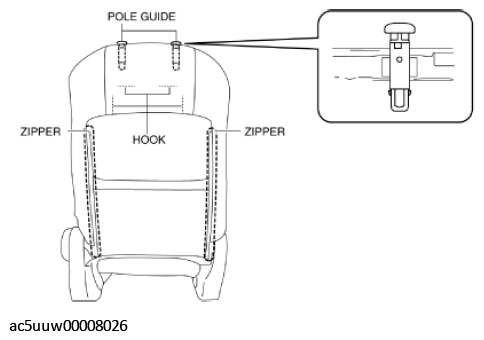 Courtesy of MAZDA MOTORS CORP.
- Install the hooks
- Zip the zippers.
- Align the front seat back trim with the shape of the front seat back pad while pressing the front seat back pad outward.
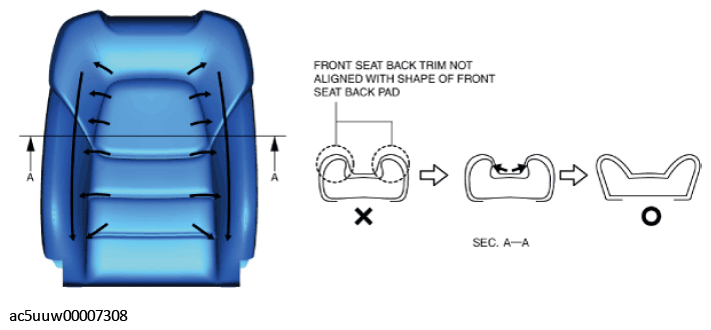 Courtesy of MAZDA MOTORS CORP.
- Pull the front seat back trim in the direction of the arrow shown in the figure and remove the wrinkles on the front seat back trim.
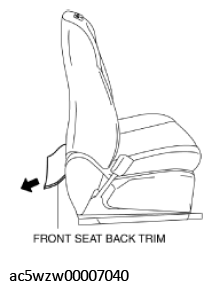 Courtesy of MAZDA MOTORS CORP.
- Move hook A in the direction of the arrow shown in the figure and install it to hook B.
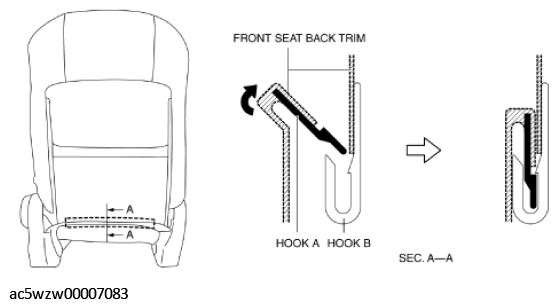 Courtesy of MAZDA MOTORS CORP.
- Connect the connectors.
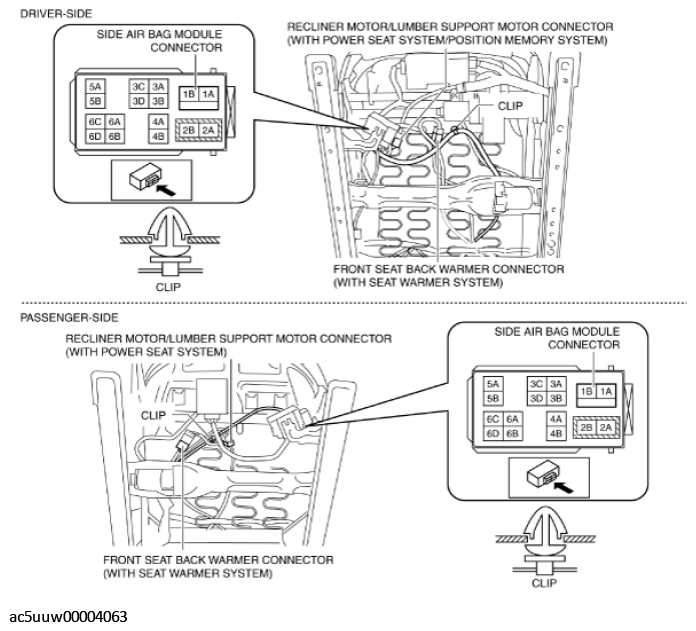 Courtesy of MAZDA MOTORS CORP.
- Install the clips.
- Install the fasteners and install the front seat cushion trim to the front seat cushion frame. (With power seat system/with position memory system)
- Move the hook in the order of arrows (1) and (2) shown in the figure and install the front seat cushion trim to the front seat cushion frame. (Without power seat system/without position memory system)
- Install the front seat. (See FRONT SEAT REMOVAL/INSTALLATION .)
- Install the headrest.
- Connect the negative battery terminal. (See NEGATIVE BATTERY TERMINAL DISCONNECTION/CONNECTION
.)