Condenser Removal/Installation: Notes
- Disconnect the negative battery cable. (See NEGATIVE BATTERY CABLE DISCONNECTION/CONNECTION
.)
- Discharge the refrigerant. (See REFRIGERANT RECOVERY
.) (See REFRIGERANT CHARGING
.)
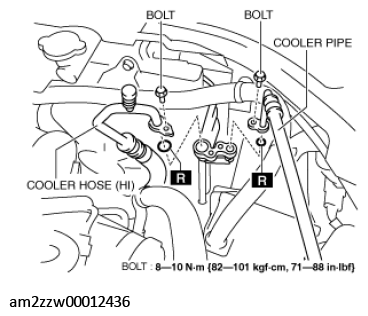
- Remove the bolts.
 Courtesy of MAZDA MOTORS CORP.
CAUTION:
- If moisture or foreign matter enters the refrigeration cycle, cooling ability will be lowered and abnormal noise or other malfunctions could occur. Always plug open fittings immediately after removing any refrigeration cycle parts.
- Disconnect the cooler pipe. (See REFRIGERANT LINE REMOVAL/INSTALLATION .)
- Disconnect the cooler hose (HI). (See REFRIGERANT LINE REMOVAL/INSTALLATION .)
- Remove the following parts:
- Plug hole plate (See PLUG HOLE PLATE REMOVAL/INSTALLATION
.)
- Air cleaner, air hose and fresh air duct component (See INTAKE-AIR SYSTEM REMOVAL/INSTALLATION
.)
- Coolant reserve tank (See COOLANT RESERVE TANK REMOVAL/INSTALLATION
.)
- Front under cover No. 1. (See FRONT UNDER COVER No. 1 REMOVAL/INSTALLATION
.)
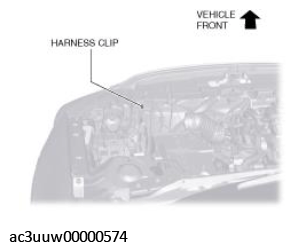
- Remove the harness clip.
 Courtesy of MAZDA MOTORS CORP.
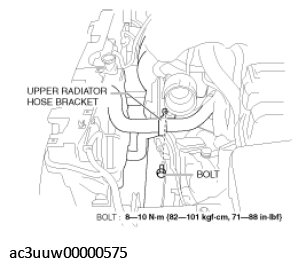
- Remove the bolt.
 Courtesy of MAZDA MOTORS CORP.
- Remove the upper radiator hose bracket.
- Remove the upper mount rubber bracket. (See RADIATOR REMOVAL/INSTALLATION
.)
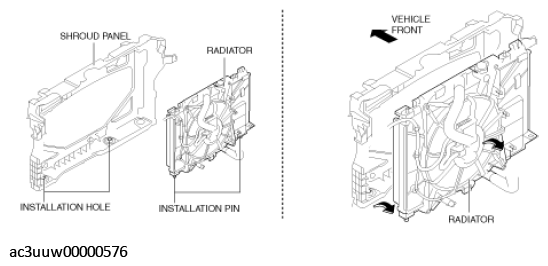
- Lift the radiator and remove the installation pins from the shroud panel installation holes and then move the radiator in the direction of the arrow shown in the figure.
 Courtesy of MAZDA MOTORS CORP.
- Remove the bolts.
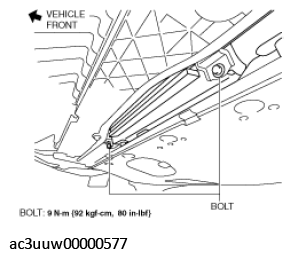 Courtesy of MAZDA MOTORS CORP.
- Lift the radiator and install the installation pins into the installation holes on the shroud panel.
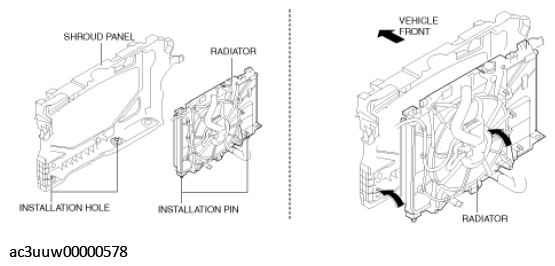 Courtesy of MAZDA MOTORS CORP.
- Move the radiator in the direction of the arrow shown in the figure and secure the wiring harness.
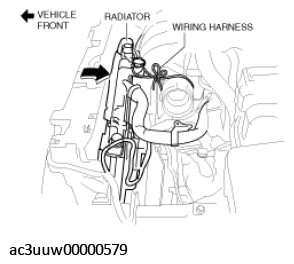 Courtesy of MAZDA MOTORS CORP.
- Remove the condenser installation bolt.
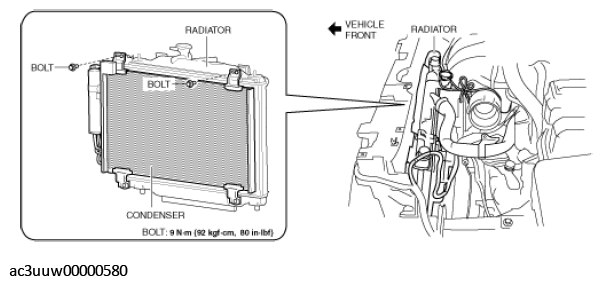 Courtesy of MAZDA MOTORS CORP.
- Remove the condenser in the direction of the arrow shown in the figure being careful not to allow the remaining compressor oil to spill.
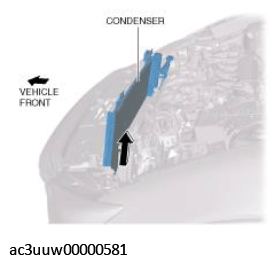 Courtesy of MAZDA MOTORS CORP.
CAUTION:
- If moisture or foreign matter enters the refrigeration cycle, cooling ability will be lowered and abnormal noise or other malfunctions could occur. Always plug open fittings immediately after removing any refrigeration cycle parts.
- Install in the reverse order of removal. (See Condenser Installation Note .)
- Perform the refrigerant system performance test. (See REFRIGERANT SYSTEM PERFORMANCE TEST
.)