Rear Outer Handle Removal/Installation: Notes
- Fully close the rear door glass.
- Disconnect the negative battery cable. (See NEGATIVE BATTERY CABLE DISCONNECTION/CONNECTION
.)
- Remove the following parts:
- Power window subswitch (See POWER WINDOW SUBSWITCH REMOVAL/INSTALLATION
.)
- Rear door trim (See REAR DOOR TRIM REMOVAL/INSTALLATION
.)
- Remove the service hole cover.
CAUTION:
- When removing service hole cover, remove it while gradually stripping the butyl rubber. Otherwise service hole cover may be deformed.
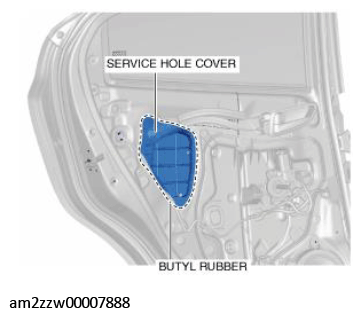 Courtesy of MAZDA MOTORS CORP.
- Remove the service hole cover.
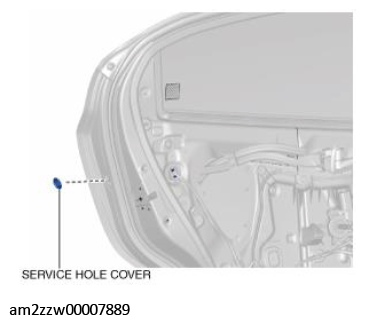 Courtesy of MAZDA MOTORS CORP.
- Loosen the screw from the rear outer handle bracket.
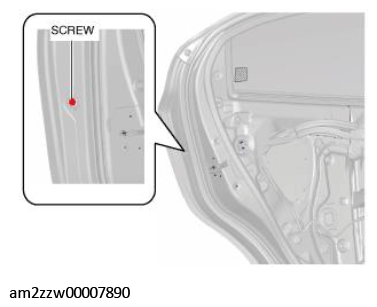 Courtesy of MAZDA MOTORS CORP.
NOTE:
- The screw cannot be removed because the front outer handle bracket has a stopper which prevents the screw from falling.
- While pressing the rear outer handle bracket tab in the direction of arrow (1) shown in the figure, pull the outer handle garnish in the direction of arrow (2) to detach the rear outer handle bracket from the outer handle garnish.
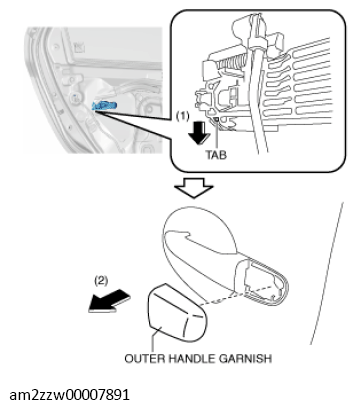 Courtesy of MAZDA MOTORS CORP.
- Remove the outer handle garnish from the rear outer handle bracket.
- While pulling the rear outer handle bracket pin in the direction of arrow (1) shown in the figure, pull the rear outer handle in the direction of arrow (2) to detach the rear outer handle bracket pin from the rear outer handle.
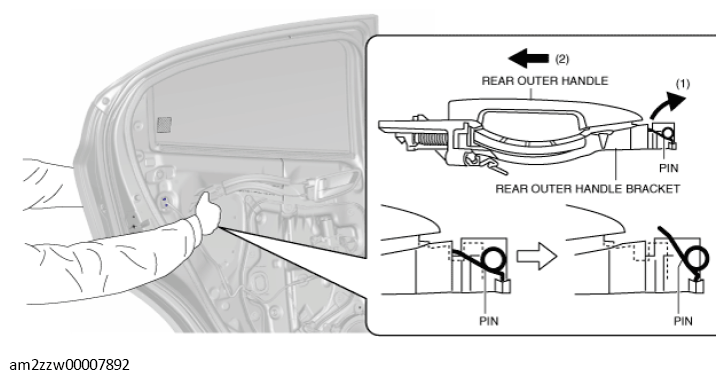 Courtesy of MAZDA MOTORS CORP.
- Remove the rear outer handle in the direction of the arrow shown in the figure.
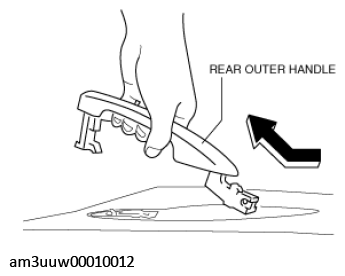 Courtesy of MAZDA MOTORS CORP.
- Loosen the screw from the rear outer handle bracket.
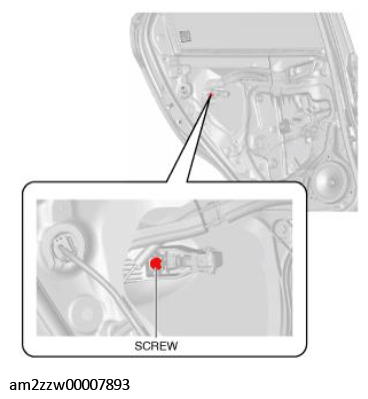 Courtesy of MAZDA MOTORS CORP.
NOTE:
- The screw cannot be removed because the rear outer handle bracket has a stopper which prevents the screw from falling.
- Pull the rear outer handle bracket in the direction of arrow shown in the figure and detach the rear outer handle bracket hooks from the body.
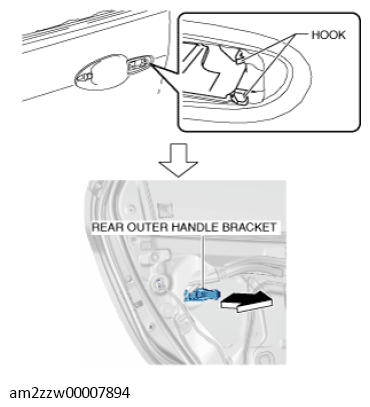 Courtesy of MAZDA MOTORS CORP.
- Lift the rear outer handle bracket in the direction of arrow shown in the figure to pull the rod out of the rod holder. (See
Rear Outer Handle Bracket Installation Note .)
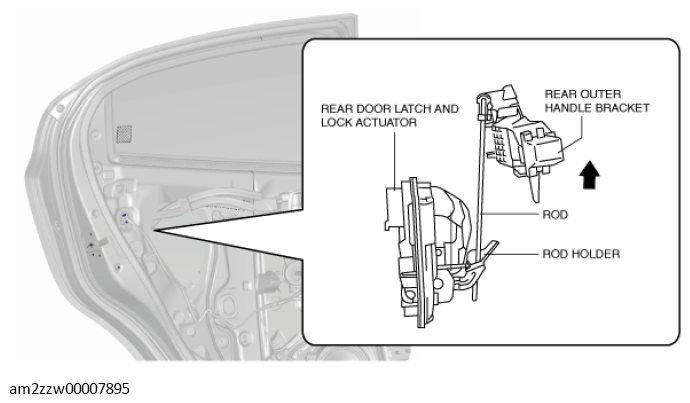 Courtesy of MAZDA MOTORS CORP.
- Remove the rear outer handle bracket.
- Remove the handle seat from the body.
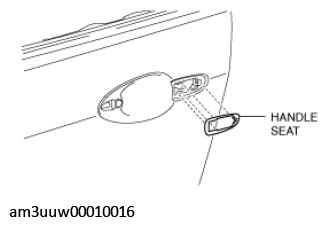 Courtesy of MAZDA MOTORS CORP.
- Install in the reverse order of removal.