Timing Chain Removal Note
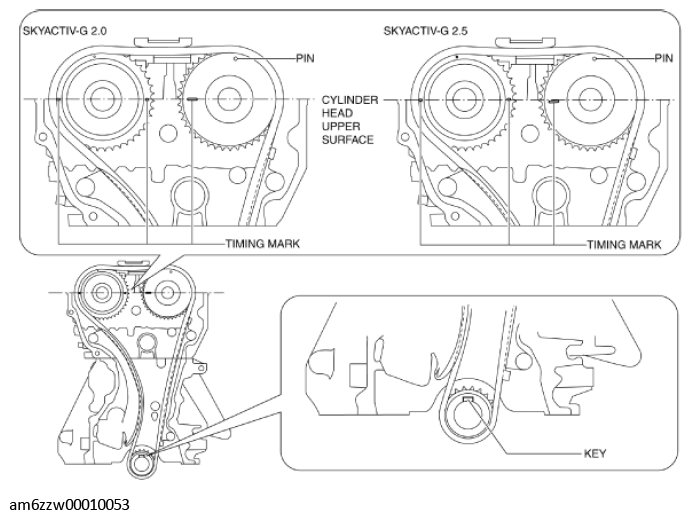
- Rotate the crankshaft clockwise to align the timing marks and the key position as shown in the figure, and set cylinder No. 1 at top dead center (TDC).
 Courtesy of MAZDA MOTORS CORP.
NOTE:
- The timing mark of SKYACTIV-G 2.5 is not parallel with the upper surface of the cylinder head.
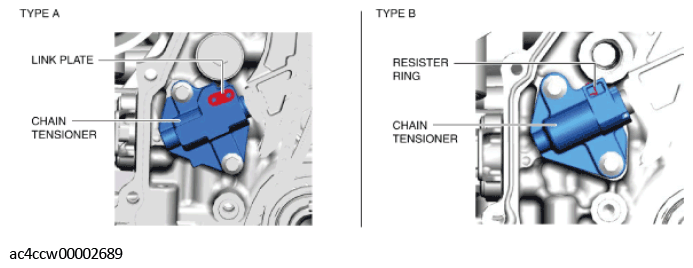
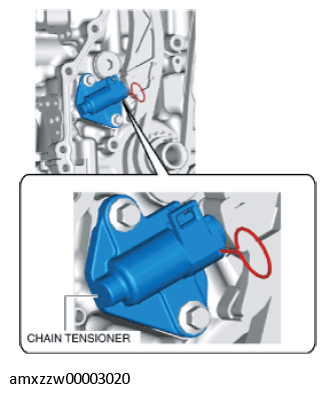
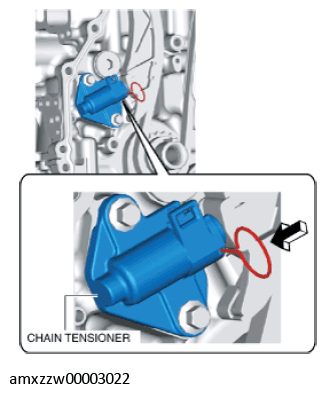
- Verify the chain tensioner shape and identify the chain tensioner type.
NOTE:
- Verifying the chain tensioner type is necessary because the following procedures may differ according to the type of tensioner.
 Courtesy of MAZDA MOTORS CORP.
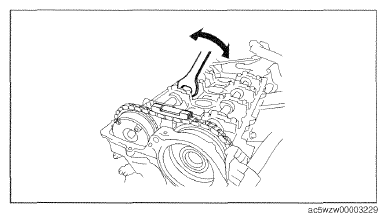
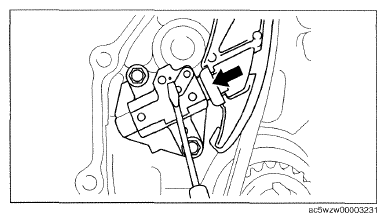
- While moving the exhaust camshaft back and forth in the direction of the arrow using a wrench on the cast hexagon, press down the link plate of the timing chain tensioner using a precision screwdriver and release the plunger lock. (chain tensioner (type A))
 Courtesy of MAZDA MOTORS CORP.
 Courtesy of MAZDA MOTORS CORP.
NOTE:
- When moving the exhaust camshaft back and forth, the timing chain pushes the plunger in the chain tensioner making it easier to operate the link plate.
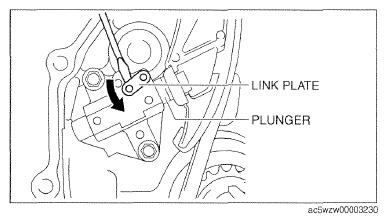
- Push back the plunger slowly in the direction shown in the figure with the link plate still pushed down. (chain tensioner (type A))
 Courtesy of MAZDA MOTORS CORP.
- Remove the screwdriver from the link plate with the plunger still pushed down. (chain tensioner (type A))
- Release the force slightly from the plunger, and move it back and forth 2-3 mm {0.08-0.11 in}. (chain tensioner (type A))
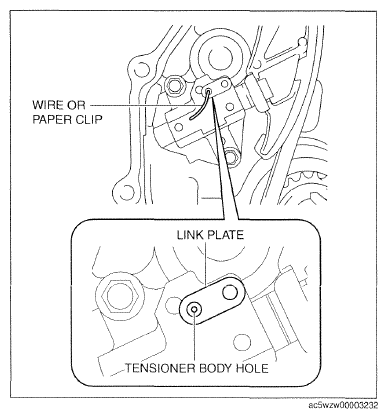
- Insert a wire with an approx. diameter of 1.5 mm {0.059 in} or a paper clip where the link plate hole and the tensioner body hole overlap to secure the link plate and lock the plunger. (chain tensioner (type A))
 Courtesy of MAZDA MOTORS CORP.
- Loosen the chain tensioner using the following procedure: (chain tensioner (type B))
- Insert a metal rod (diameter approx. 1.4 mm {0.055 in}, length approx. 55 mm {2.2 in}) into the hole in the body of the chain tensioner.
 Courtesy of MAZDA MOTORS CORP.
- Press the resister ring and unlock the plunger.
 Courtesy of MAZDA MOTORS CORP.
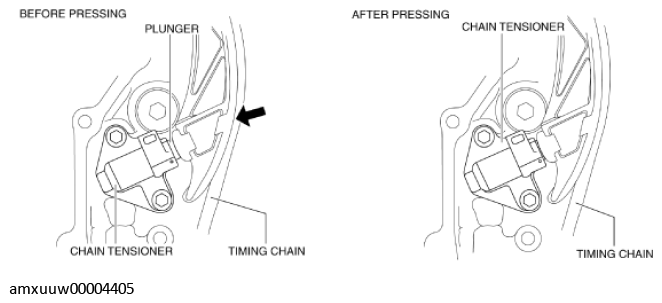
- Press the timing chain in the direction of the arrow and press in the chain tensioner plunger to the position where the groove and body hole are aligned.
 Courtesy of MAZDA MOTORS CORP.
- With the plunger pressed in, further insert the metal rod set in (1) above.
 Courtesy of MAZDA MOTORS CORP.
NOTE:
- The rod secures the plunger and releases the tension.
- Loosen the power of the hand pressing the plunger and verify that the pressed-in rod does not move.
- Remove the chain tensioner, tensioner arm, and the chain guide (No. 1).
- Remove the timing chain.