Front Console Removal/Installation
- Disconnect the negative battery terminal. (Refer to NEGATIVE BATTERY TERMINAL DISCONNECTION/CONNECTION
.)
- Remove the following parts:
- Selector lever knob (Refer to AUTOMATIC TRANSAXLE SHIFT MECHANISM REMOVAL/INSTALLATION
.)
- Shift panel (Refer to SHIFT PANEL REMOVAL/INSTALLATION .)
- Console side panel (Refer to CONSOLE SIDE PANEL REMOVAL/INSTALLATION .)
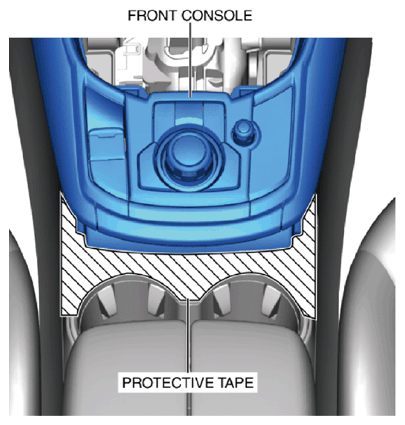
- To prevent scratches or damage, affix protective tape to the position shown in the figure.
 Courtesy of MAZDA MOTORS CORP.
CAUTION:
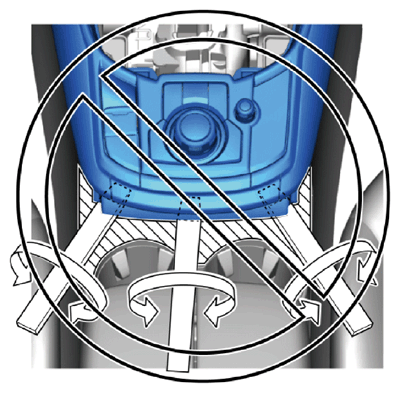
- If any of the inserted remover tools are moved in the directions of the arrows shown in the figure, the front console and rear console may be damaged from the edge of the remover tool. Insert the remover tools laterally between the front console and rear console without moving them in the direction of the arrows.
 Courtesy of MAZDA MOTORS CORP.
- Insert the remover tools in the order shown in the figure.
 Courtesy of MAZDA MOTORS CORP.
- Put on non-slip gloves.
- Hold the shaded area with both hands, move the front console in the direction of the arrow shown in the figure, and detach clips A, B, C and D from the front console.
 Courtesy of MAZDA MOTORS CORP.
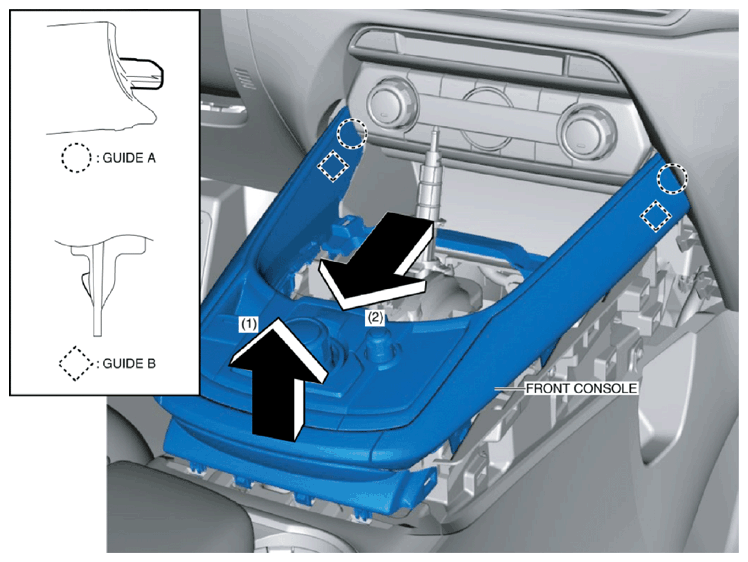
- Remove the front console in the order of arrows (1), (2) shown in the figure while detaching guides A, B.
 Courtesy of MAZDA MOTORS CORP.
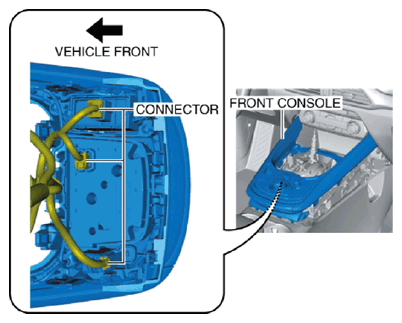
- Disconnect the connectors.
 Courtesy of MAZDA MOTORS CORP.
- Remove the front console.
- Install in the reverse order of removal.