Front Seat Back Component Removal/Installation: Driver-Side
- Switch the ignition off (LOCK).
- Disconnect the negative battery cable and wait for 1 min or more. (See NEGATIVE BATTERY CABLE DISCONNECTION/CONNECTION
.)
- Remove the front seat. (See FRONT SEAT REMOVAL/INSTALLATION .)
- Remove the front seat side cover. (See FRONT SEAT SIDE COVER REMOVAL/INSTALLATION .)
- Remove the fasteners. (With power seat system/with position memory system)
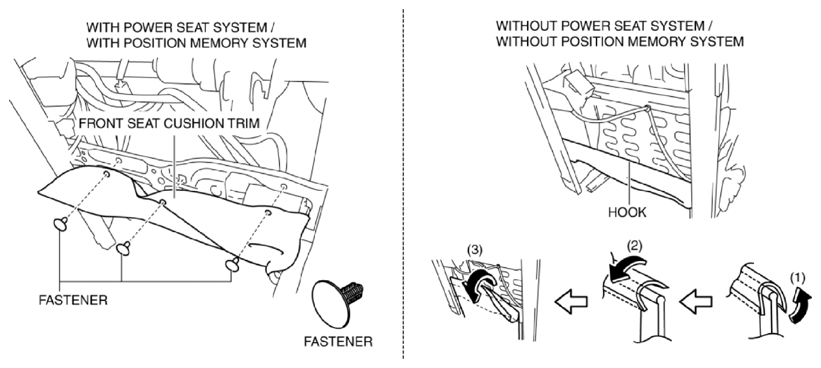 Courtesy of MAZDA MOTORS CORP.
- Set the front seat cushion trim aside. (With power seat system/with position memory system)
- Slide the hook in the order of arrows (1), (2), (3) shown in the figure and remove the front seat cushion trim. (Without power seat system/without position memory system)
- Remove the side air bag module connector from the junction connector box.
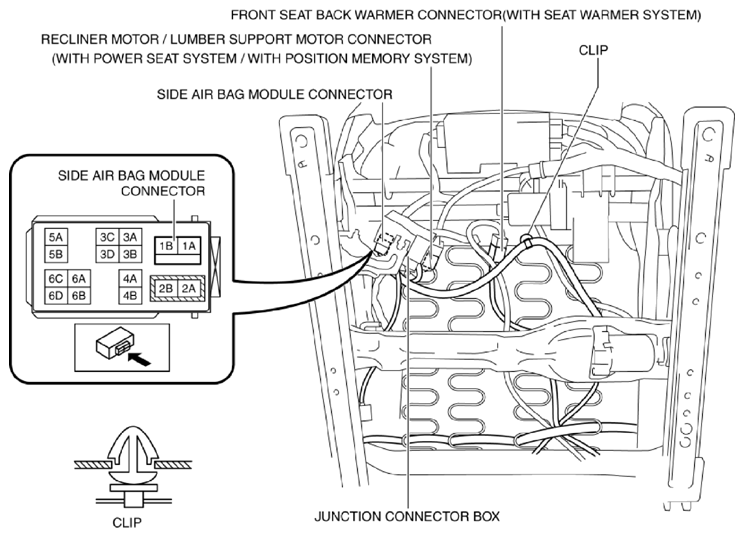 Courtesy of MAZDA MOTORS CORP.
- Detach the clip.
- Disconnect the front seat back warmer connector. (With seat warmer system)
- Disconnect the recliner motor/lumbar support motor connectors. (With power seat system/with position memory system)
- Remove the bolts, then remove the front seat back component.
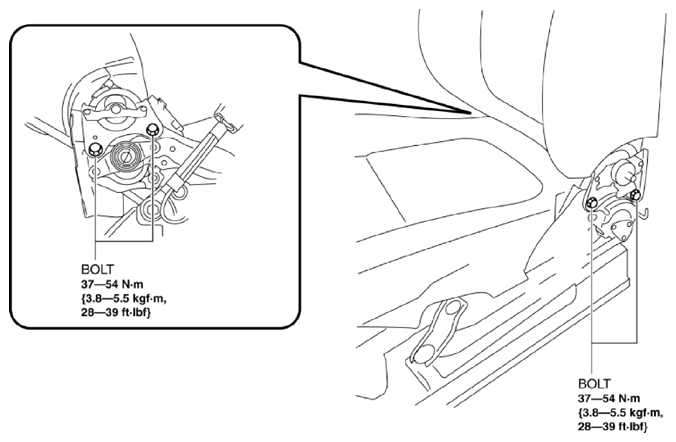 Courtesy of MAZDA MOTORS CORP.
- Install in the reverse order of removal.