Power Window SUBSWITCH Removal/Installation: Rear-side
- Disconnect the negative battery cable. (Refer to NEGATIVE BATTERY CABLE DISCONNECTION/CONNECTION
.)
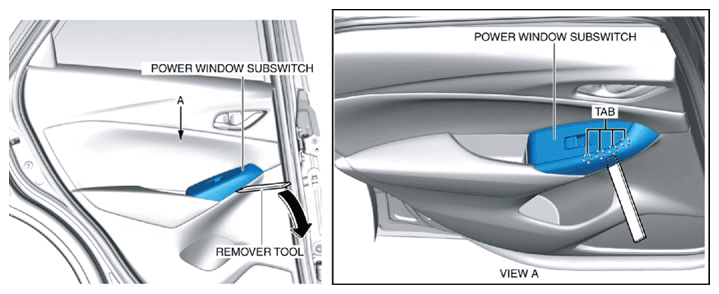
- Affix the protective tape to the position shown in the figure to prevent scratches and damage.
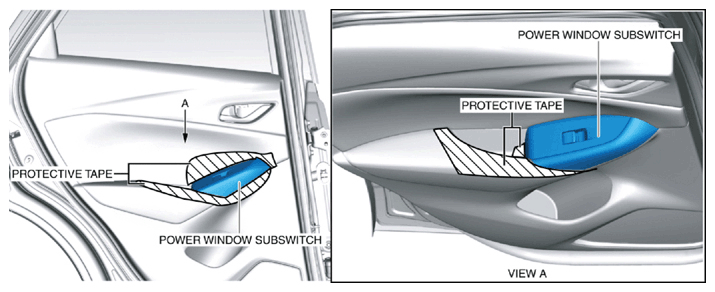 Courtesy of MAZDA MOTORS CORP.
CAUTION:
- When detaching the tabs, move the remover tool gradually. If the remover tool is moved too extensively, the welded area of the power window subswitch panel could be damaged.
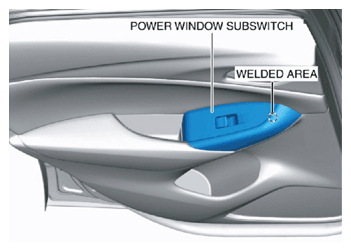 Courtesy of MAZDA MOTORS CORP.
- Insert the remover tool into the position shown in the figure.
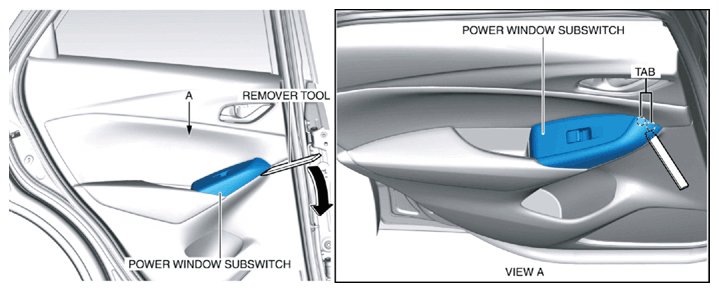 Courtesy of MAZDA MOTORS CORP.
- Move the remover tool in the direction of the arrow shown in the figure and detach the tabs.
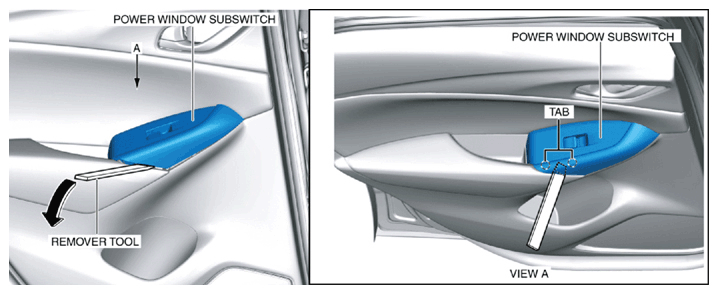
- While pulling the power window subswitch in the direction of arrow (1) shown in the figure, press the rear door trim in the direction of arrows (2) and detach the tabs.
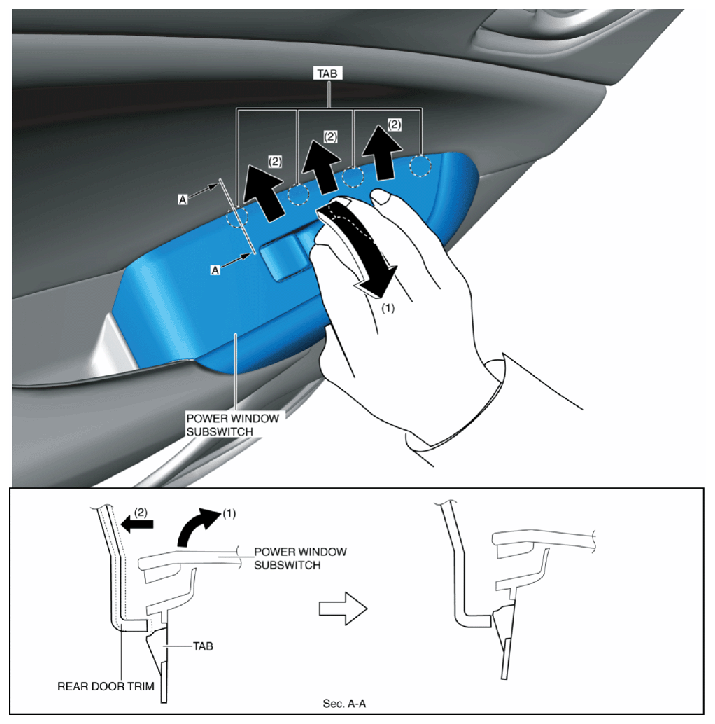 Courtesy of MAZDA MOTORS CORP.
- Insert the remover tool into the position shown in the figure.
 Courtesy of MAZDA MOTORS CORP.
- Move the remover tool in the direction of the arrow shown in the figure and detach the tabs.
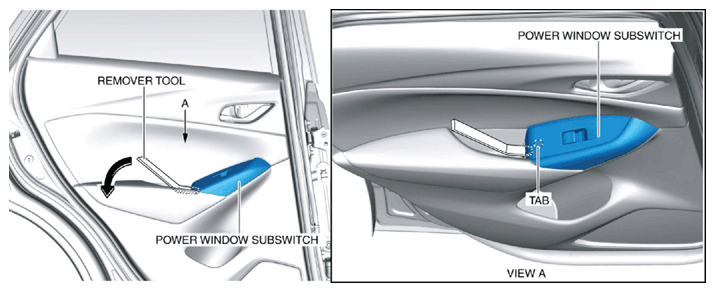
- Insert the remover tool into the position shown in the figure.
 Courtesy of MAZDA MOTORS CORP.
- Move the remover tool in the direction of the arrow shown in the figure and detach the tabs.
- Insert the remover tool into the position shown in the figure.
 Courtesy of MAZDA MOTORS CORP.
- Move the remover tool in the direction of the arrow shown in the figure and detach the tab.
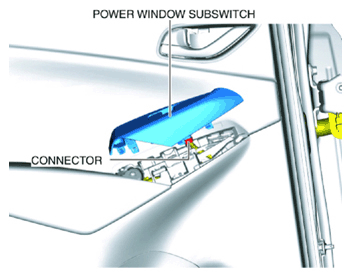
- Disconnect the connector.
 Courtesy of MAZDA MOTORS CORP.
- Detach the tabs and remove the power window subswitch from the power window subswitch panel.
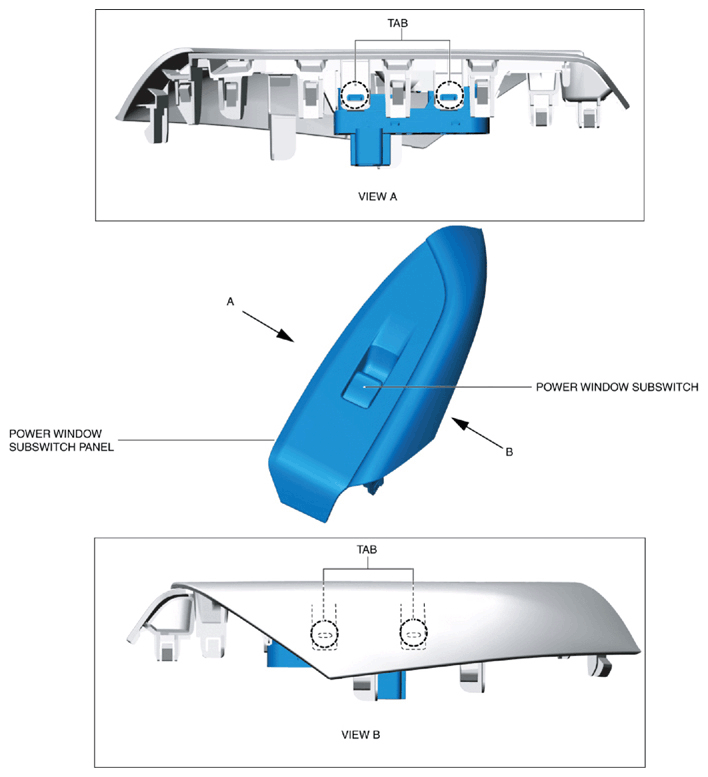 Courtesy of MAZDA MOTORS CORP.
- Install in the reverse order of removal.