Rear Door Glass Removal/Installation
- Fully lower the rear door glass.
- Disconnect the negative battery cable. (See NEGATIVE BATTERY CABLE DISCONNECTION/CONNECTION [SKYACTIV-G 2.5]
.)
- Remove the following parts:
- Rear door trim (See REAR DOOR TRIM REMOVAL/INSTALLATION
.)
- Rear door quarter glass (See REAR DOOR QUARTER GLASS REMOVAL/INSTALLATION .)
- Rear door speaker (See REAR DOOR SPEAKER REMOVAL/INSTALLATION
.)
- Rear power window motor (See POWER WINDOW MOTOR REMOVAL/INSTALLATION .)
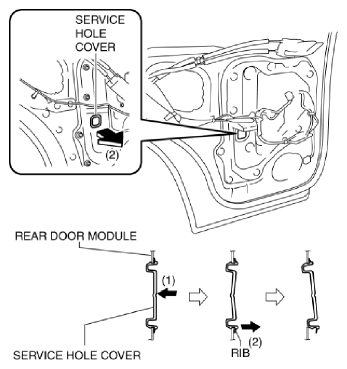
- Press the center of the service hole cover in the direction of arrow (1) shown in the figure.
 Courtesy of MAZDA MOTORS CORP.
- Remove the service hole cover by holding its rib and partially peeling it back in the direction of arrow (2) shown in the figure.
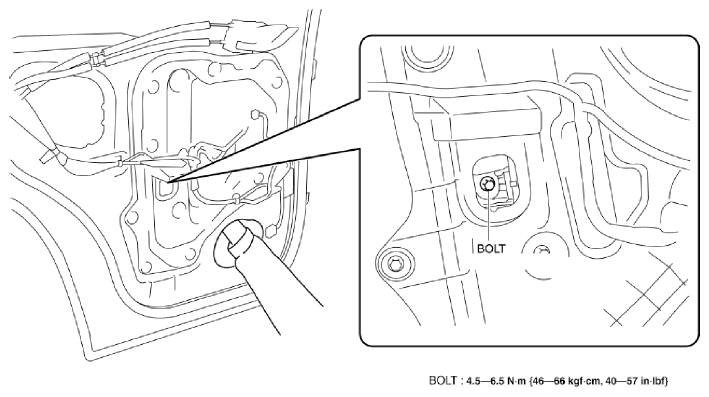
- Remove the bolt.
CAUTION:
- If the bolts are removed without supporting the rear door glass, the rear door glass may fall off and be damaged. Remove the bolts while inserting your hand into the rear door speaker installation hole to support the rear door glass.
 Courtesy of MAZDA MOTORS CORP.
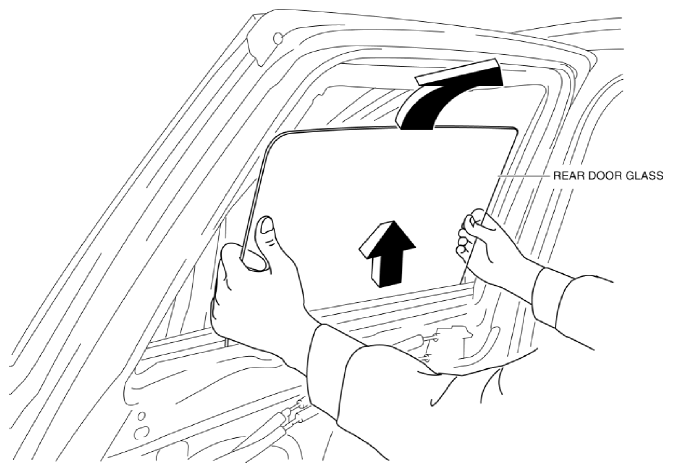
- Lift the rear door glass up and remove while tilting it.
 Courtesy of MAZDA MOTORS CORP.
- Lift up the rear door glass, tilt it in the direction of arrow shown in the figure.
- Install in the reverse order of removal.