Rear Seat Back Trim Removal/Installation: Installation
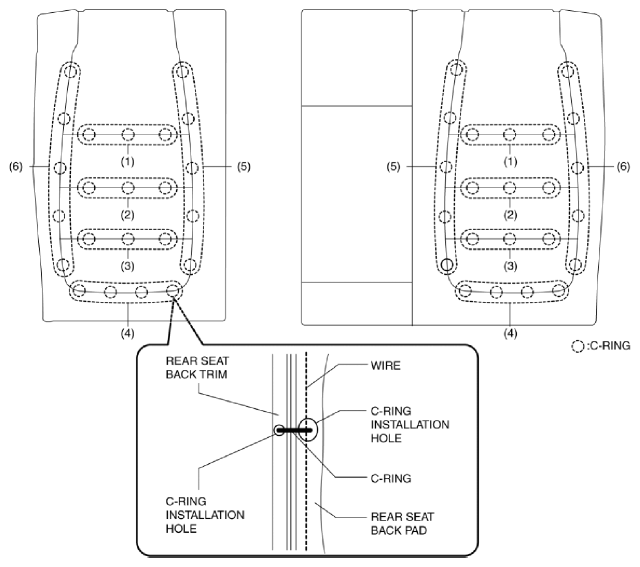
- Align the rear seat back trim with the installation hole of the rear seat back pad, and install the C-rings in the order of (1), (2), (3), (4), (5), and (6) shown in the figure.
 Courtesy of MAZDA MOTORS CORP.
CAUTION:
- If a C-ring is damaged while removing or installing the rear seat back trim and rear seat back pad, it may not be possible to install the rear seat back trim and rear seat back pad normally. When removing or installing the rear seat back trim and rear seat back pad, be careful not to damage the C-rings.
- If a C-ring is damaged, replace it with a new one.
NOTE:
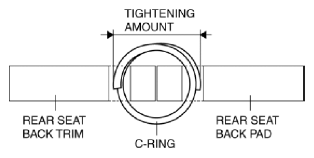
- Wrinkling can be easily prevented by installing the C-rings with a certain amount of tightening.
 Courtesy of MAZDA MOTORS CORP.
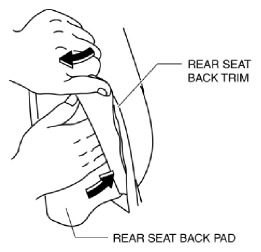
- Press the rear seat back pad inward while pulling the rear seat back trim outward.
 Courtesy of MAZDA MOTORS CORP.
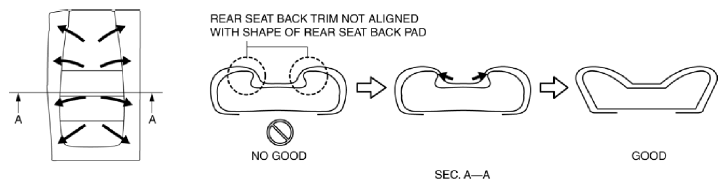
- Align the rear seat back trim with the shape of the rear seat back pad while pressing the rear seat back pad outward.
 Courtesy of MAZDA MOTORS CORP.
- Install the rear seat back frame. (See REAR SEAT BACK FRAME REMOVAL/INSTALLATION .)
- Install the rear seat center armrest. (See REAR SEAT CENTER ARMREST REMOVAL/INSTALLATION .)
- Install the rear seat back. (See REAR SEAT BACK REMOVAL/INSTALLATION .)
- Connect the negative battery cable. (with rear seat warmer system) (See NEGATIVE BATTERY CABLE DISCONNECTION/CONNECTION
.)