Manual Transaxle Shift Mechanism Removal/Installation: Installation
- Make sure that the MTX is in neutral position.
- Install the control cable using the following procedure:
- Install the control cable.
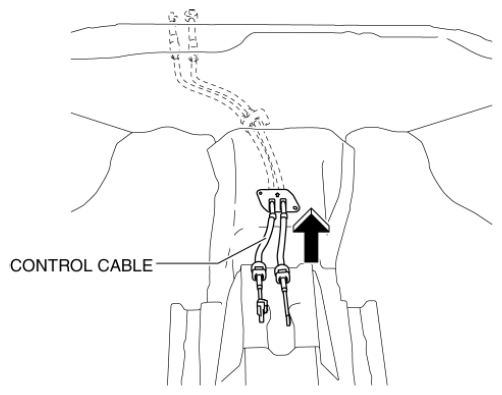 Courtesy of MAZDA MOTORS CORP.
- Install the fastening nuts for the grommet.
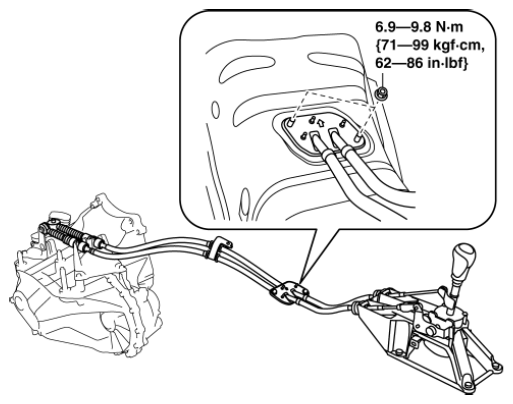 Courtesy of MAZDA MOTORS CORP.
- Install the fastening nut for the control cable.
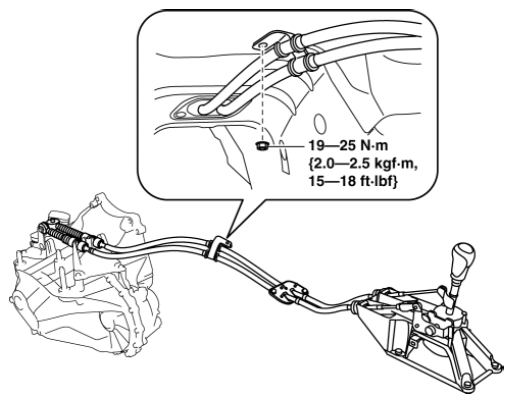 Courtesy of MAZDA MOTORS CORP.
- Connect the control cable from the bracket.
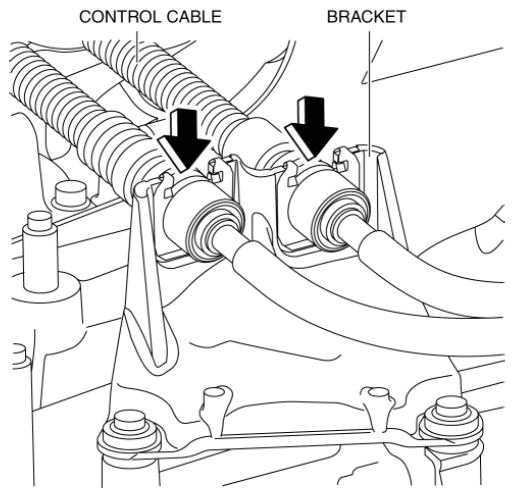 Courtesy of MAZDA MOTORS CORP.
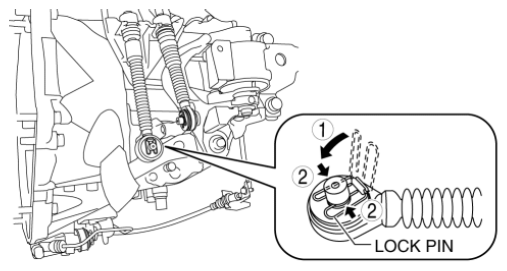
- Install the control cable end from the MTX.
 Courtesy of MAZDA MOTORS CORP.
- Install the control cable end from the MTX.
- Install the lock pin as shown in the figure and lock the control cable end (MTX side).
- Install the battery tray and PCM component. (See BATTERY REMOVAL/INSTALLATION [SKYACTIV-G 2.0, SKYACTIV-G 2.5]
.)
- Install the air cleaner and air hose as a single unit. (See INTAKE-AIR SYSTEM REMOVAL/INSTALLATION [SKYACTIV-G 2.0, SKYACTIV-G 2.5]
.)
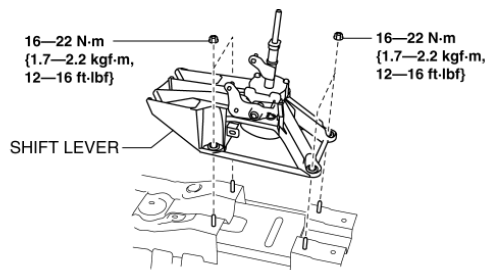
- Install the shift lever using the following procedure:
- Install the shift lever.
 Courtesy of MAZDA MOTORS CORP.
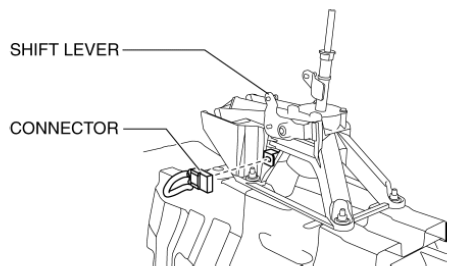
- Connect the connector from shift lever as shown in the figure.
 Courtesy of MAZDA MOTORS CORP.
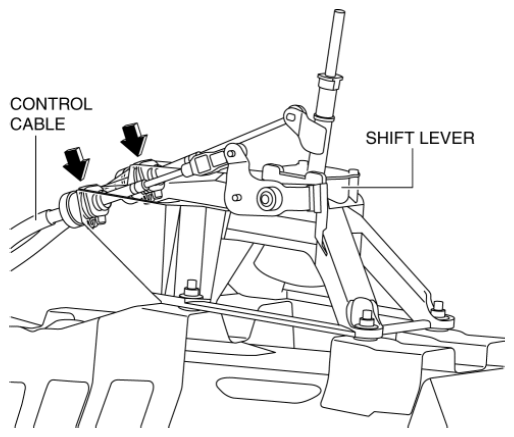
- Connect the control cable from the shift lever.
 Courtesy of MAZDA MOTORS CORP.
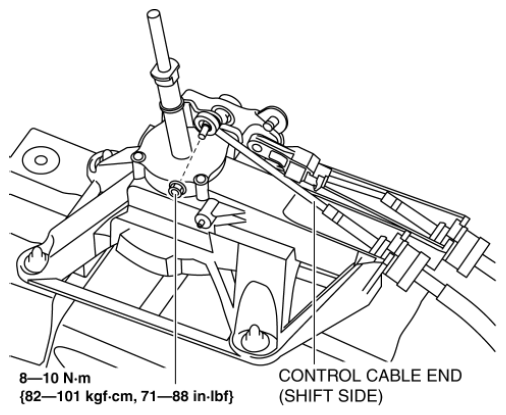
- Connect the control cable end (shift side) from shift lever as shown in the figure.
 Courtesy of MAZDA MOTORS CORP.
- Use the following procedure to install the control cable end (selector side) to the shift lever.
NOTE:
- Because the vehicle may have been moved during the servicing, verify that the shift lever is in neutral again.
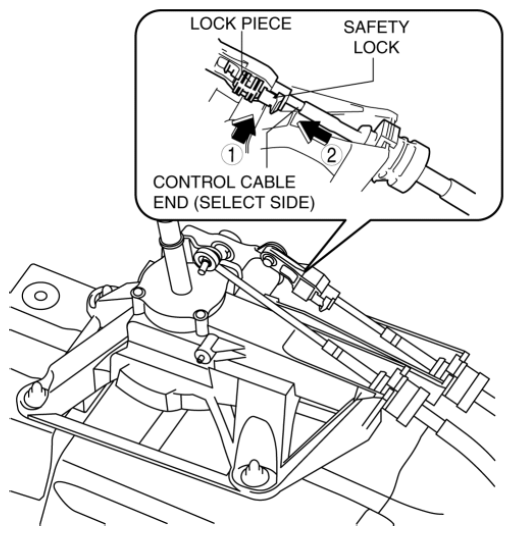
- Install the control cable end (select side) to the shift lever.
- Verify that the shift lever and the manual transaxle are in the neutral position.
- Shift the shift lever to fourth gear.
- Press in the lock piece in the direction shown in the figure. (1 in Fig.)
 Courtesy of MAZDA MOTORS CORP.
- Press up the safety lock in the direction shown in the figure. (2 in Fig.)
- Shift the shift lever to the neutral position.
- Install the rear console. (See REAR CONSOLE REMOVAL/INSTALLATION
.)
- Install the side wall. (See SIDE WALL REMOVAL/INSTALLATION
.)
- Install the front console box. (See FRONT CONSOLE BOX REMOVAL/INSTALLATION
.)
- Install the shift panel. (See SHIFT PANEL REMOVAL/INSTALLATION
.)
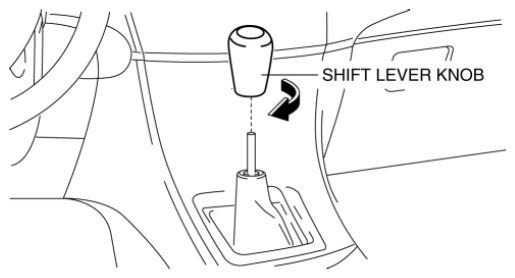
- Install the shift lever knob.
 Courtesy of MAZDA MOTORS CORP.
- Install the upper panel. (See UPPER PANEL INSTALLATION
.)
- Connect the negative battery cable. (See NEGATIVE BATTERY CABLE DISCONNECTION/CONNECTION [SKYACTIV-G 2.0, SKYACTIV-G 2.5]
.)