Switch Panel Removal/Installation
- Disconnect the negative battery cable. (See
NEGATIVE BATTERY CABLE DISCONNECTION/CONNECTION [SKYACTIV-G 2.0, SKYACTIV-G 2.5]
.)
- Remove the car-navigation unit, (with car-navigation system) (See
CAR-NAVIGATION UNIT REMOVAL/INSTALLATION
.)
- Insert your hand from the lower side of the lower panel (without car-navigation system) or the area where the car-navigation unit was installed (with car-navigation system), press the switch panel in the direction of the arrow (1) shown in the figure and remove it while detaching hook A and B and hook C.
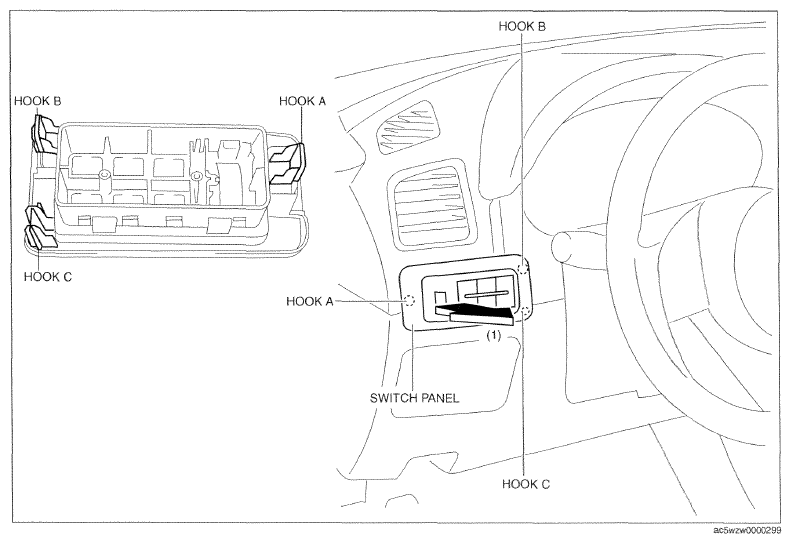 Courtesy of MAZDA MOTORS CORP.
- Disconnect the cluster switch connector.
- Remove the cluster switch in the direction of the arrow (3) while detaching hooks D in the direction of the arrow (2).
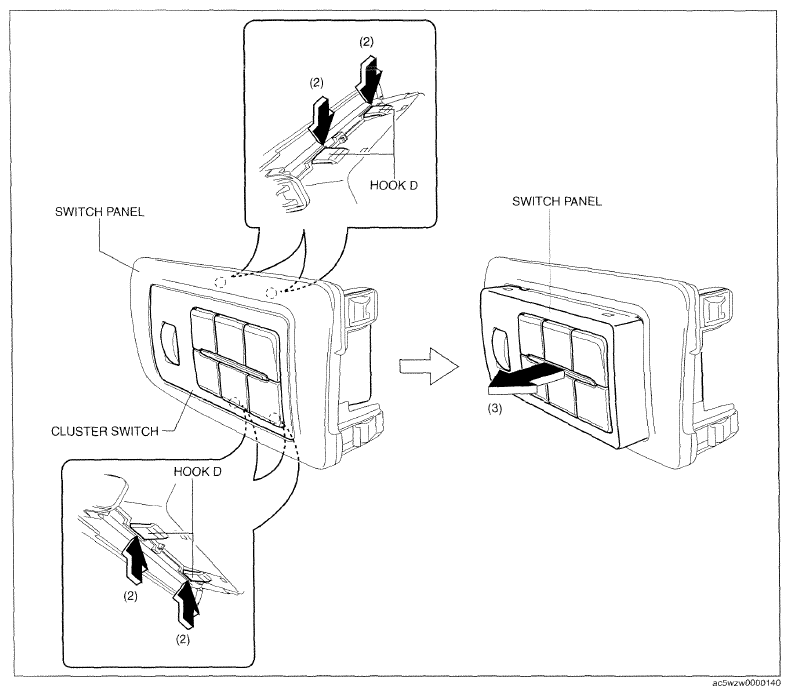 Courtesy of MAZDA MOTORS CORP.
- Install in the reverse order of removal.