Second-Row Seat Back Trim Removal/Installation
- Remove the headrest.
- Remove the second-row seat armrest.
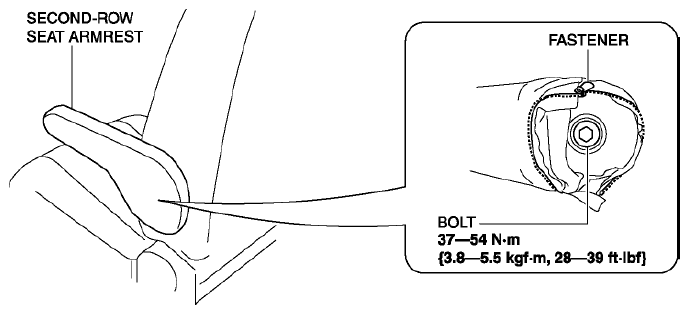 Courtesy of MAZDA MOTORS CORP.
- Slide the hook A shown below to detach it from the hook B.
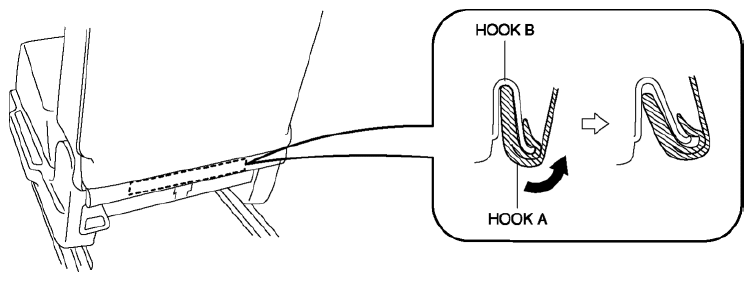 Courtesy of MAZDA MOTORS CORP.
- Raise the seat cushion.
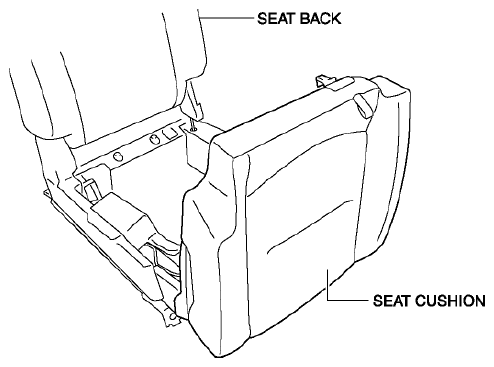 Courtesy of MAZDA MOTORS CORP.
- Fold the seat back forward.
- Remove the second-row seat back board.
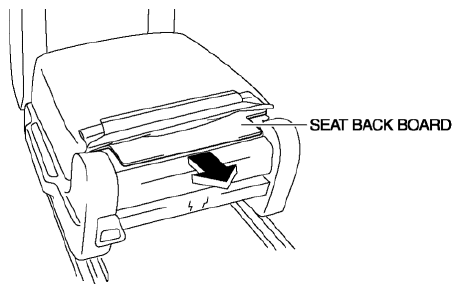 Courtesy of MAZDA MOTORS CORP.
- Raise the seat back.
- Release the pole guide tabs in the direction of arrow (1) shown below, then pull the pole guide out in the direction of arrow (2).
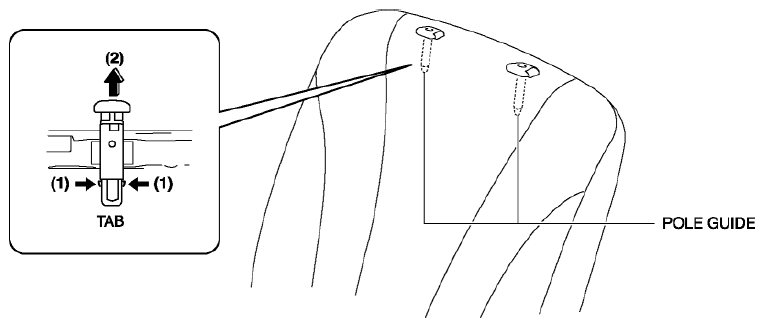 Courtesy of MAZDA MOTORS CORP.
- Remove the second-row seat back trim and the second-row seat pad from the second-row seat back frame.
- Remove the rings C in the order of (3), (4), (5), (6), then remove the second-row seat back trim from the second-row seat back pad.
CAUTION:
- Be careful not to damage the ring C when removing/installing it. If a damaged ring C is used, it could result in improper installation of the second-row seat cushion trim and the second-row cushion pad.
- If the ring C is damaged, replace the ring C with a new one.
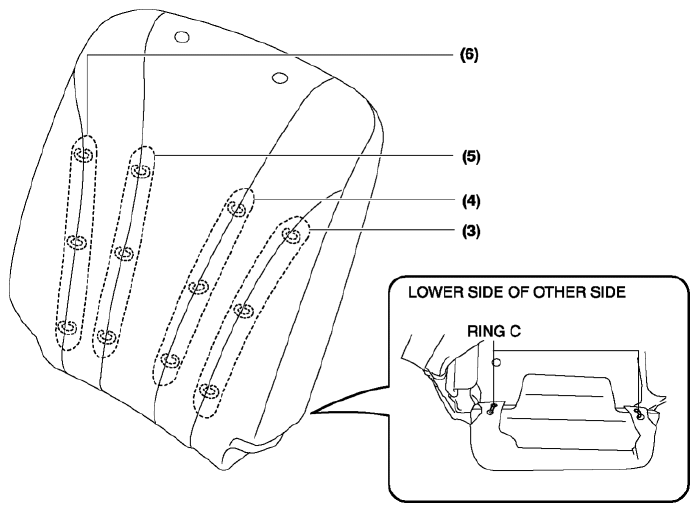 Courtesy of MAZDA MOTORS CORP.
- Install in the reverse order of removal.