Expansion Valve Removal/Installation
- Disconnect the negative battery cable. (See
NEGATIVE BATTERY CABLE DISCONNECTION/CONNECTION [SKYACTIV-G 2.0, SKYACTIV-G 2.5]
.)
- Discharge the refrigerant from the system. (See
REFRIGERANT CHARGING
.)
CAUTION:
- If moisture or foreign matter enters the refrigeration cycle, cooling ability will be lowered and abnormal noise will occur. Always immediately plug all open fittings after removing any refrigeration cycle parts to keep moisture or foreign matter out of the cycle.
- Remove the nut.
- Remove the clip.
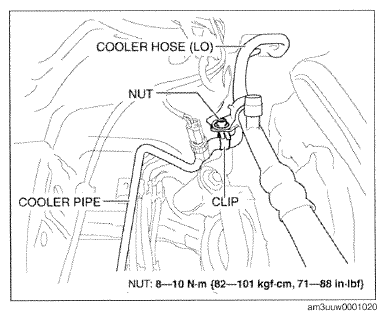 Courtesy of MAZDA MOTORS CORP.
- Remove the bolt and disconnect the cooler hose (LO) and cooler pipe. Do not allow compressor oil to spill.
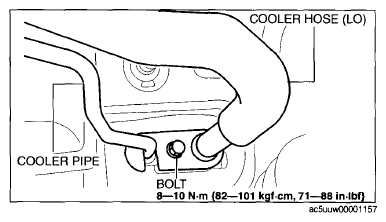 Courtesy of MAZDA MOTORS CORP.
- Remove the bolts.
- Remove the expansion valve. Do not allow compressor oil to spill.
- Install in the reverse order of removal.
- Perform the refrigerant system performance test. (See
REFRIGERANT SYSTEM PERFORMANCE TEST
.)
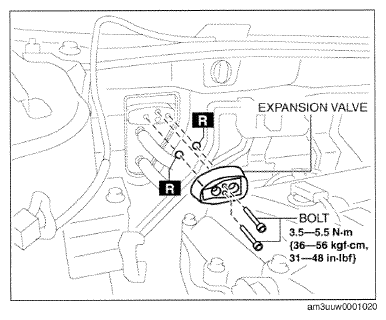 Courtesy of MAZDA MOTORS CORP.