Starter Interlock Switch Removal/Installation
- Disconnect the negative battery cable. (See
NEGATIVE BATTERY CABLE DISCONNECTION/CONNECTION [SKYACTIV-G 2.0, SKYACTIV-G 2.5]
.)
- Disconnect the starter interlock switch connector.
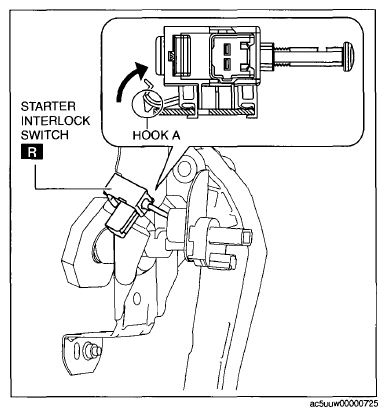
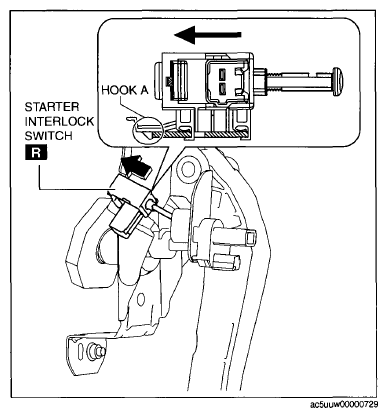
- Remove the starter interlock switch using the following procedure:
- Detach hook A in the direction of the arrow shown in the figure.
 Courtesy of MAZDA MOTORS CORP.
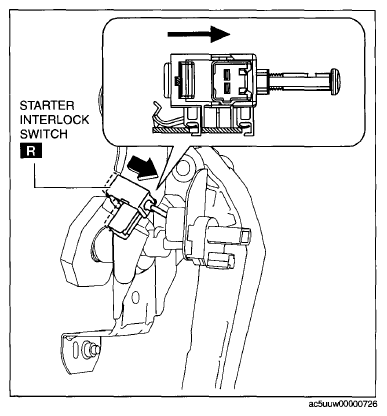
- Slide the starter interlock switch in the direction of the arrow shown in the figure.
 Courtesy of MAZDA MOTORS CORP.
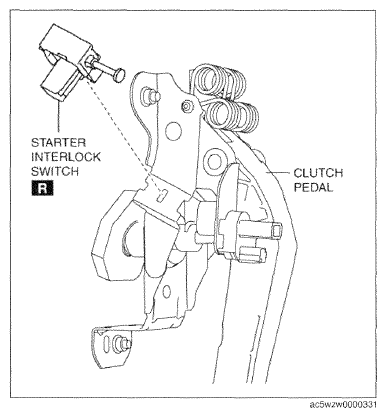
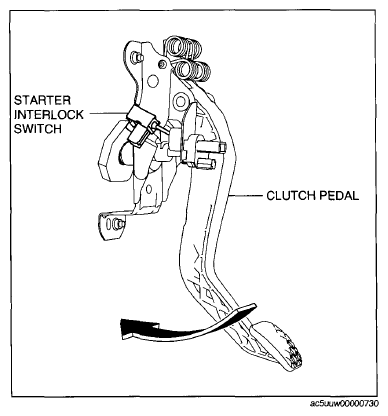
- Remove the starter interlock switch from the clutch pedal.
 Courtesy of MAZDA MOTORS CORP.
- Install the starter interlock switch using the following procedure:
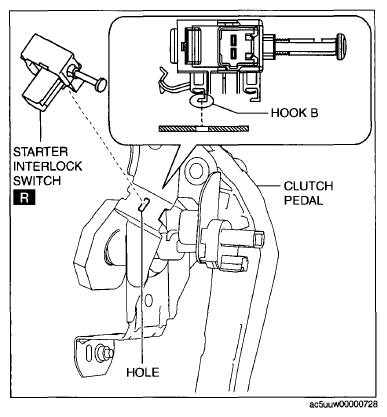
- Insert hook B of a new starter interlock switch into the clutch pedal hole.
 Courtesy of MAZDA MOTORS CORP.
- While pressing the starter interlock switch against the clutch pedal, slide the starter interlock switch until hook A is locked in the direction of the arrow shown in the figure.
 Courtesy of MAZDA MOTORS CORP.
- Fully depress the clutch pedal in the direction of arrow, and verify that a click sound from the starter interlock switch is heard.
- Install in the reverse order of removal.
- Fully depress the clutch pedal, and verify that the engine starts.
 Courtesy of MAZDA MOTORS CORP.