Liftgate Side Trim Removal/Installation: Removal
- Remove the liftgate upper trim. (See
LIFTGATE UPPER TRIM REMOVAL/INSTALLATION .)
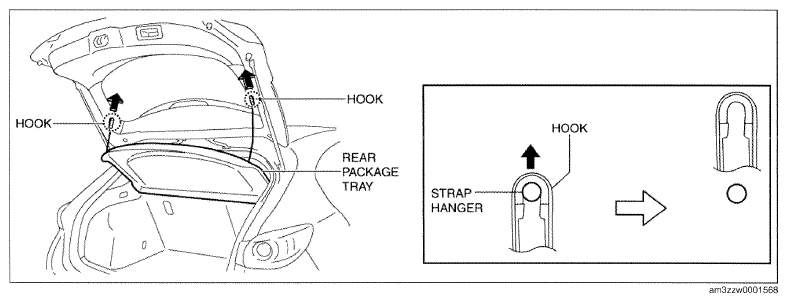
- Move the hooks in the direction of arrows shown in the figure to disengage them from the strap hangers.
 Courtesy of MAZDA MOTORS CORP.
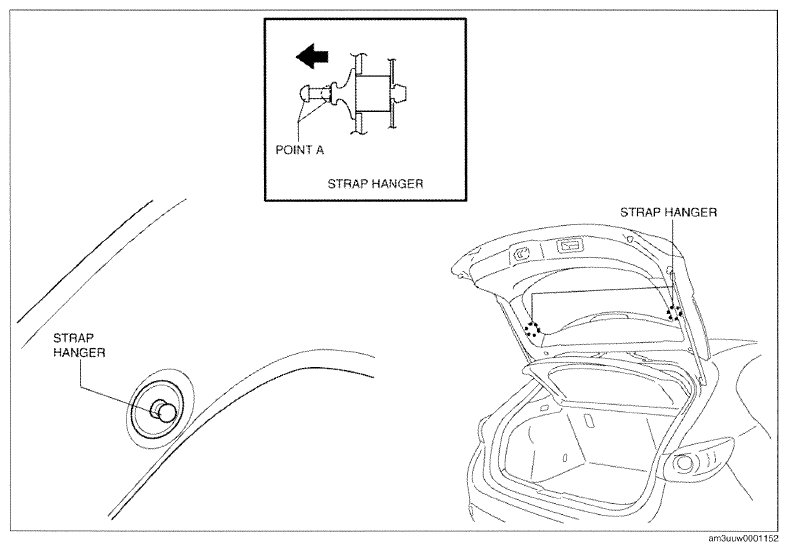
- Pull the point A of the strap hanger as shown in the figure.
 Courtesy of MAZDA MOTORS CORP.
- Remove the strap hanger.
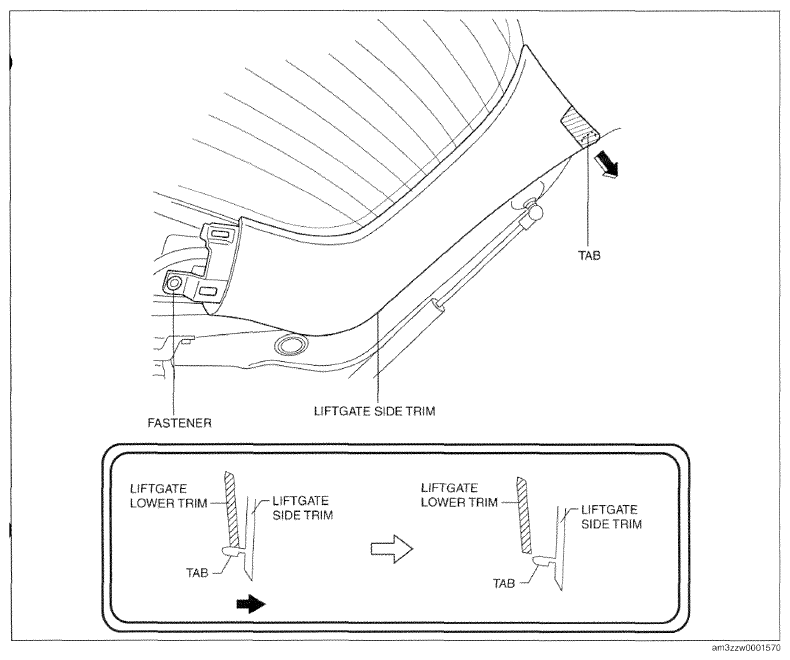
- Remove the fastener.
 Courtesy of MAZDA MOTORS CORP.
- Hold the shaded area shown in the figure, open the liftgate side trim in the direction of the arrow, and detach the tab from the liftgate lower trim.
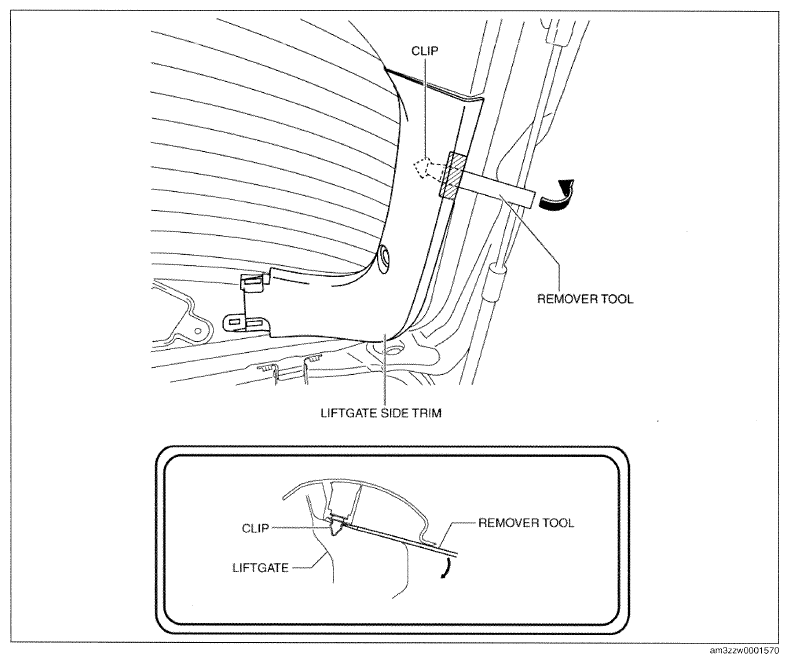
- Pull up the shaded area shown in the figure, verify the clip position, and insert the remover tool.
 Courtesy of MAZDA MOTORS CORP.
- Move the remover tool in the direction of the arrow shown in the figure and detach the clip from the liftgate.
CAUTION:
- Remove the clip using the remover tool. If the liftgate side trim is raised excessively, it may damage the tab and hook.
- Move the liftgate side trim in the direction of the arrow shown in the figure and disengage the hook from the liftgate lower trim.
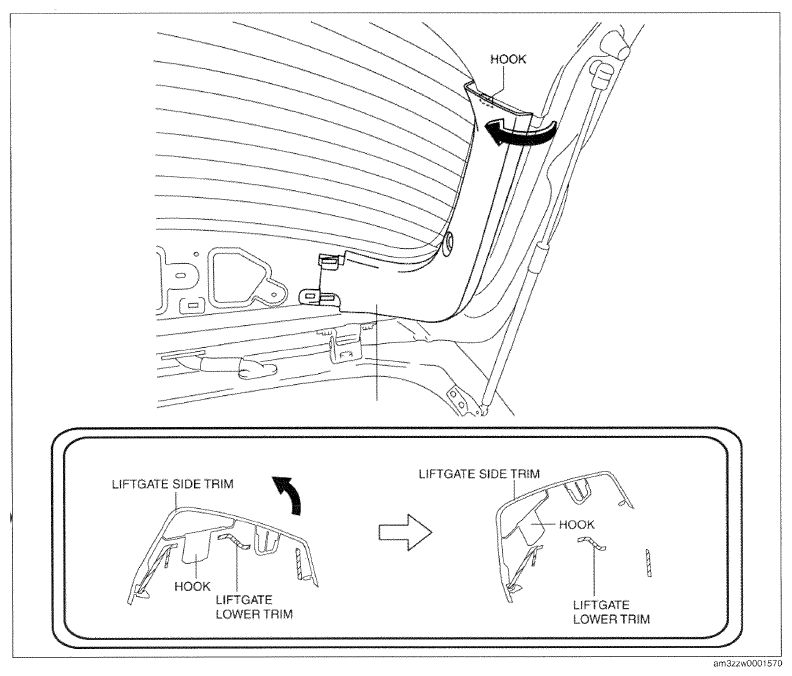 Courtesy of MAZDA MOTORS CORP.
- Move the liftgate side trim in the direction of the arrow shown in the figure with the hook detached in Step 9, and detach the tab from the liftgate lower trim.
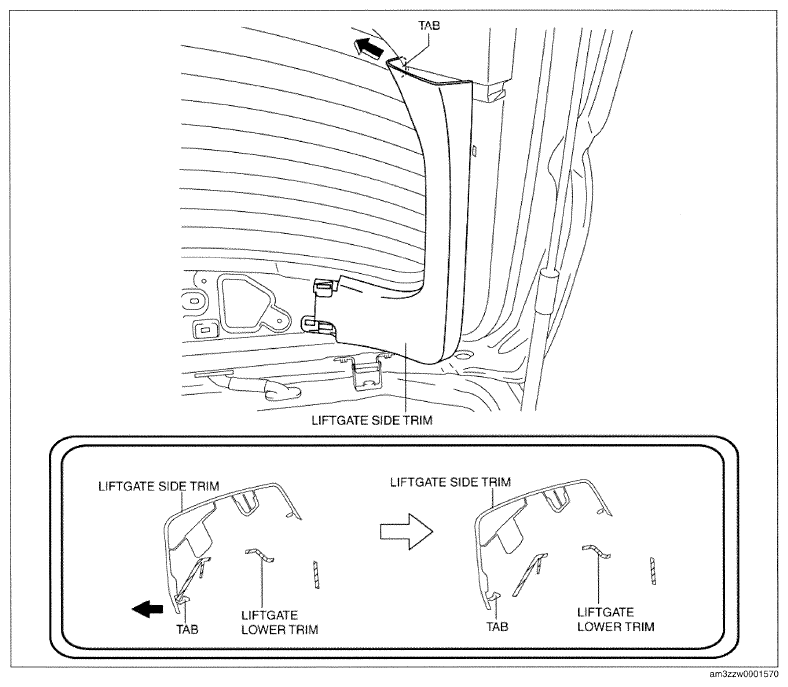 Courtesy of MAZDA MOTORS CORP.
- Remove the liftgate side trim.