Rear Map Light Bulb Removal/Installation
- Disconnect the negative battery cable. (See
NEGATIVE BATTERY CABLE DISCONNECTION/CONNECTION [SKYACTIV-G 2.0, SKYACTIV-G 2.5]
.)
- To prevent scratches or damage, affix protective tape to the position shown in the figure.
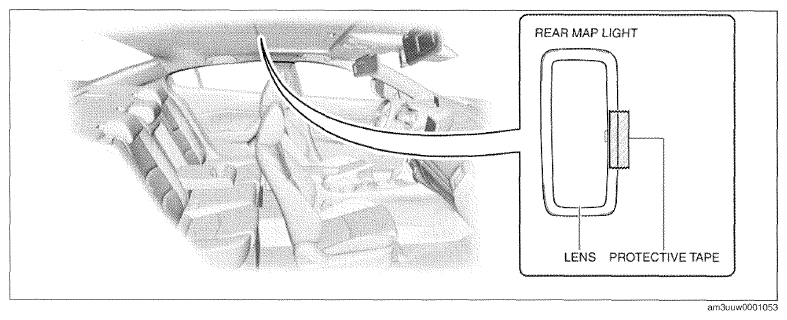 Courtesy of MAZDA MOTORS CORP.
CAUTION:
- When inserting the remover tool in the gap between the rear map light and the lens, the remover tool may contact the rear map light and damage it. Apply protective tape to the rear map light before removing the lens from the rear map light.
- Insert the remover tool into the service hole at the position shown in the figure.
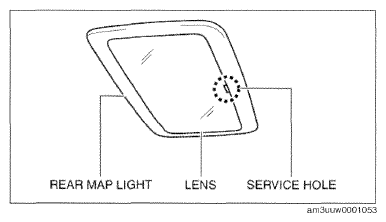 Courtesy of MAZDA MOTORS CORP.
- Move the remover tool in the direction of the arrow shown in the figure to detach the lens tabs from the rear map light.
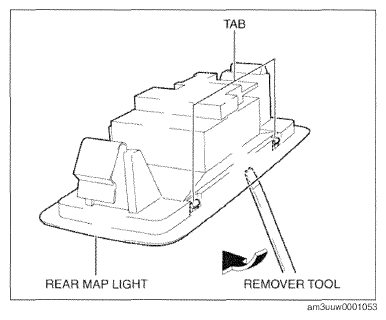 Courtesy of MAZDA MOTORS CORP.
- Pull out the lens tabs from the rear map light and remove the lens from the rear map light.
- Remove the rear map light bulb.
CAUTION:
- The bulb reaches high temperatures when illuminated. If there is oil or dirt on the surface of the bulb, excessive heat will build up and the life of the bulb will be shortened. When replacing the bulb, hold the metal flange, not the glass.
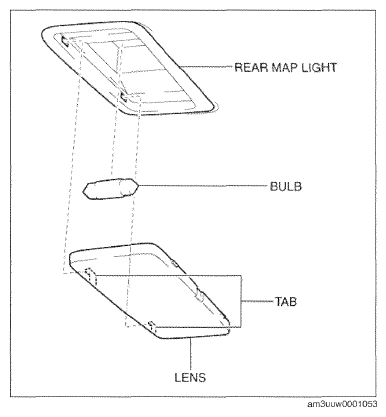 Courtesy of MAZDA MOTORS CORP.
- Install in the reverse order of removal.