Rear Combination Light Removal/Installation: 4SD
- Disconnect the negative battery cable. (See
NEGATIVE BATTERY CABLE DISCONNECTION/CONNECTION [SKYACTIV-G 2.0, SKYACTIV-G 2.5]
.)
- Partially peel back the trunk side trim. (See
TRUNK SIDE TRIM REMOVAL/INSTALLATION
.)
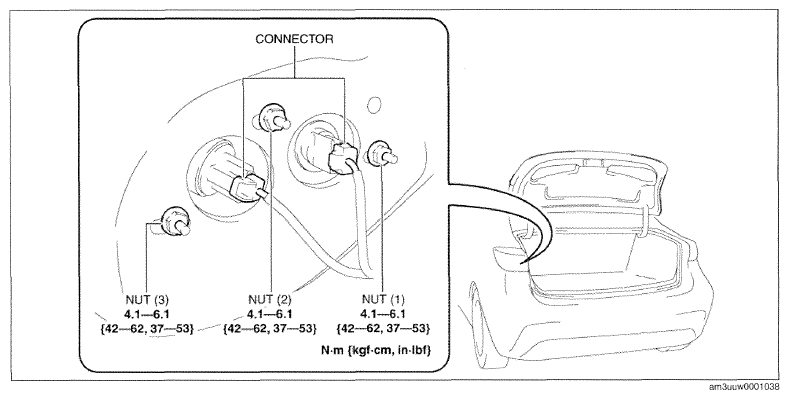
- Disconnect the connectors.
 Courtesy of MAZDA MOTORS CORP.
- Remove the nuts in the order of (1), (2), and (3).
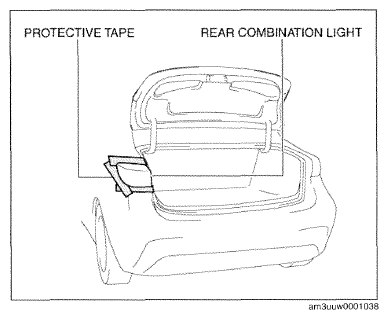
- To prevent scratches or damage, affix protective tape to the position shown in the figure.
CAUTION:
- When removing the rear combination light from the body, it could interfere with the body and cause scratching or damage to the body. When removing the rear combination light from the body, apply protective tape to the body.
 Courtesy of MAZDA MOTORS CORP.
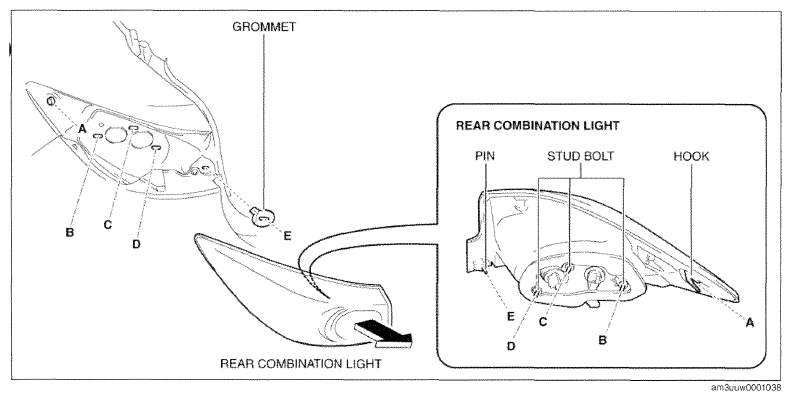
- Pull the rear combination light in the direction of the arrow shown in the figure and pull out pin, stud bolts and hook from the body. (See
GROMMET INSTALLATION NOTE .)
 Courtesy of MAZDA MOTORS CORP.
CAUTION:
- When removing the rear combination light from the body, the grommet could fall off and become lost. When removing the rear combination light from the body, verify that the grommet remains in the body.
- Remove the rear combination light.
- Install in the reverse order of removal.