Auto Leveling Sensor Inspection
- Disconnect the negative battery cable. (See
NEGATIVE BATTERY CABLE DISCONNECTION/CONNECTION [SKYACTIV-G 2.0, SKYACTIV-G 2.5]
.)
- Remove the auto leveling sensor. (See
AUTO LEVELING SENSOR REMOVAL/INSTALLATION .)
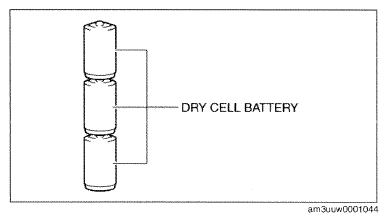
- Prepare three dry cell batteries (1.5 V)
.
- Connect the three dry cell batteries in a series.
 Courtesy of MAZDA MOTORS CORP.
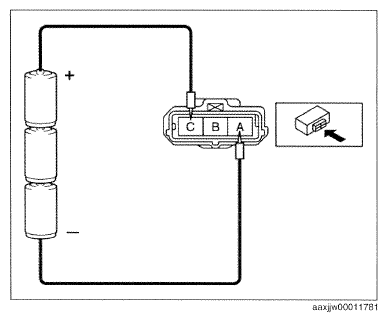
- Connect the positive pole of the dry cell batteries to auto leveling sensor terminal C, and the negative pole to terminal A.
 Courtesy of MAZDA MOTORS CORP.
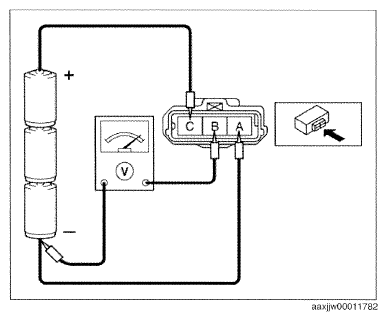
- Connect the tester as shown in the figure with approx. 4.5 V
of voltage applied between auto leveling sensor terminals A and C, and measure the voltage at auto leveling sensor terminal B.
 Courtesy of MAZDA MOTORS CORP.
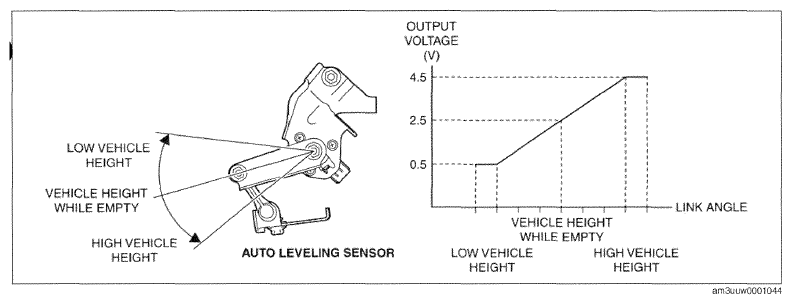
- Verify that the voltage fluctuates linearly between 0.5-4.5 V
as shown in the figure when slowly moving the auto leveling sensor link upward or downward.
 Courtesy of MAZDA MOTORS CORP.