Front Console Box Mat Removal/Installation
- Insert a tape-wrapped flathead screwdriver between the indicator panel and front console box mat.
CAUTION:
- The rubber may deform if it is pried with a flathead screwdriver. Therefore, fully insert a tape-wrapped flathead screwdriver as shown in the illustration, and do not pry the rubber.
- Raise the front console box mat.
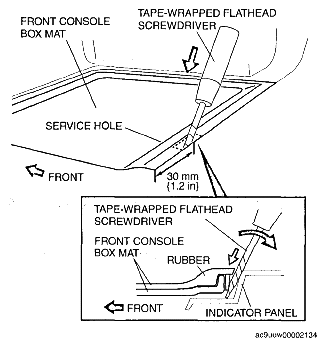 Courtesy of MAZDA MOTORS CORP.
- Remove the front console box mat in the direction of the arrow (shown in the illustration).
- Remove the front console box mat.
- Install in the reverse order of removal.
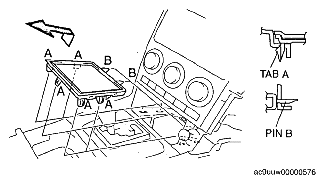 Courtesy of MAZDA MOTORS CORP.