Driver Side
- Switch the ignition to off.
- Disconnect the negative battery cable and wait for 1 min or more
.
- Remove the front scuff plate. (See
FRONT SCUFF PLATE REMOVAL/INSTALLATION
).
- Remove the rear scuff plate. (See
REAR SCUFF PLATE REMOVAL/INSTALLATION
).
- Remove the B-pillar lower trim. (See
B-PILLAR LOWER TRIM REMOVAL/INSTALLATION
).
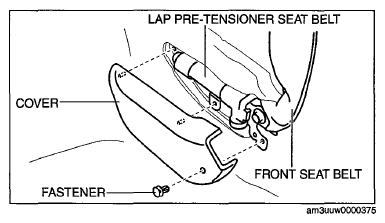
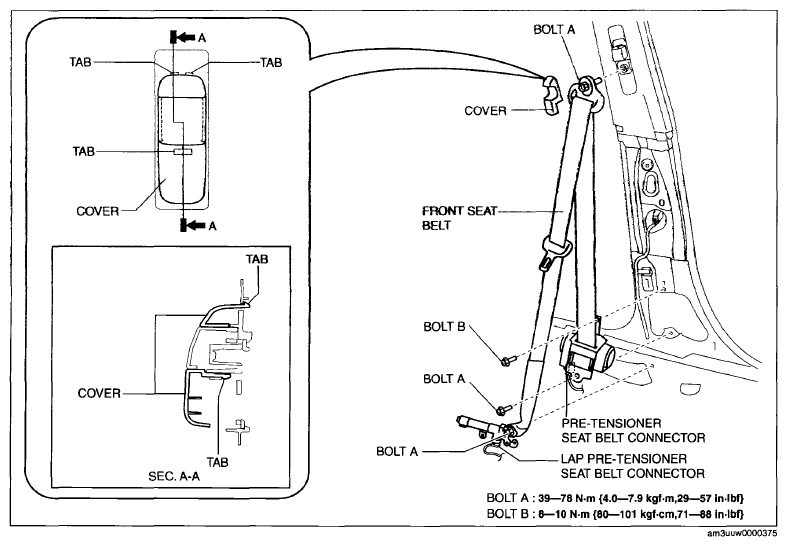
- Remove the fastener.
- Remove the cover.
- Remove the bolt A.
 Courtesy of MAZDA MOTORS CORP.
 Courtesy of MAZDA MOTORS CORP.
- Remove the bolt B.
- Remove the front seat belt.
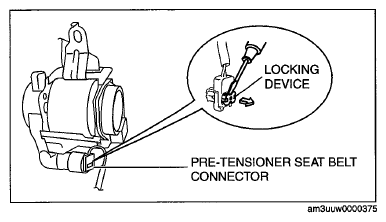
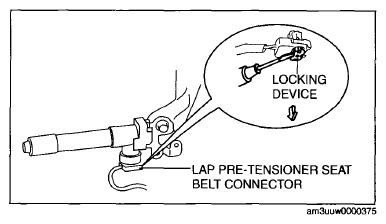
- Using a Flathead screwdriver, lift the locking device carefully, however do not remove it.
 Courtesy of MAZDA MOTORS CORP.
- Disconnect the pre-tensioner seat belt connector.
- Disconnect the lap pre-tensioner seat belt connector.
- Install in the reverse order of removal.
- Switch the ignition to ON.
- Verify that the air bag system warning light illuminates for approx. 6 s
and goes out.
- If the air bag system warning light does not operate, refer to the on-board diagnostic system (air bag system) and perform inspection of the system. (See
FLOWCHART [TWO-STEP DEPLOYMENT CONTROL SYSTEM]
).
 Courtesy of MAZDA MOTORS CORP.