Front Outer Handle Removal/Installation
- To access the glass installation bolt, position the front door glass so that the distance from the top of the front door glass to the upper part of the front beltline molding is approx. 80 mm {3.1 in}.
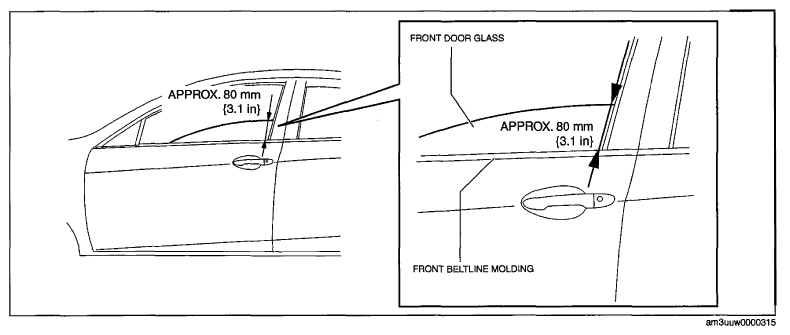 Courtesy of MAZDA MOTORS CORP.
- Disconnect the negative battery cable.
- Remove the following parts:
- Inner garnish (See
INNER GARNISH REMOVAL/INSTALLATION
).
- Front door trim (See
FRONT DOOR TRIM REMOVAL/INSTALLATION
).
- Front door speaker (See
FRONT DOOR SPEAKER REMOVAL/INSTALLATION
).
- Front door glass (See
FRONT DOOR GLASS REMOVAL/INSTALLATION
).
- Front door module panel (See
FRONT DOOR MODULE PANEL REMOVAL/INSTALLATION
).
- Front door key cylinder (See
FRONT DOOR KEY CYLINDER REMOVAL/INSTALLATION ).
- Disconnect the keyless antenna connector (With advanced keyless entry and push button start system).
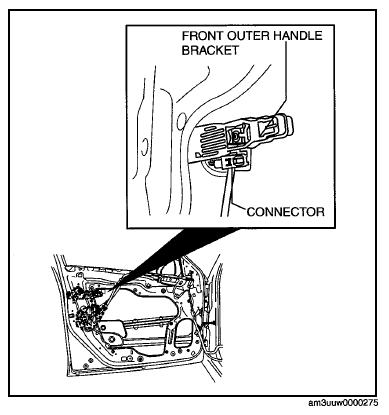 Courtesy of MAZDA MOTORS CORP.
- Remove the front outer handle.
- Remove the screw.
NOTE:
- The screw cannot be removed because of the stopper.
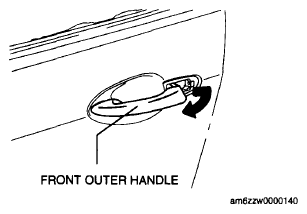 Courtesy of MAZDA MOTORS CORP.
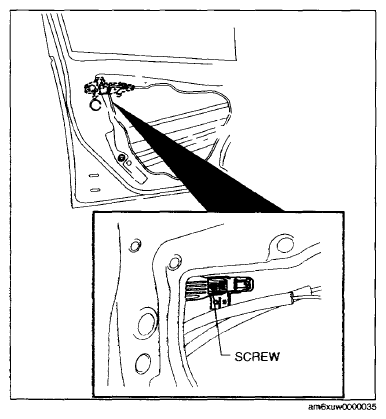 Courtesy of MAZDA MOTORS CORP.
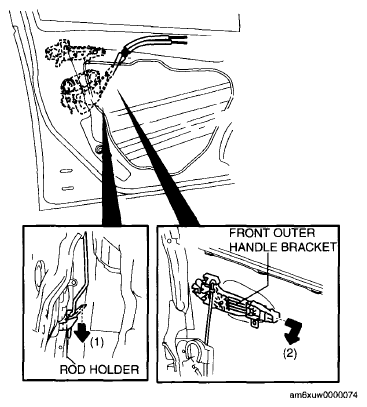
- Press down the rod holder in the direction of arrow (1) shown in the figure and remove the front outer handle bracket in the direction of arrow (2) shown in the figure.
- Install in the reverse order of removal.
 Courtesy of MAZDA MOTORS CORP.