Front Door Glass Removal/Installation
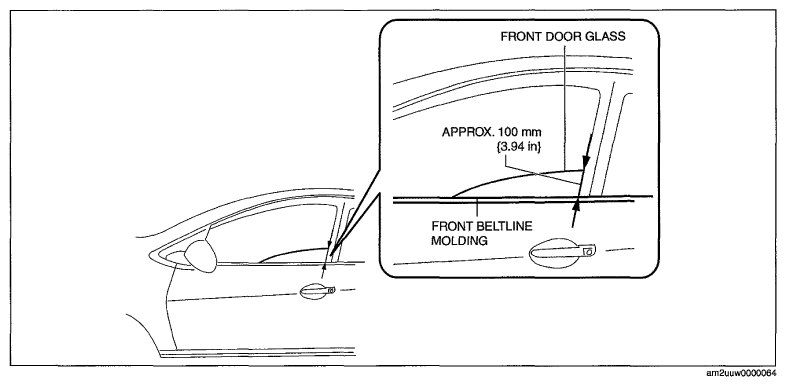
- To access the glass installation bolt, adjust the position of the front door glass so that the height of the front door glass towards the rear is approx. 100 mm {3.94 in}.
 Courtesy of MAZDA MOTORS CORP.
- Disconnect the negative battery cable.
- Remove the inner garnish. (See
INNER GARNISH REMOVAL/INSTALLATION
.)
- Remove the front door trim. (See
FRONT DOOR TRIM REMOVAL/INSTALLATION
.)
- Remove the front door speaker. (See
FRONT DOOR SPEAKER REMOVAL/INSTALLATION
.)
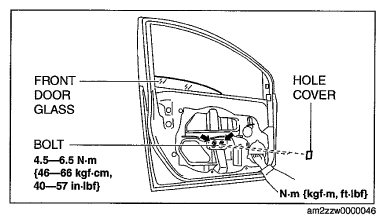
- Remove the hole cover.
- Remove the bolts.
CAUTION:
- If the bolts are removed without supporting the front door glass, the front door glass may fall off and be damaged. Remove the bolts while inserting your hand into the front door speaker installation hole to support the front door glass.
 Courtesy of MAZDA MOTORS CORP.
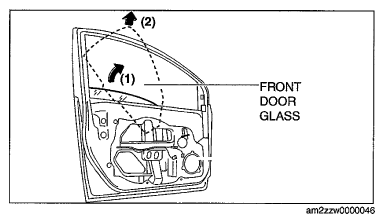
- Lift up the front door glass, tilt it in the direction of arrow (1) shown in illustration, then remove it in the direction of arrow (2).
- Install in the reverse order of removal.
CAUTION:
- If the bolts are installed without supporting the front door glass, the front door glass may fall off and be damaged. When installing the front door glass, align the glass edge with the front door glass guide by hand through the speaker installation hole, and then install the bolts.
 Courtesy of MAZDA MOTORS CORP.