Front Console Component Removal/Installation
- Shift lever to neutral position.
- Remove the following parts:
- Rear console (See
REAR CONSOLE REMOVAL/INSTALLATION .)
- Side wall (See
SIDE WALL REMOVAL/INSTALLATION .)
- Shift lever knob (MTX) (See
MANUAL TRANSAXLE SHIFT MECHANISM REMOVAL/INSTALLATION [F35M-R]
.)
- Remove the screws, then pull the lower side of the front console component in the direction of the arrow shown in the figure, and remove the clips.
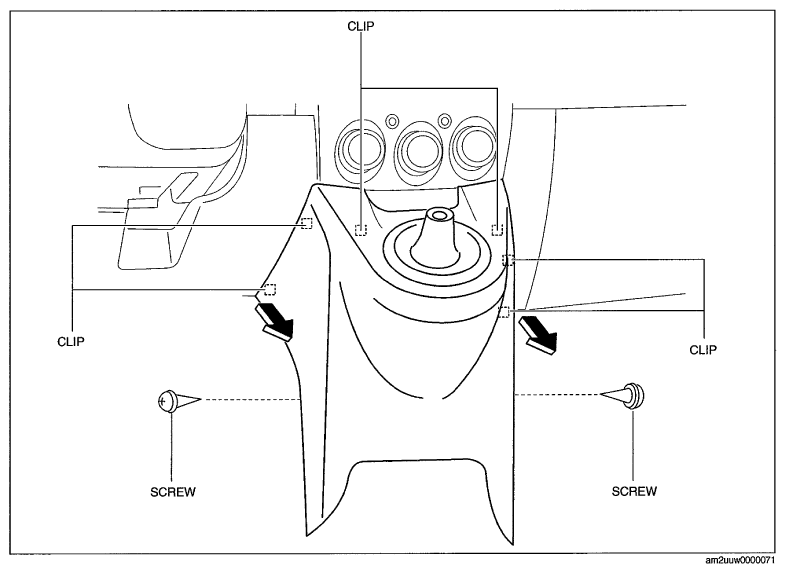 Courtesy of MAZDA MOTORS CORP.
CAUTION:
- Affix protective tape to the AT shift panel to prevent scratches or damage. (ATX)
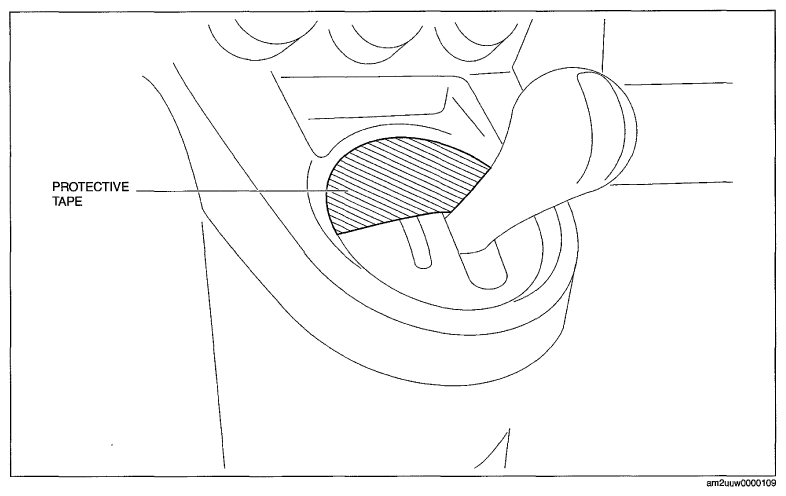 Courtesy of MAZDA MOTORS CORP.
- Install the boot panel and front console as a single unit.
- Install in the reverse order of removal.