Crankshaft Position (CKP) Sensor Removal/Installation - 2.5L: Installation
- Install a 6 mm (0.23 in) x 18 mm (0.7 in) standard bolt.
CAUTION:
- Only hand tighten the bolt or damage to the front cover may occur.
 Courtesy of MAZDA MOTORS CORP.
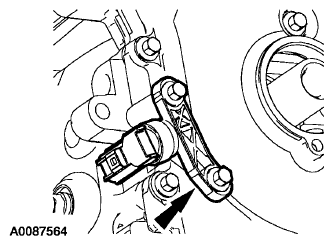
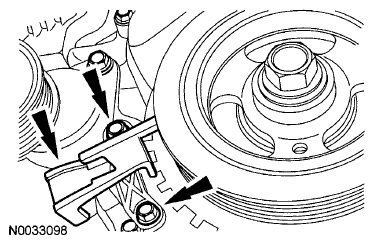
- Install a new CKP sensor and the bolts.
- Do not tighten the bolts at this time.
NOTE:
- Whenever the crankshaft position (CKP) sensor is removed, a new one must be installed using the alignment tool supplied with the new part.
 Courtesy of MAZDA MOTORS CORP.
- Adjust the CKP sensor with the alignment tool.
- Tighten to 7 N.m {0.7 kgf.m, 62 in.lbf}.
NOTE:
- The crankshaft position (CKP) sensor alignment tool is supplied with the new sensor and is not available separately.
 Courtesy of MAZDA MOTORS CORP.
- Connect the CKP sensor electrical connector.
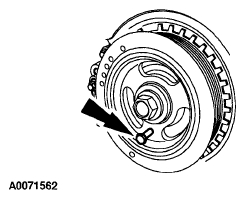
- Remove the 6 mm (0.23 in) bolt from the crankshaft pulley.
- Install the engine plug bolt.
- Tighten to 20 N.m {2.0 kgf.m, 177 in.lbf}.
- Install the RH splash shield and the 5 bolts.
- Tighten to 9 N.m {0.9 kgf.m, 80 in.lbf}.
- Using the scan tool, carry out the Misfire Monitor Neutral Profile Correction procedure, following the onscreen instructions.