Overdrive/Direct Clutch Assembly Disassembly/Assembly: Assembly
- Clean and inspect the O/D/direct clutch assembly for damage or excessive wear and install new components as necessary.
- Install new direct (3, 5, R) clutch piston seals and lubricate the seals with petroleum jelly.
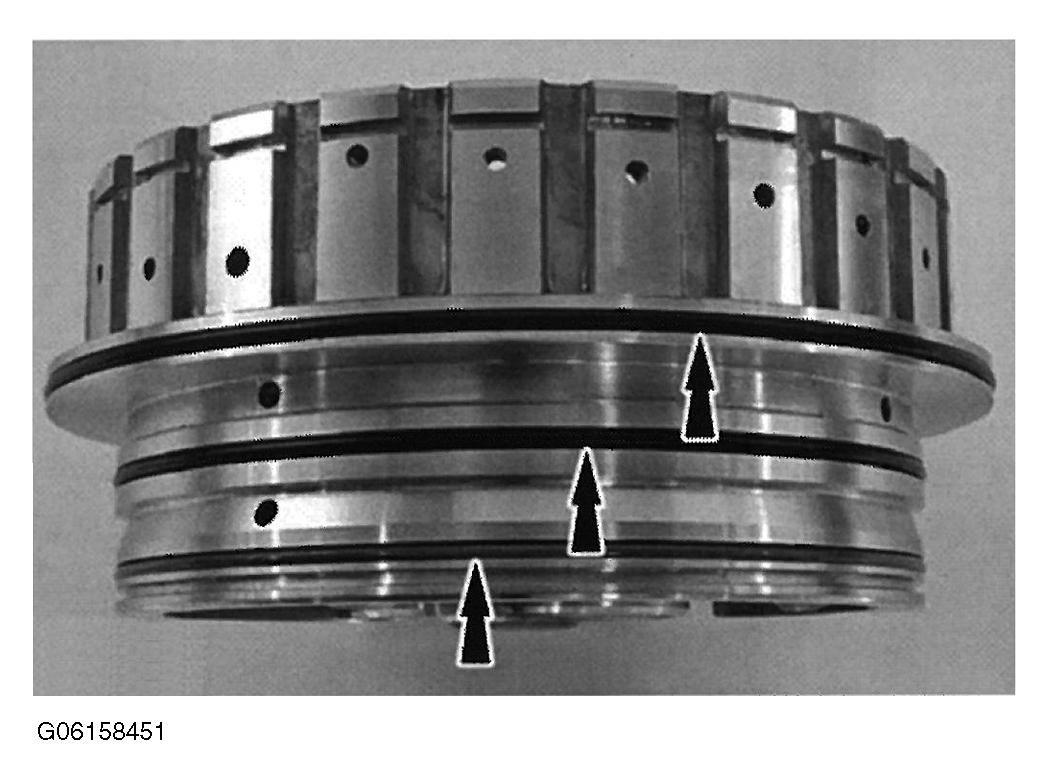 Courtesy of MAZDA MOTORS CORP.
- Install the direct (3, 5, R) clutch wave spring.
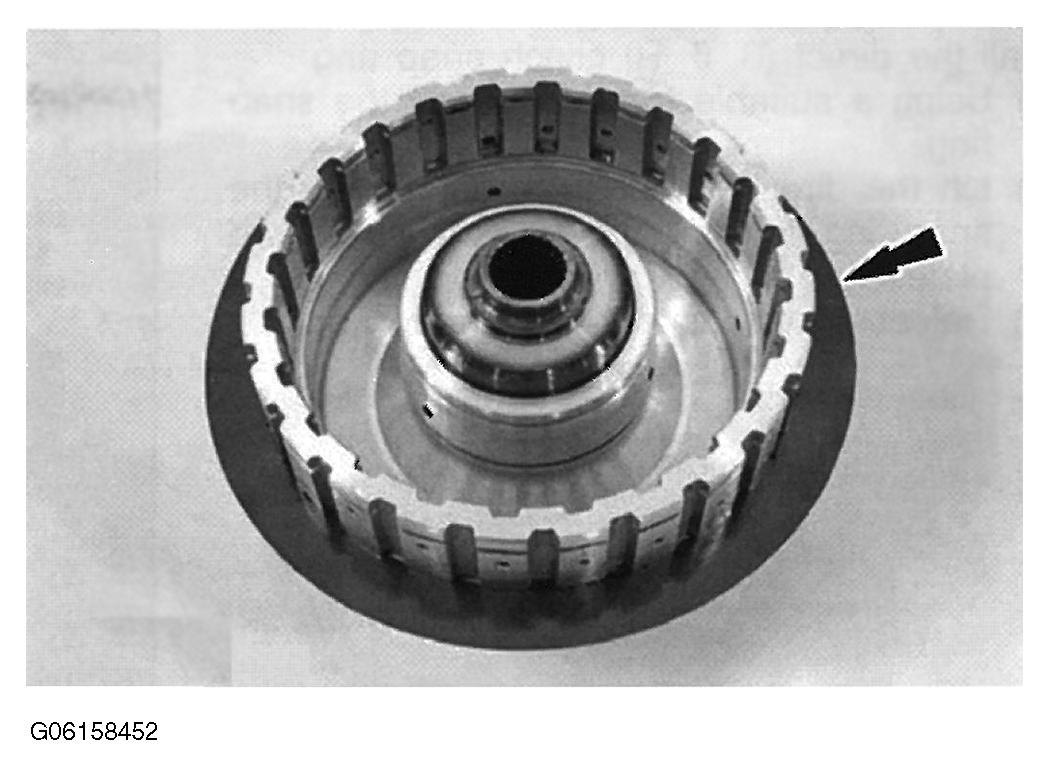 Courtesy of MAZDA MOTORS CORP.
- Soak the direct (3, 5, R) clutch pack in clean automatic transmission fluid.
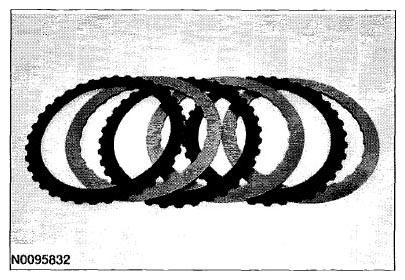 Courtesy of MAZDA MOTORS CORP.
- Install the direct (3, 5, R) clutch assembly and pressure plate.
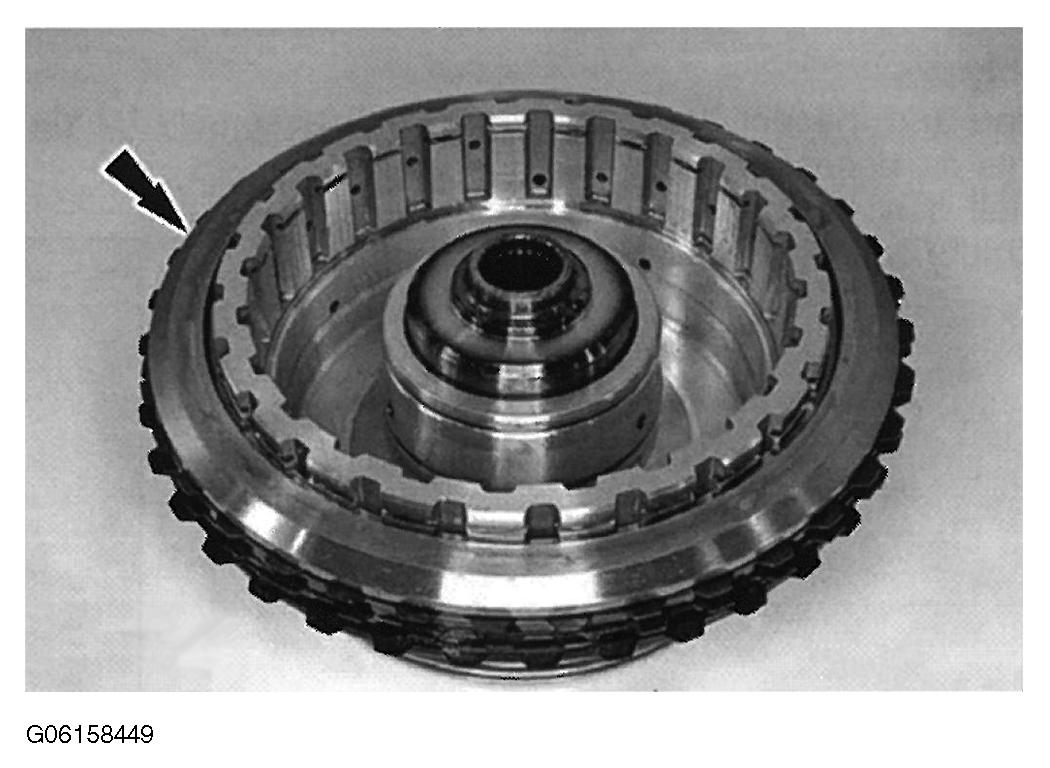 Courtesy of MAZDA MOTORS CORP.
- Install the direct (3, 5, R) clutch snap ring.
- Using a suitable tool, compress the snap ring.
- Lift the direct (3, 5, R) clutch so that the snap ring is in the groove of the pressure plate.
- Release the tension on the snap ring.
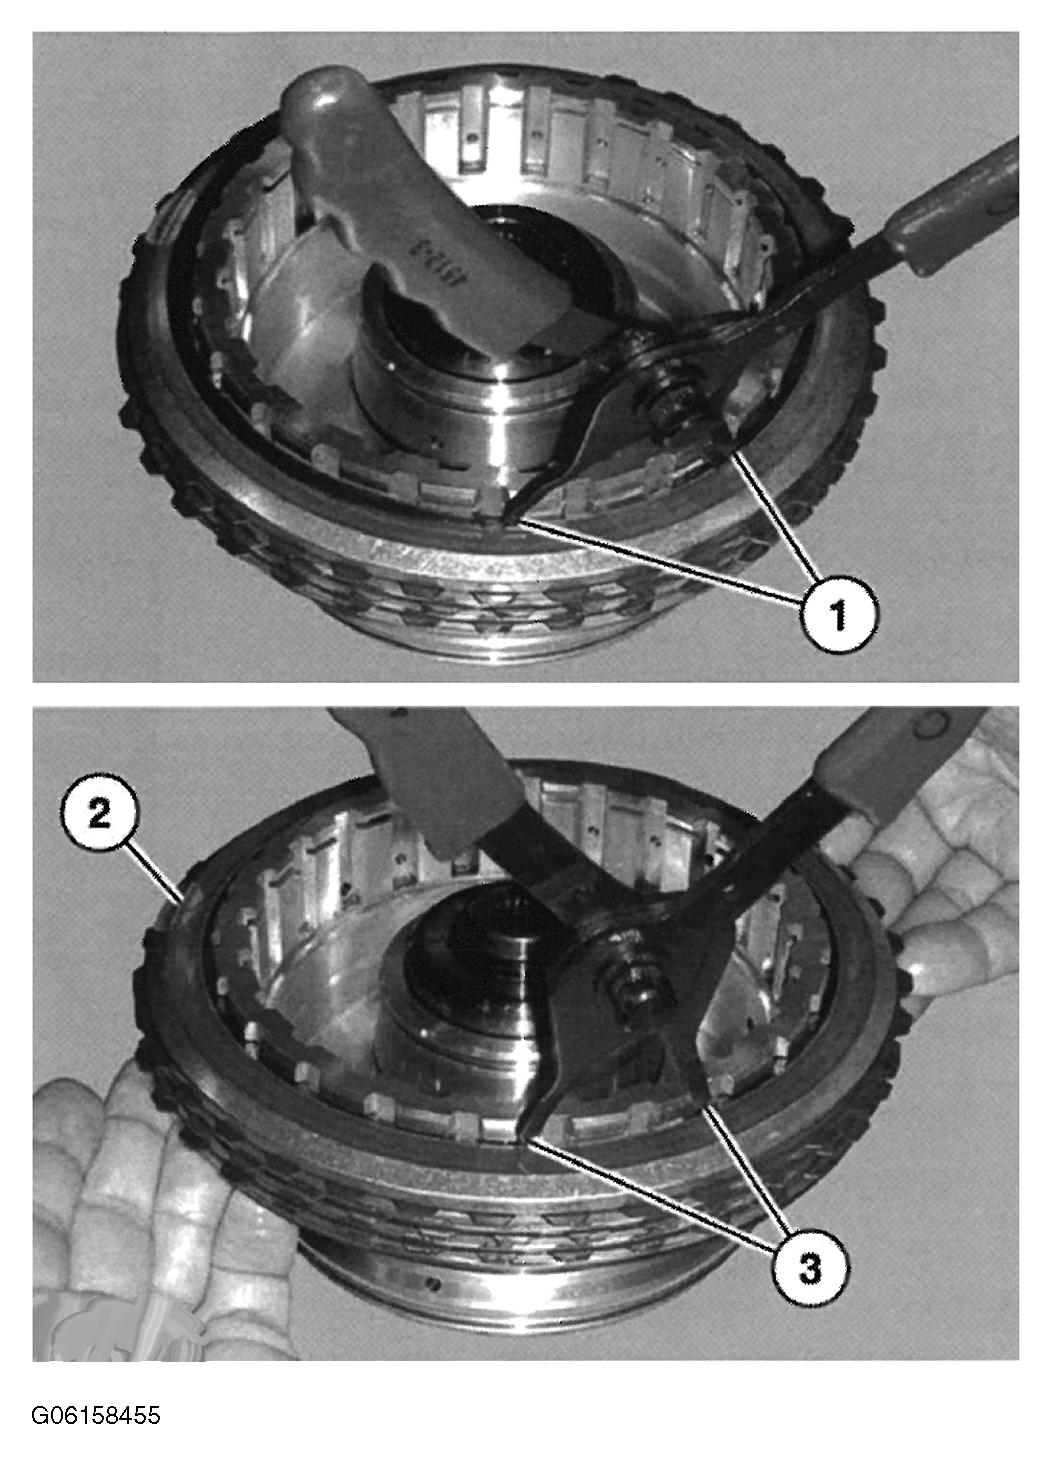 Courtesy of MAZDA MOTORS CORP.
- Install the direct (3, 5, R) clutch piston return spring.
NOTE:
- Install the direct (3, 5, R) clutch piston return spring with the flat side facing down.
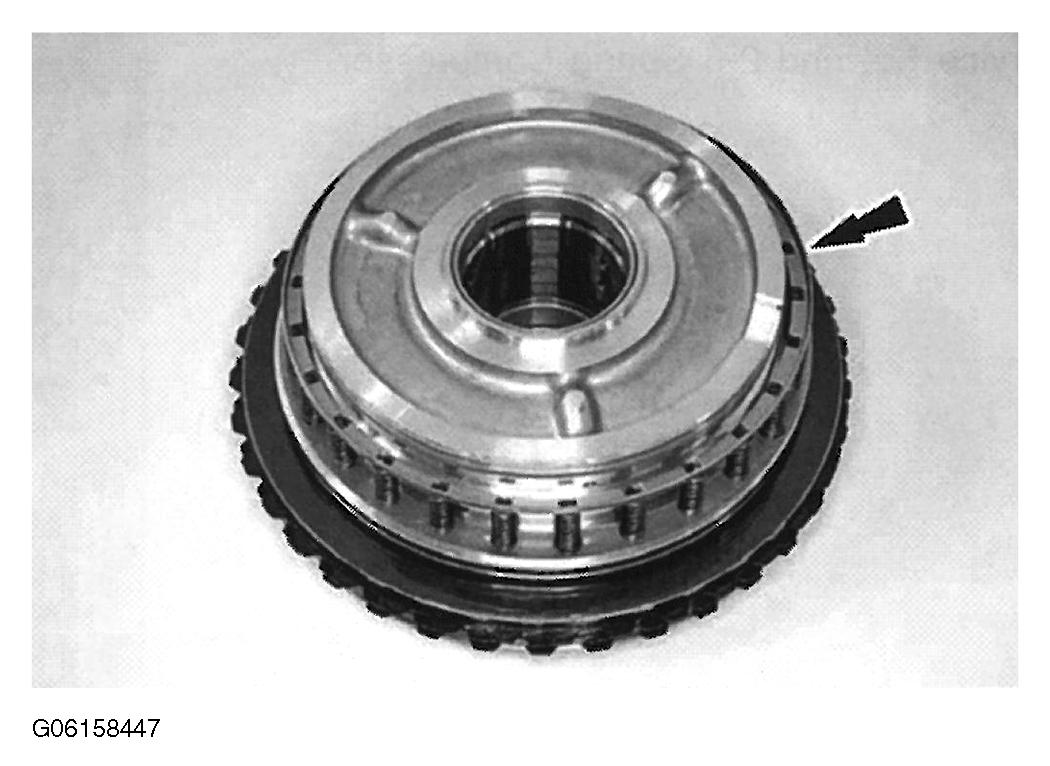 Courtesy of MAZDA MOTORS CORP.
- Lubricate a new direct (3, 5, R) clutch piston with petroleum jelly and install the piston.
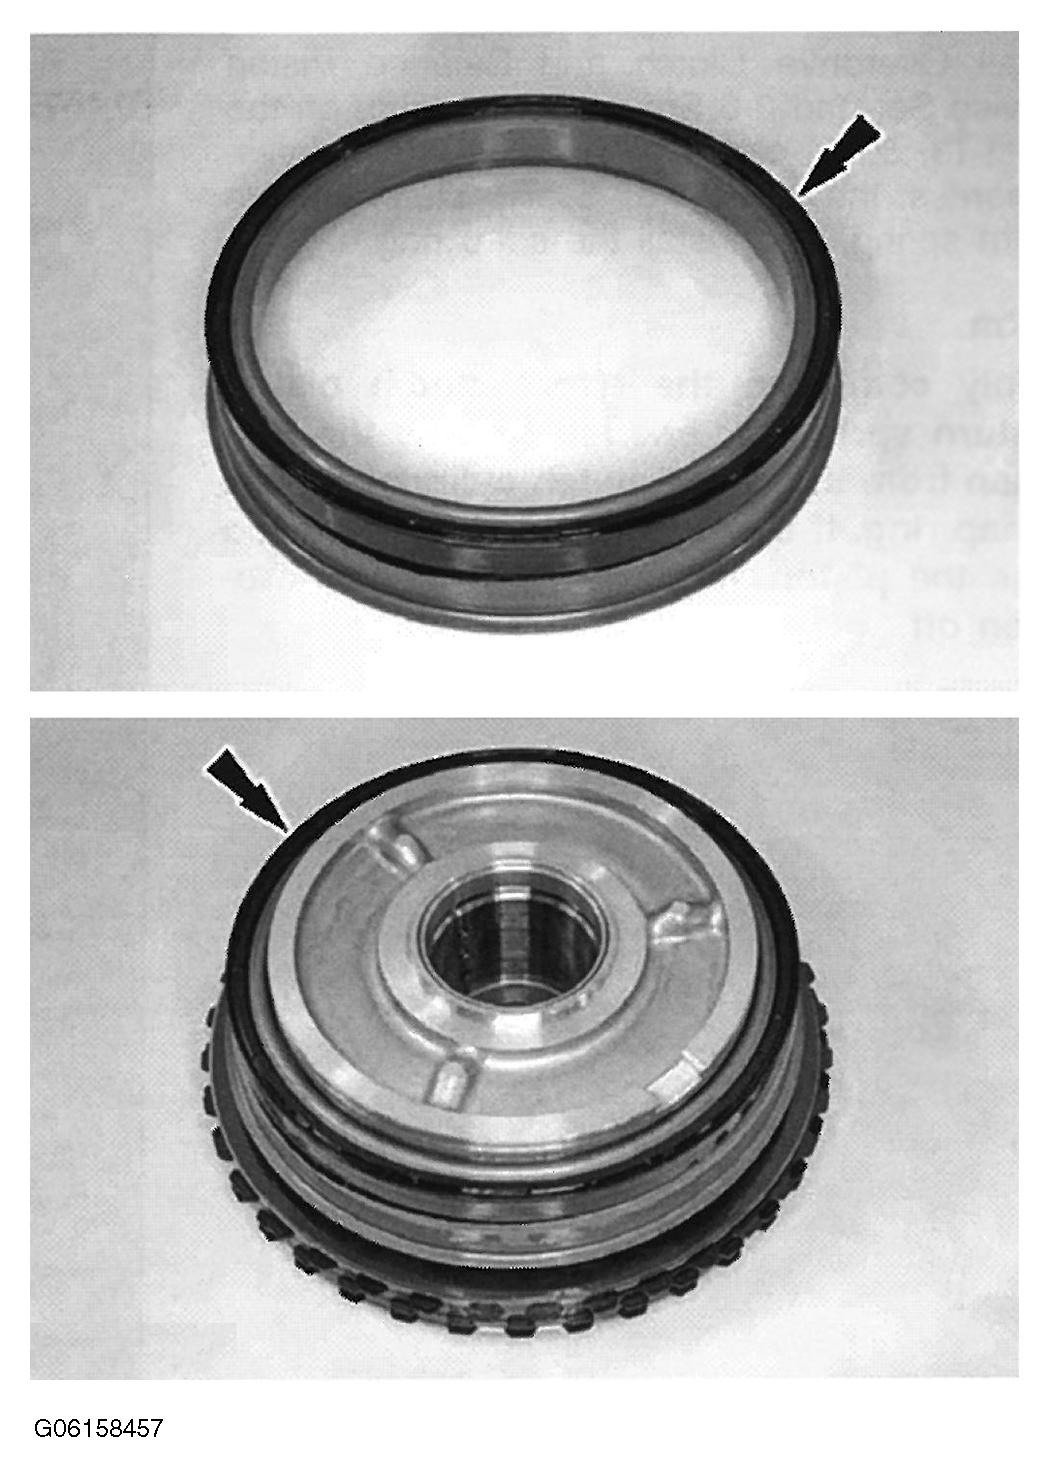 Courtesy of MAZDA MOTORS CORP.
- Install the direct (3, 5, R) clutch cylinder.
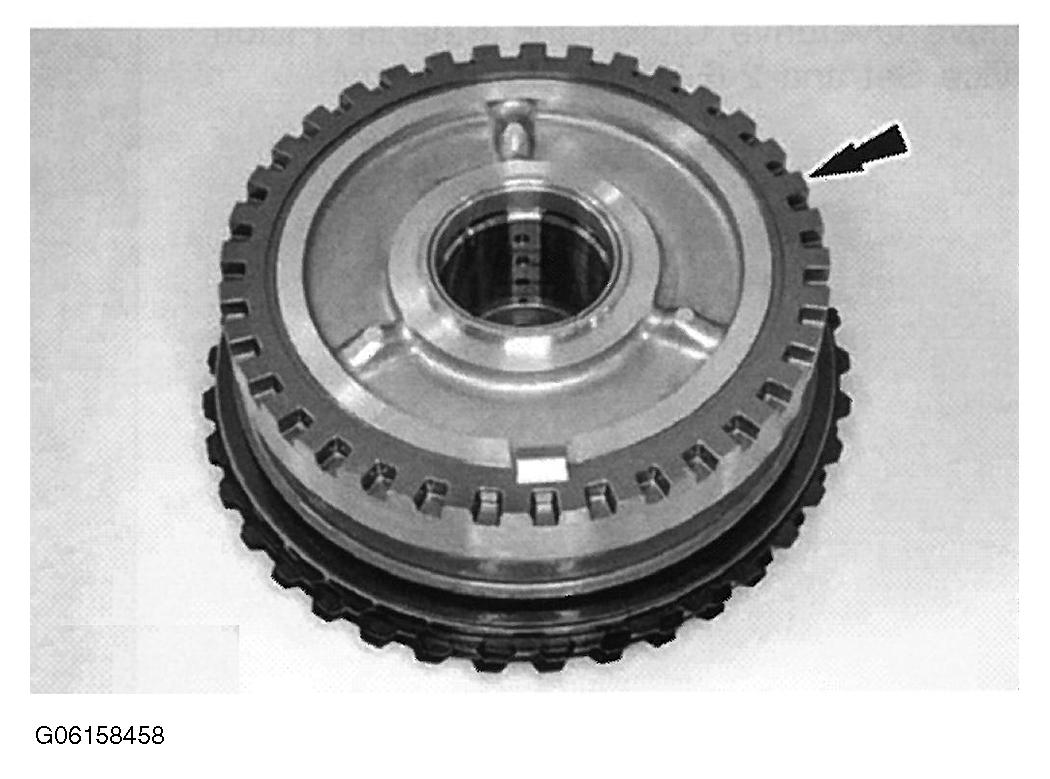 Courtesy of MAZDA MOTORS CORP.
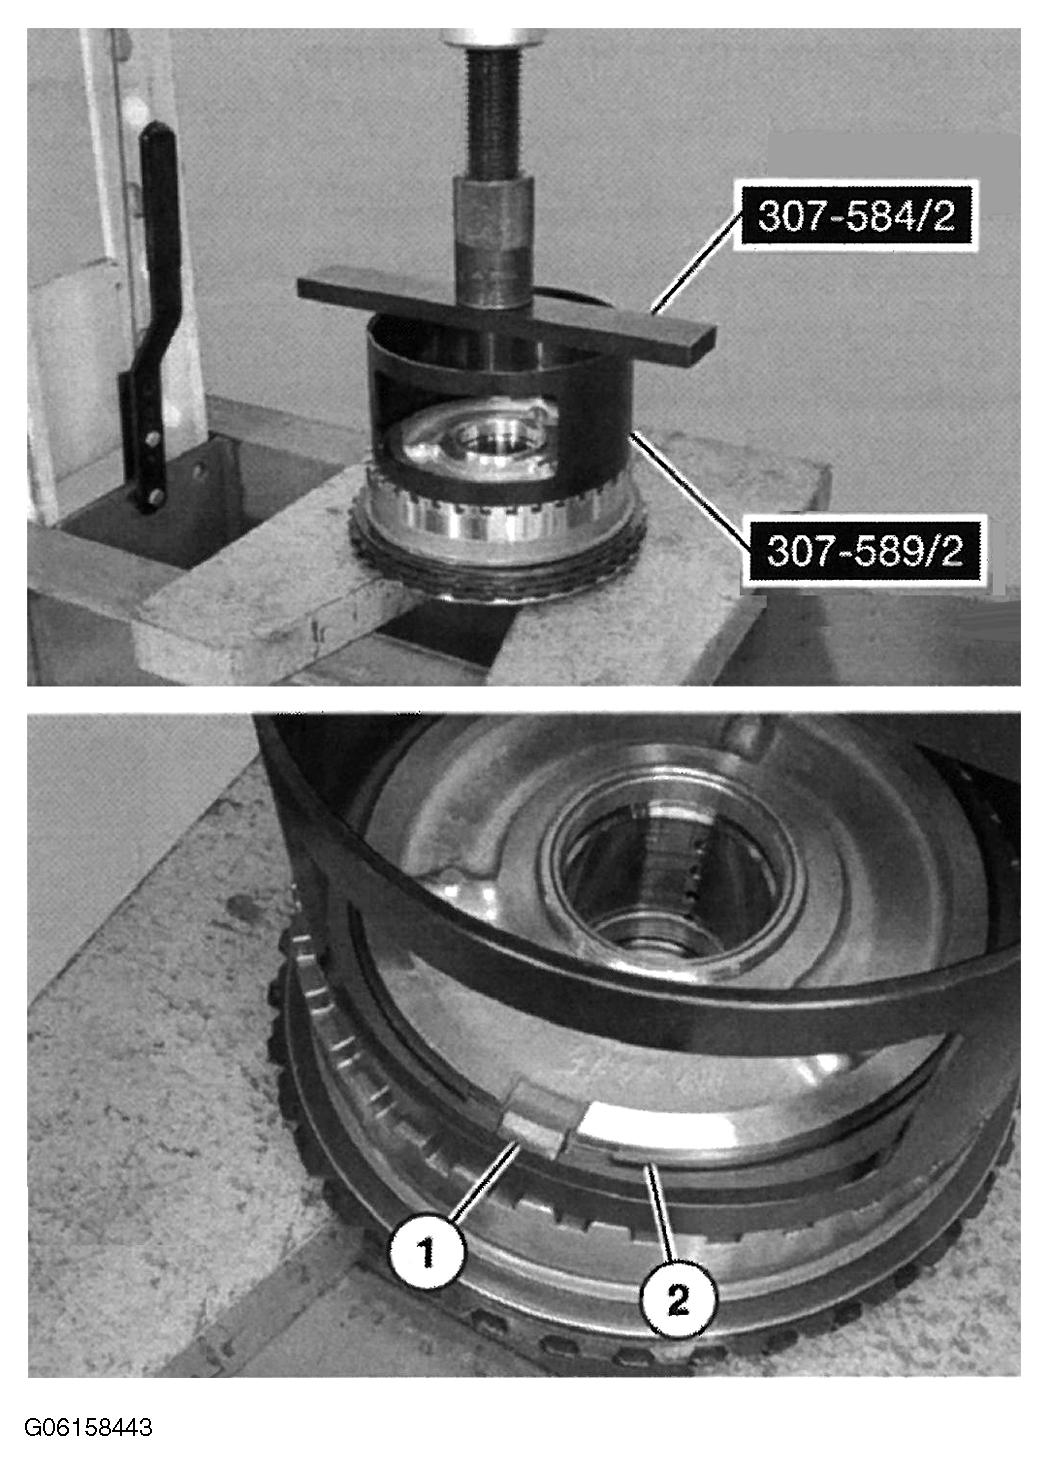
- Install Overdrive Clutch and Balance Piston Service Set and 2-6 Spring Compressor on the direct (3, 5, R) clutch cylinder. Using a press, compress the direct (3, 5, R) clutch piston return spring, and install the snap ring.
CAUTION:
- Only compress the direct clutch piston return spring far enough to take the tension from the direct clutch cylinder off the snap ring. If the piston is compressed too far, the piston alignment tab may be broken off.
 Courtesy of MAZDA MOTORS CORP.
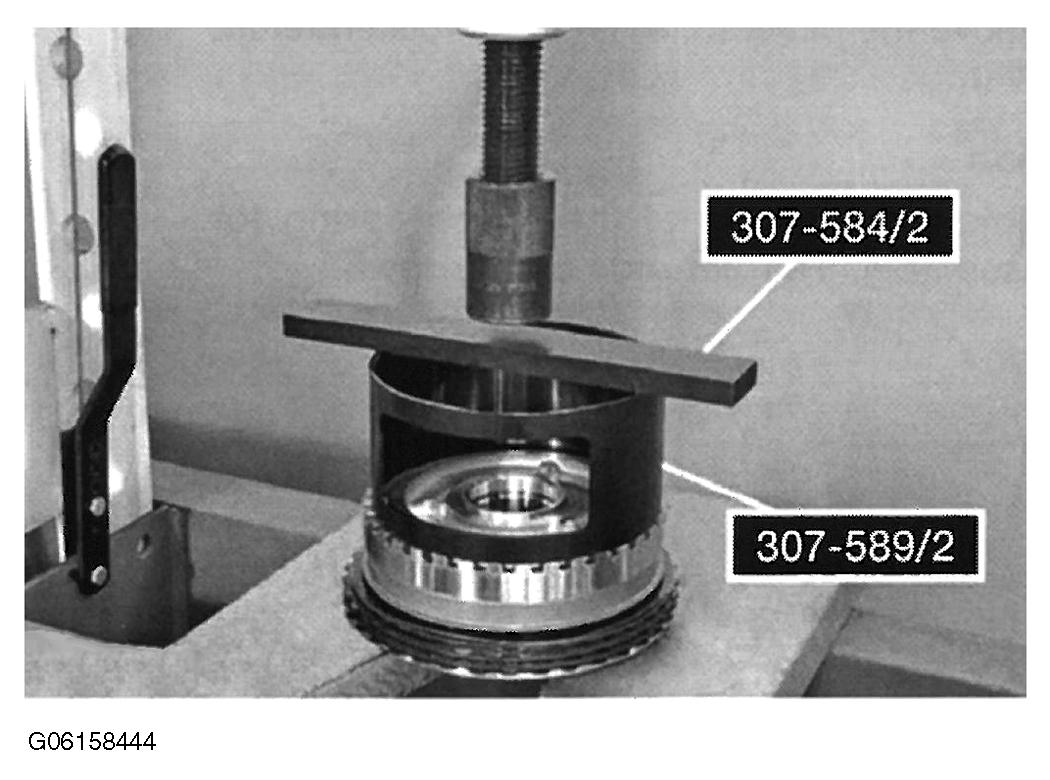
- Remove Overdrive Clutch and Balance Piston Service Set and 2-6 Spring Compressor.
 Courtesy of MAZDA MOTORS CORP.
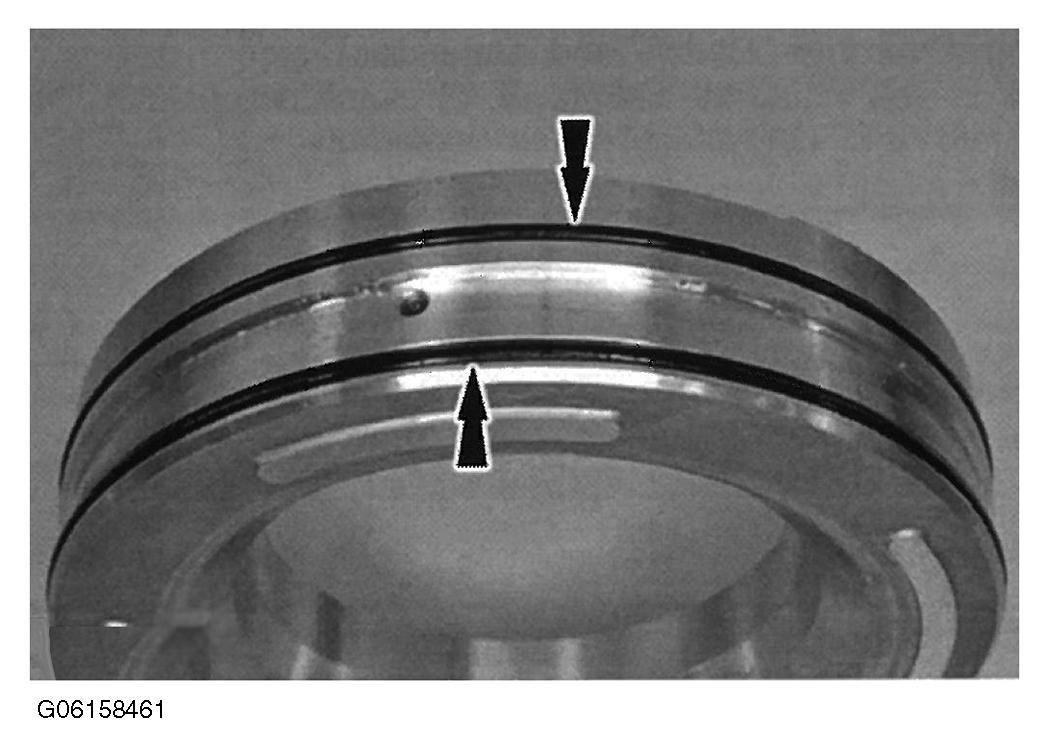
- Install 2 new seals on the O/D (4, 5, 6) clutch piston and lubricate the seals with petroleum jelly.
 Courtesy of MAZDA MOTORS CORP.
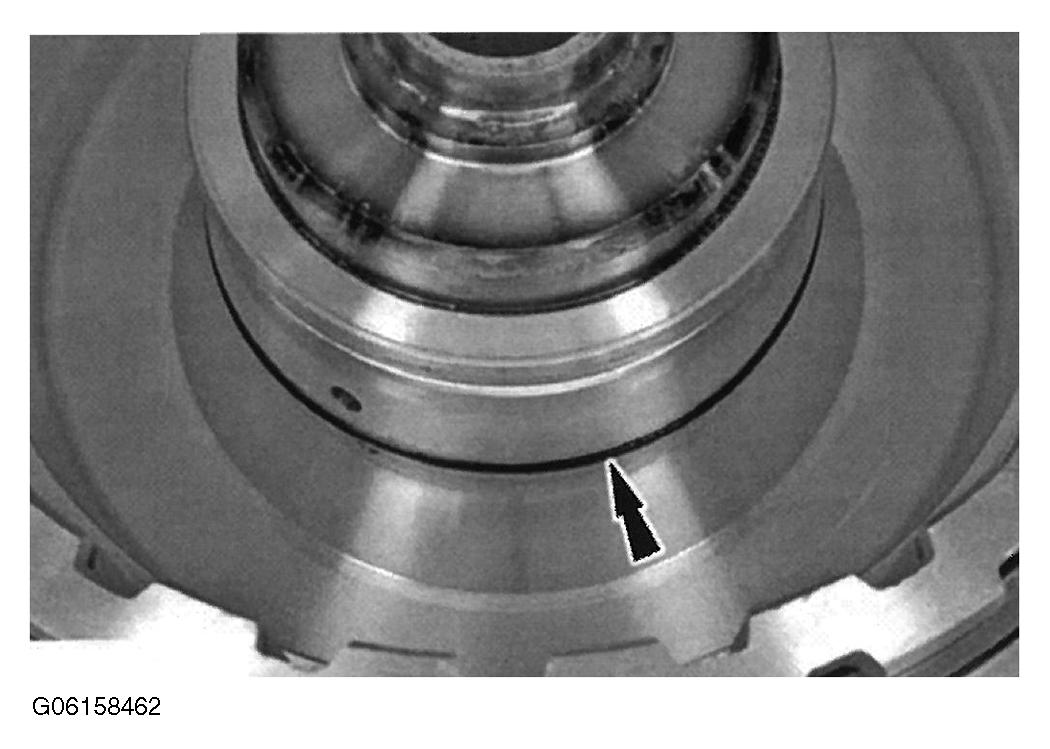
- Install a new O/D (4, 5, 6) clutch piston clutch piston inner seal and lubricate the seal with petroleum jelly.
 Courtesy of MAZDA MOTORS CORP.
- Position the O/D (4, 5, 6) clutch piston in place.
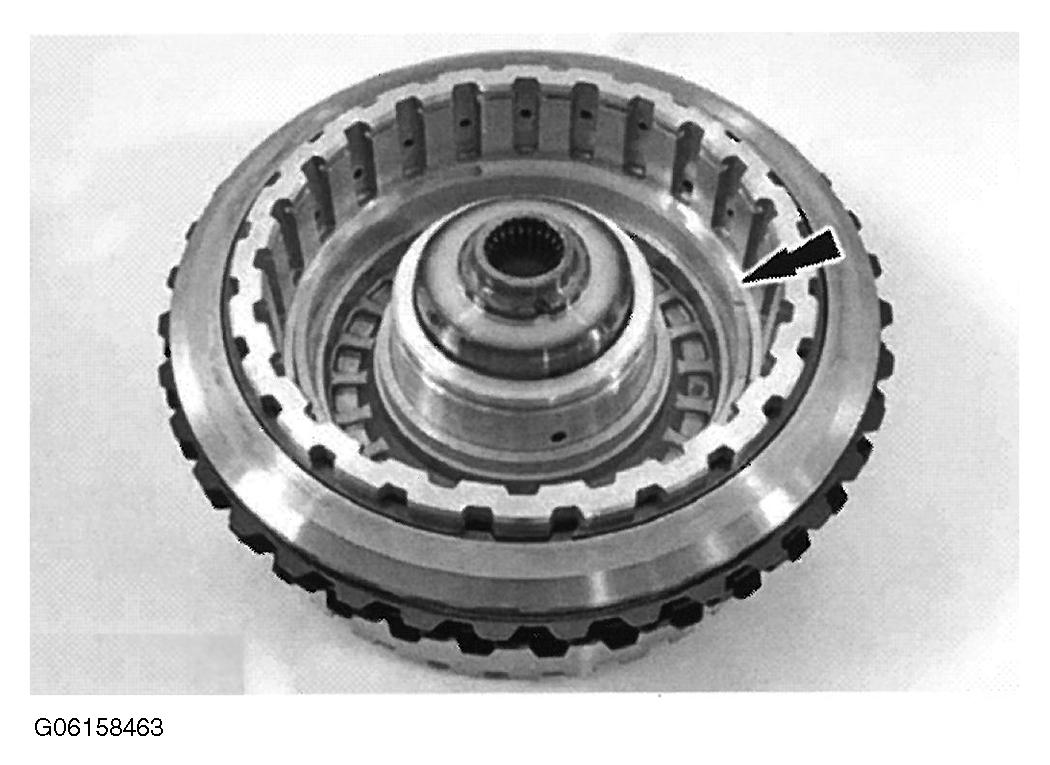 Courtesy of MAZDA MOTORS CORP.
- Using Overdrive Clutch and Balance Piston Service Set, install the O/D (4, 5, 6) clutch piston into the O/D/direct clutch assembly by hand.
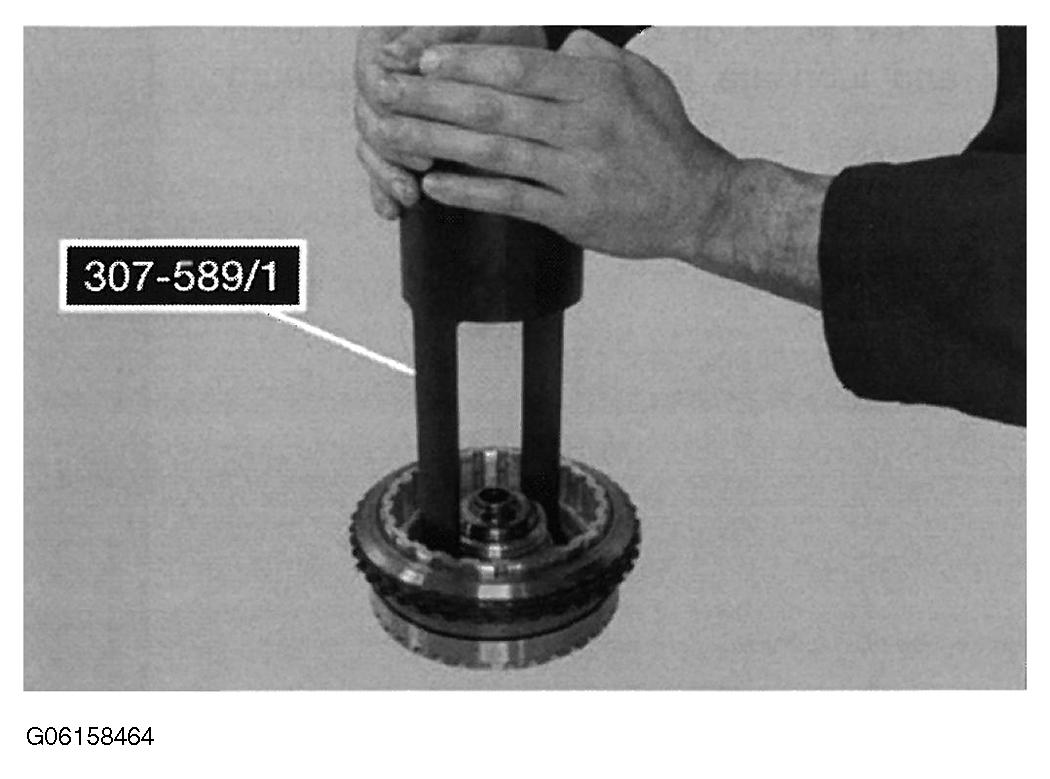 Courtesy of MAZDA MOTORS CORP.
- Install the O/D (4, 5, 6) clutch piston return spring.
NOTE:
- Holes face up on the O/D (4, 5, 6) clutch piston return spring.
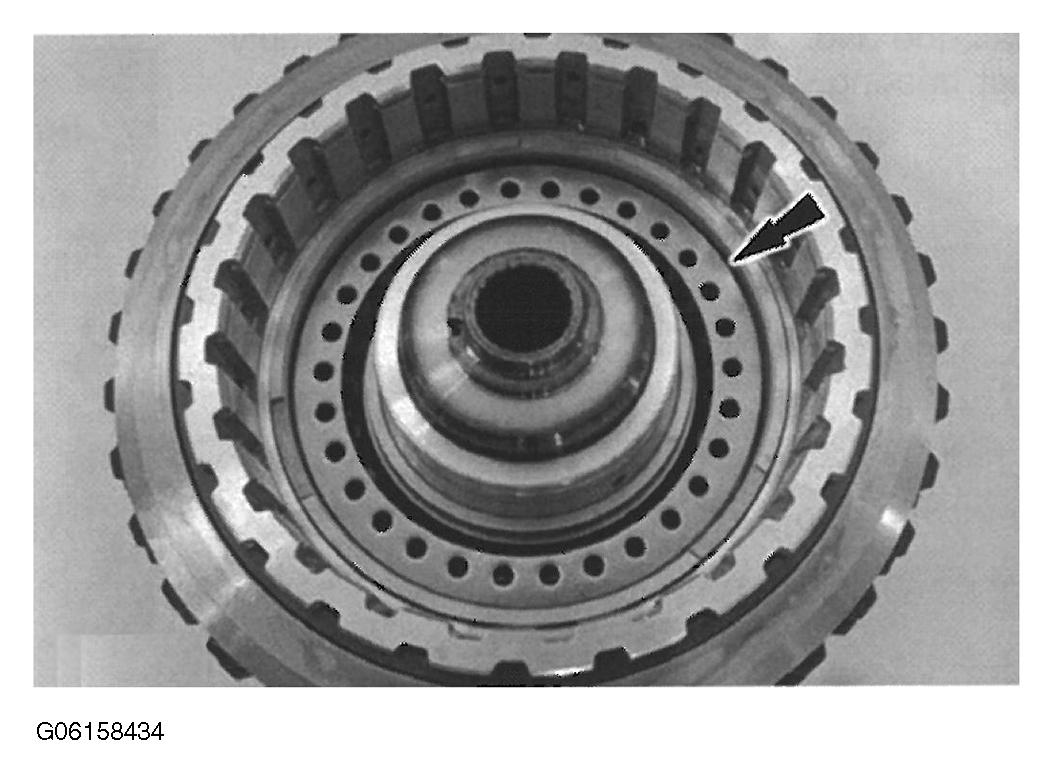 Courtesy of MAZDA MOTORS CORP.
- Lubricate the seals on a new balance piston and position the piston in place.
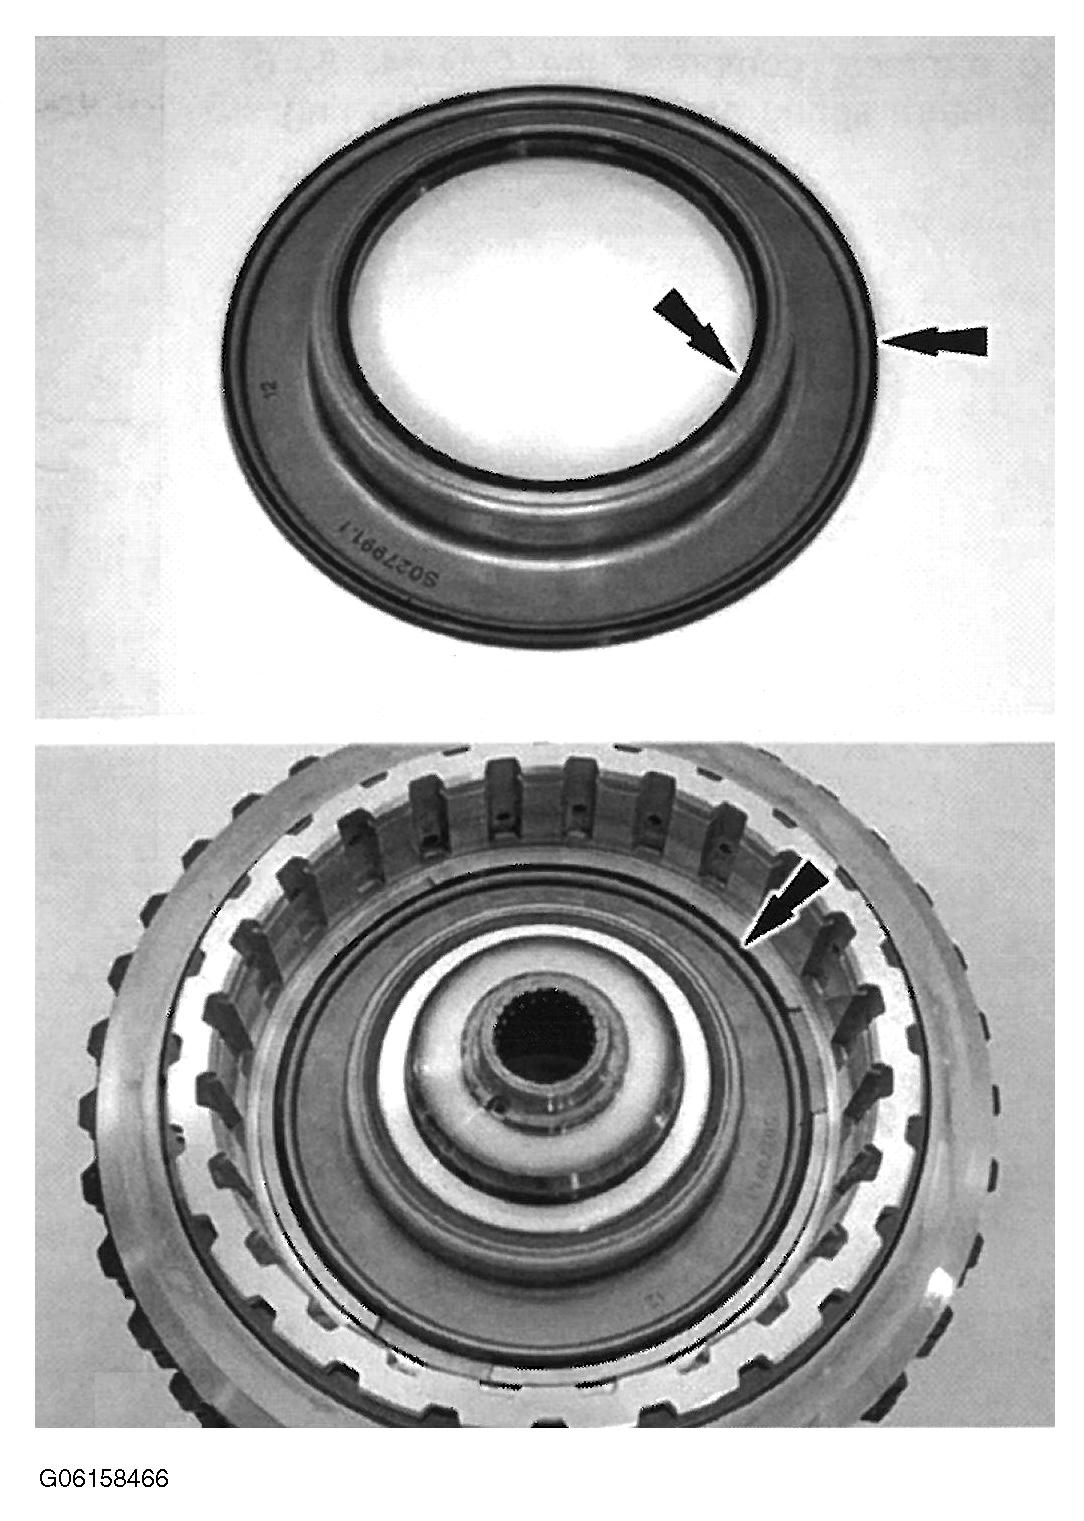 Courtesy of MAZDA MOTORS CORP.
- Install Overdrive Clutch and Balance Piston Service Set and 2-6 Spring Compressor on the balance piston.
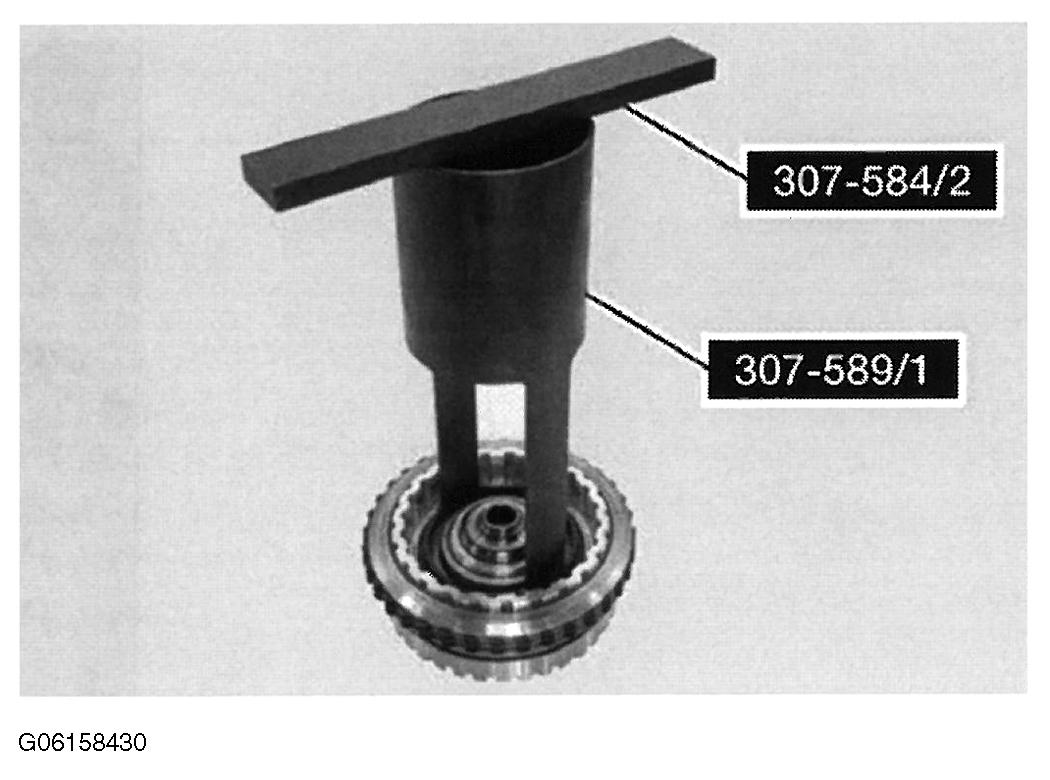 Courtesy of MAZDA MOTORS CORP.
- Using a press, compress the O/D (4, 5, 6) clutch return spring and install the snap ring.
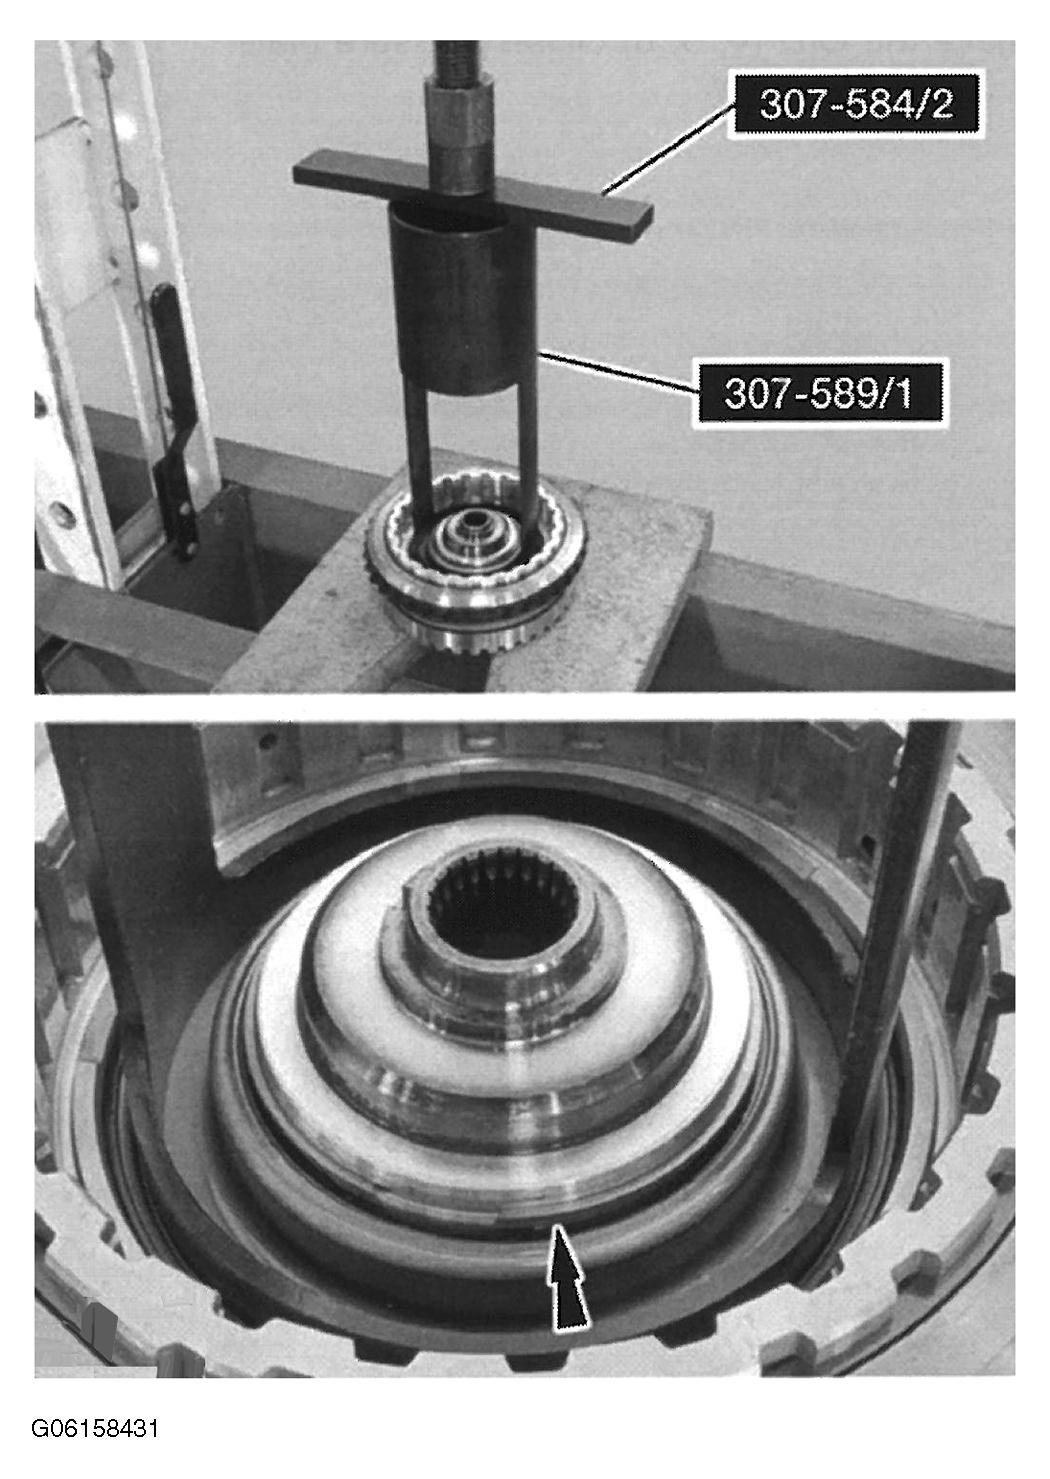 Courtesy of MAZDA MOTORS CORP.
- Remove the Overdrive Clutch and Balance Piston Service Set and 2-6 Spring Compressor.
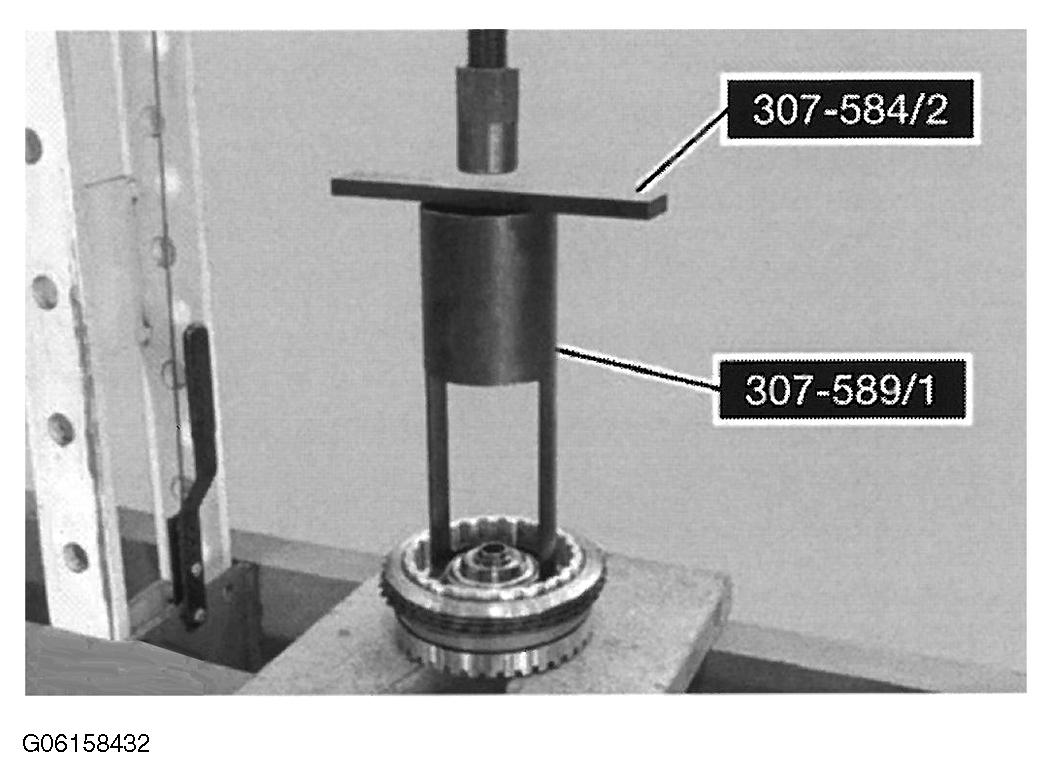 Courtesy of MAZDA MOTORS CORP.
- Install the No. 2 thrust bearing.
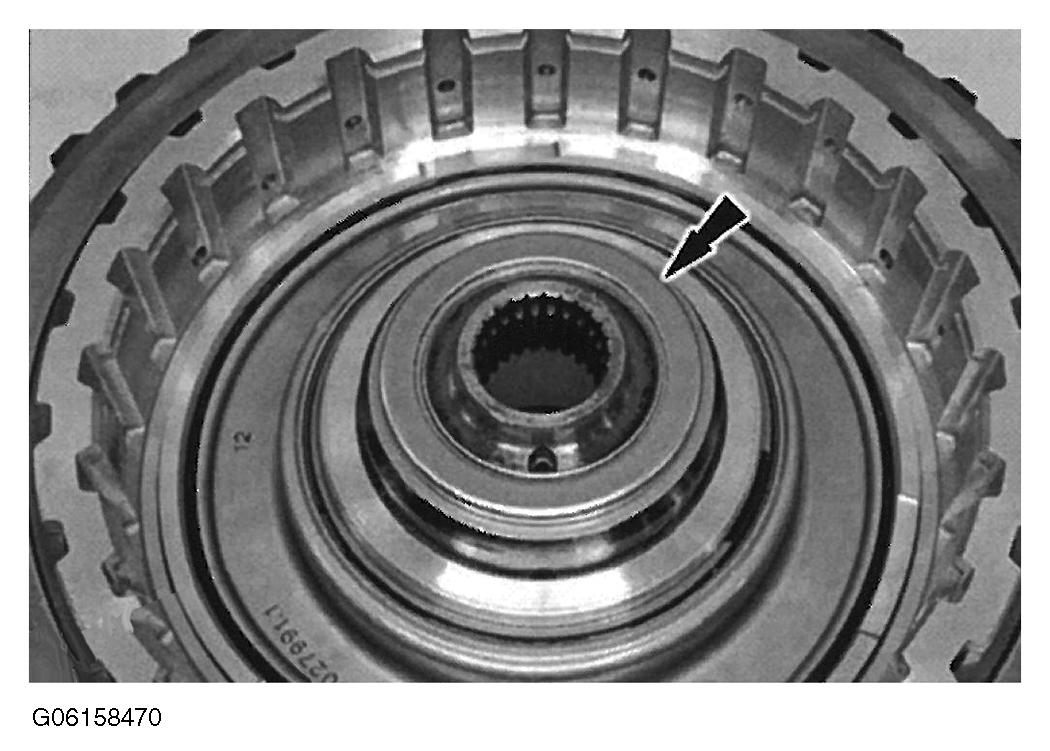 Courtesy of MAZDA MOTORS CORP.
- Install the O/D (4, 5, 6) clutch hub.
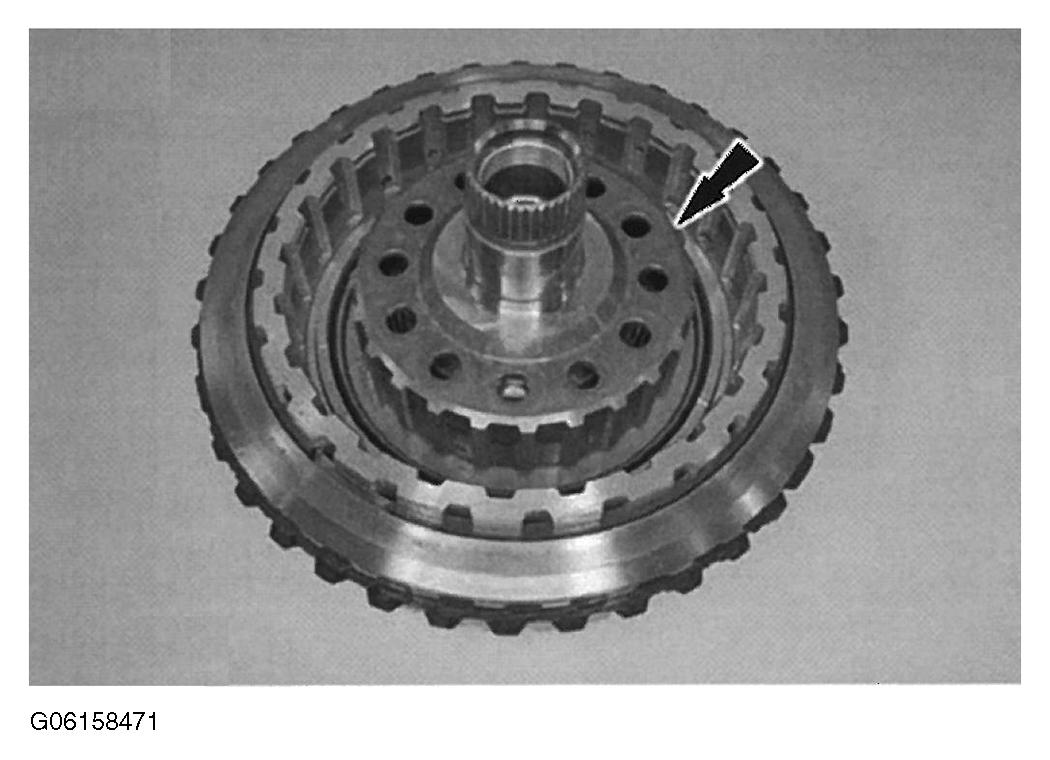 Courtesy of MAZDA MOTORS CORP.
- Soak the O/D (4, 5, 6) clutch pack in clean automatic transaxle fluid.
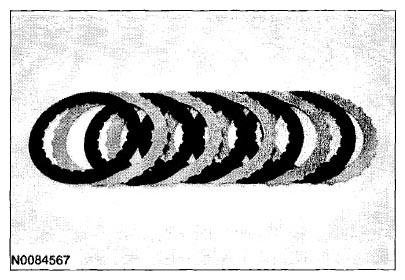 Courtesy of MAZDA MOTORS CORP.
- Install the O/D (4, 5, 6) clutch pack.
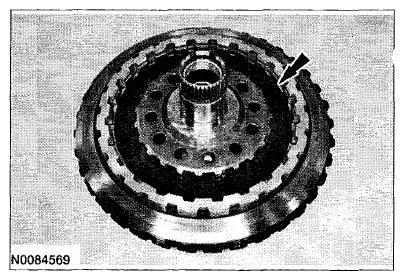 Courtesy of MAZDA MOTORS CORP.
- Install the O/D (4, 5, 6) clutch pressure plate.
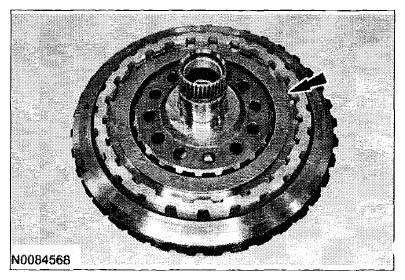 Courtesy of MAZDA MOTORS CORP.
- Install the O/D (4, 5, 6) clutch snap ring.
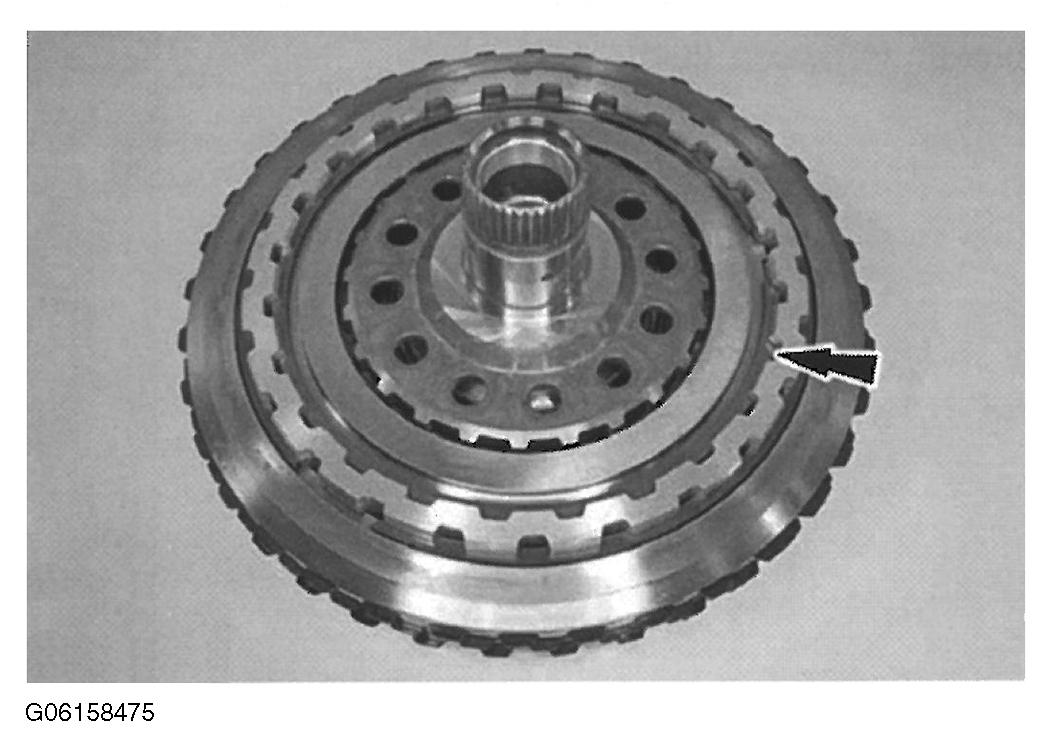 Courtesy of MAZDA MOTORS CORP.
- Install the input shaft.
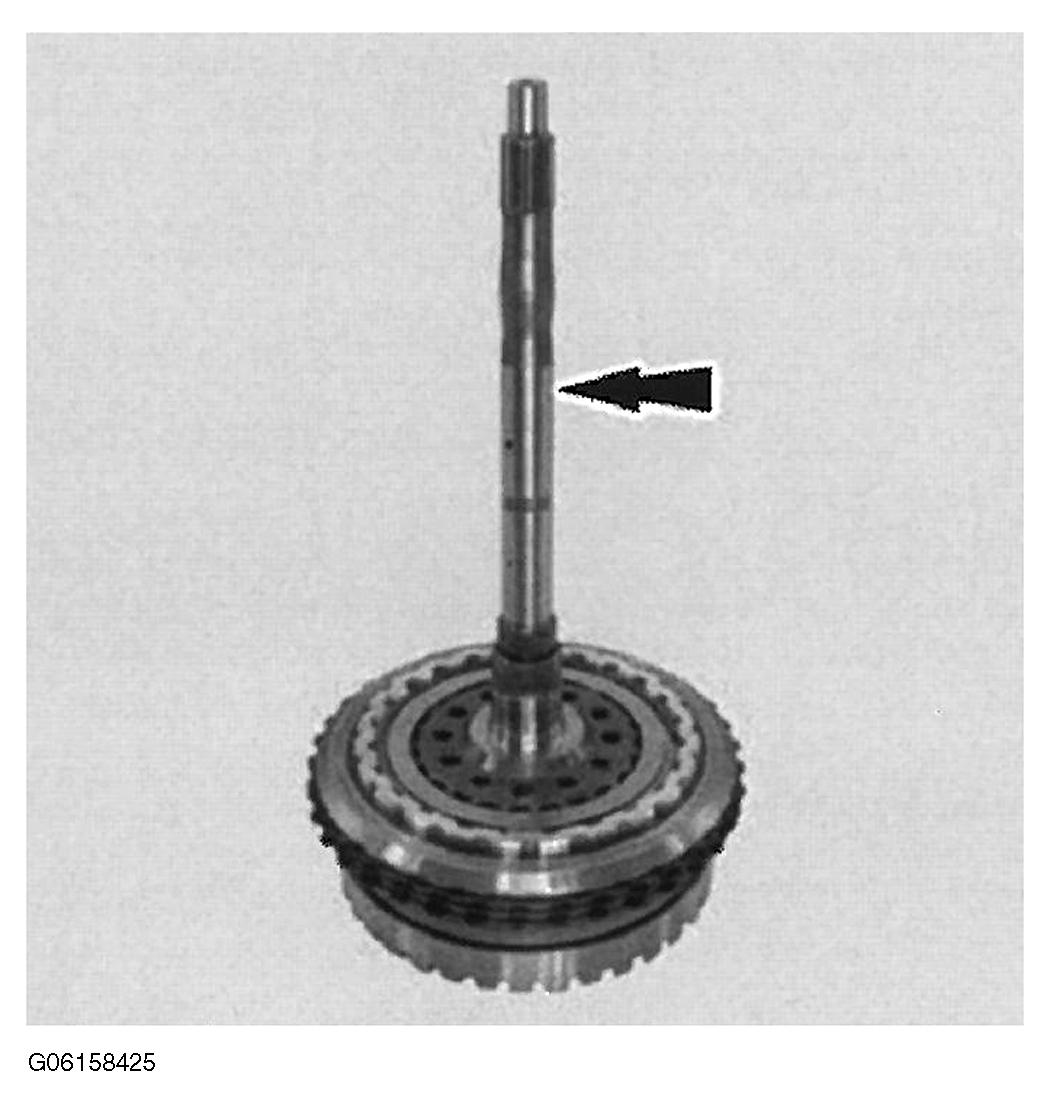 Courtesy of MAZDA MOTORS CORP.
- While holding the input shaft in place, install the snap ring.
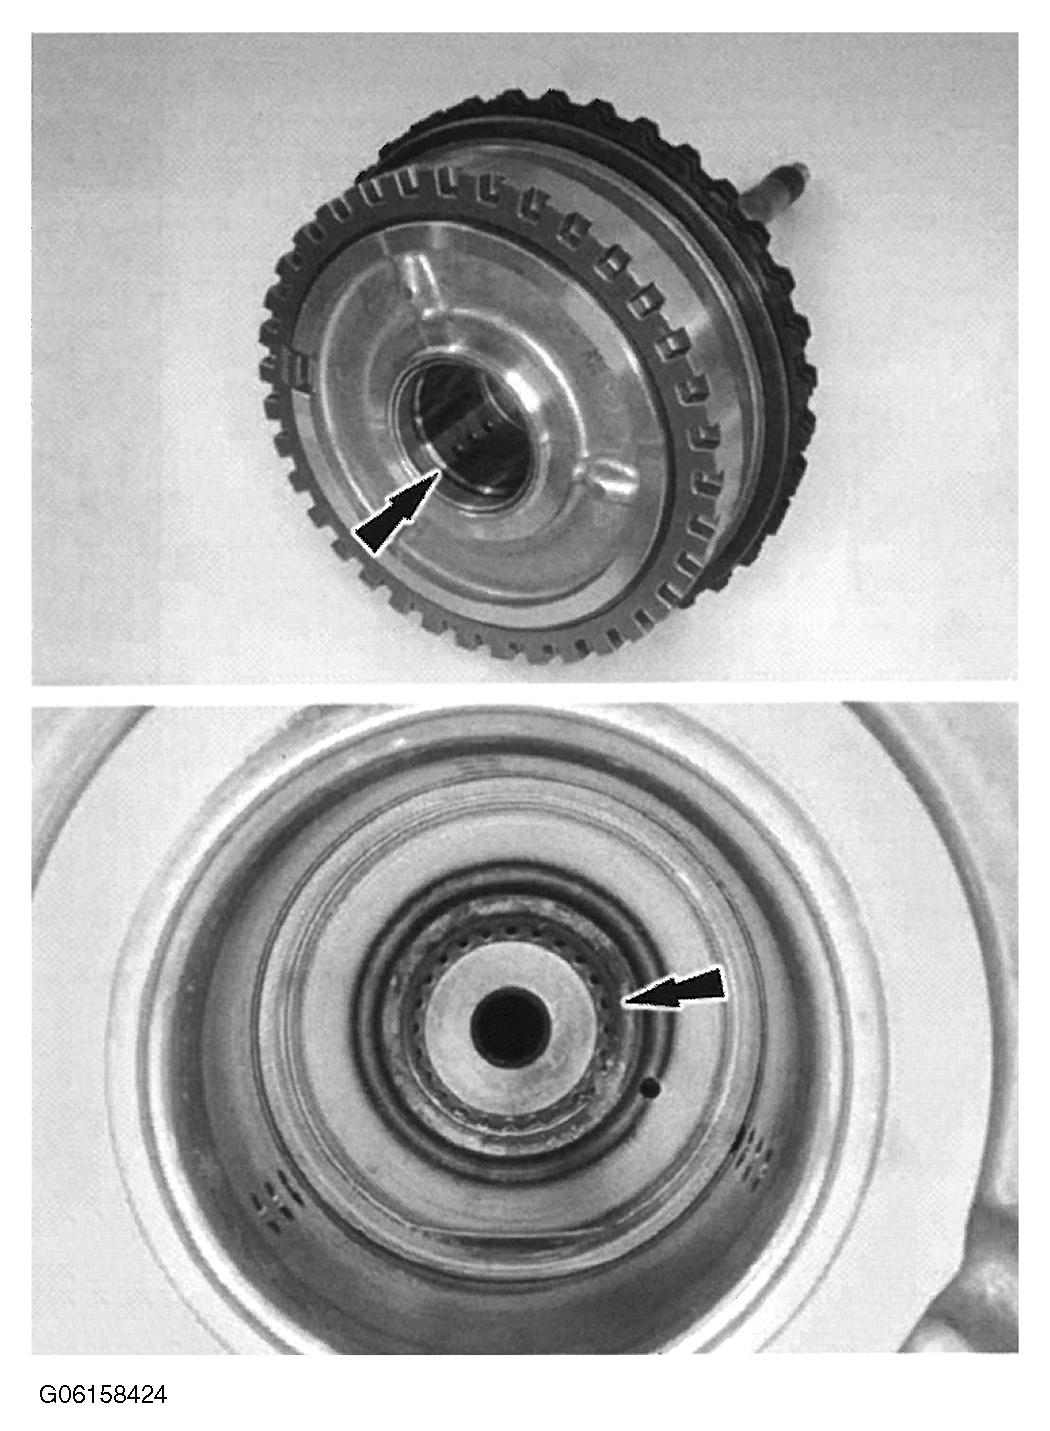 Courtesy of MAZDA MOTORS CORP.
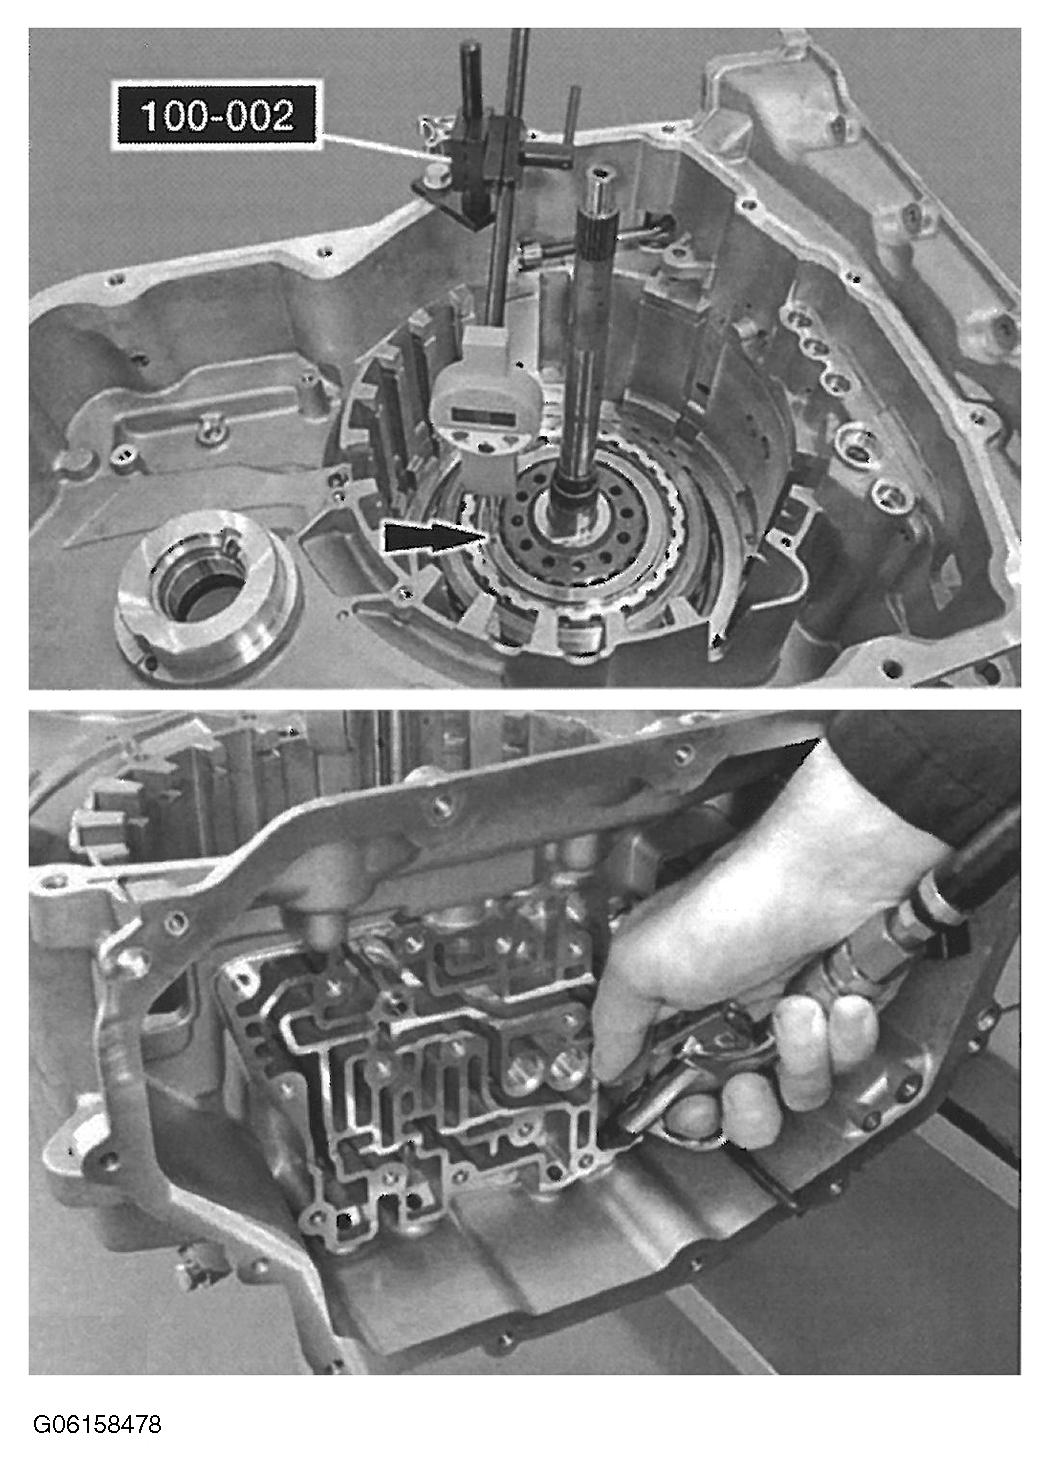
- Position the O/D/direct clutch assembly in the transaxle case, install Dial Indicator Gauge With Holding Fixture or a suitable dial indicator and position the plunger on the O/D (4, 5, 6) clutch pressure plate. Apply 483 kPa (70 psi) of air pressure to the O/D (4, 5, 6) clutch piston port while recording the clutch pack clearance on the Dial Indicator. The clearance should be between 0.950 mm (0.037 in) and 1.778 mm (0.07 in). If the clearance is out of range, check the O/D (4, 5, 6) clutch pack for correct installation. If the O/D (4, 5, 6) clutch pack is correctly installed, install a new O/D (4, 5, 6) clutch pack.
 Courtesy of MAZDA MOTORS CORP.
- Position the plunger on one of the top direct (3, 5, R) clutch plate tabs. Apply 483 kPa (70 psi) of air pressure to the direct (3, 5, R) clutch piston port while recording the clutch pack clearance on Dial Indicator Gauge With Holding Fixture. The clearance should be between 0.412 mm (0.016 in) and 1.728 mm (0.068 in). If the clearance is out of range, check the direct (3, 5, R) clutch pack for correct installation. If the direct (3, 5, R) clutch pack is correctly installed, install a new direct (3, 5, R) clutch pack.
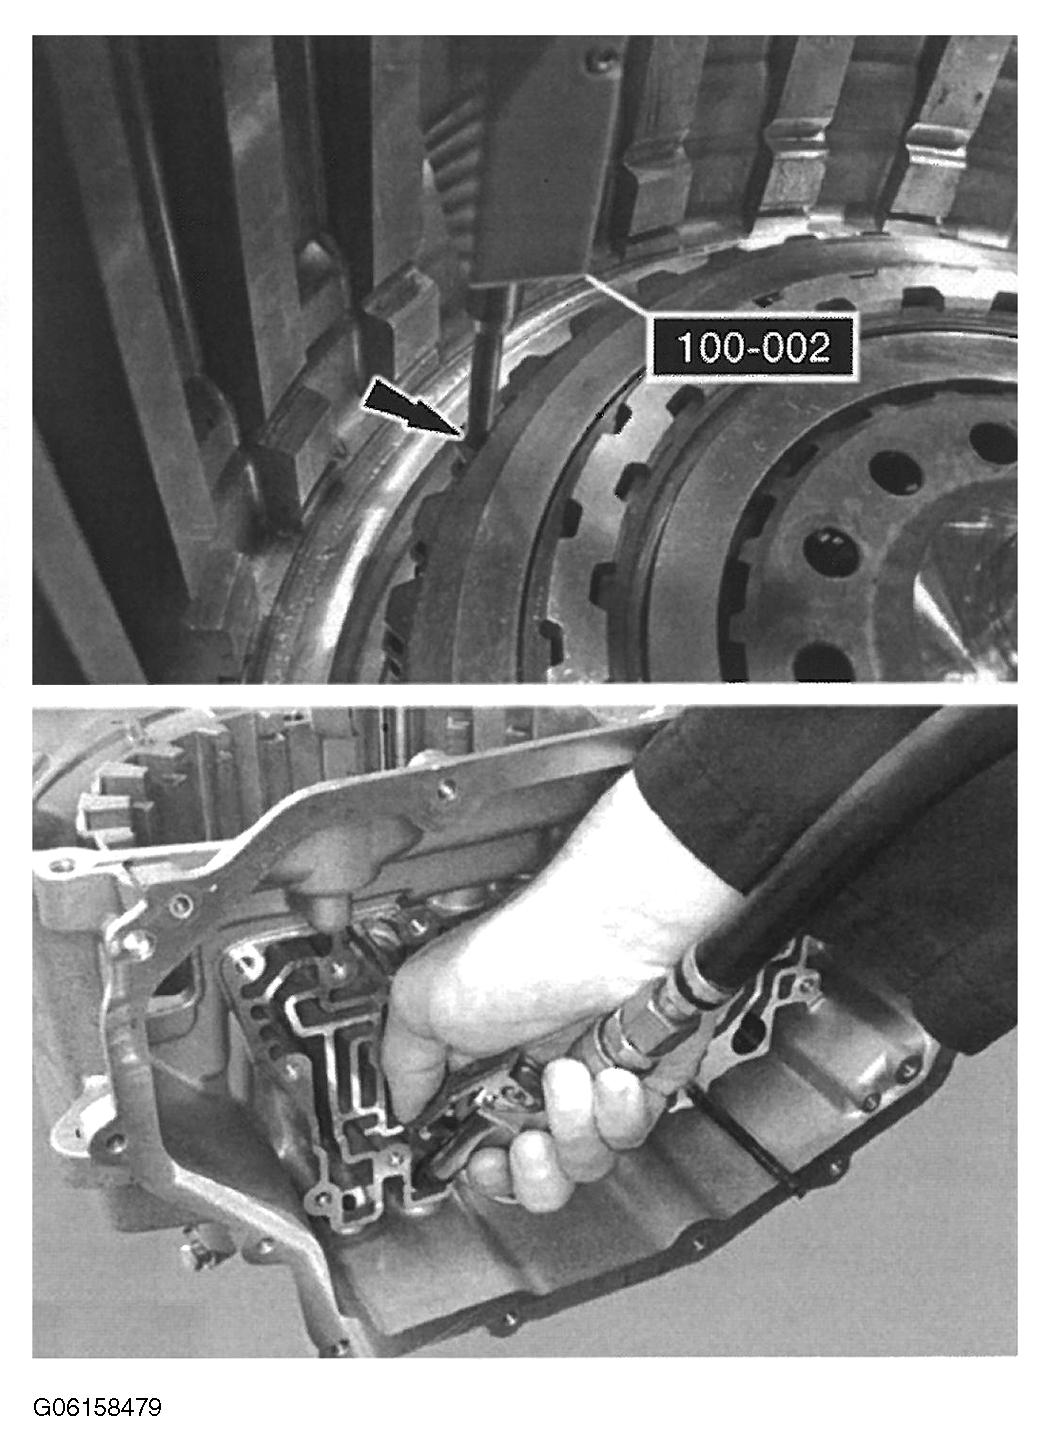 Courtesy of MAZDA MOTORS CORP.
- Remove Dial Indicator Gauge With Holding Fixture, O/D/direct clutch assembly and the No. 1 O/D/direct clutch assembly thrust bearing.
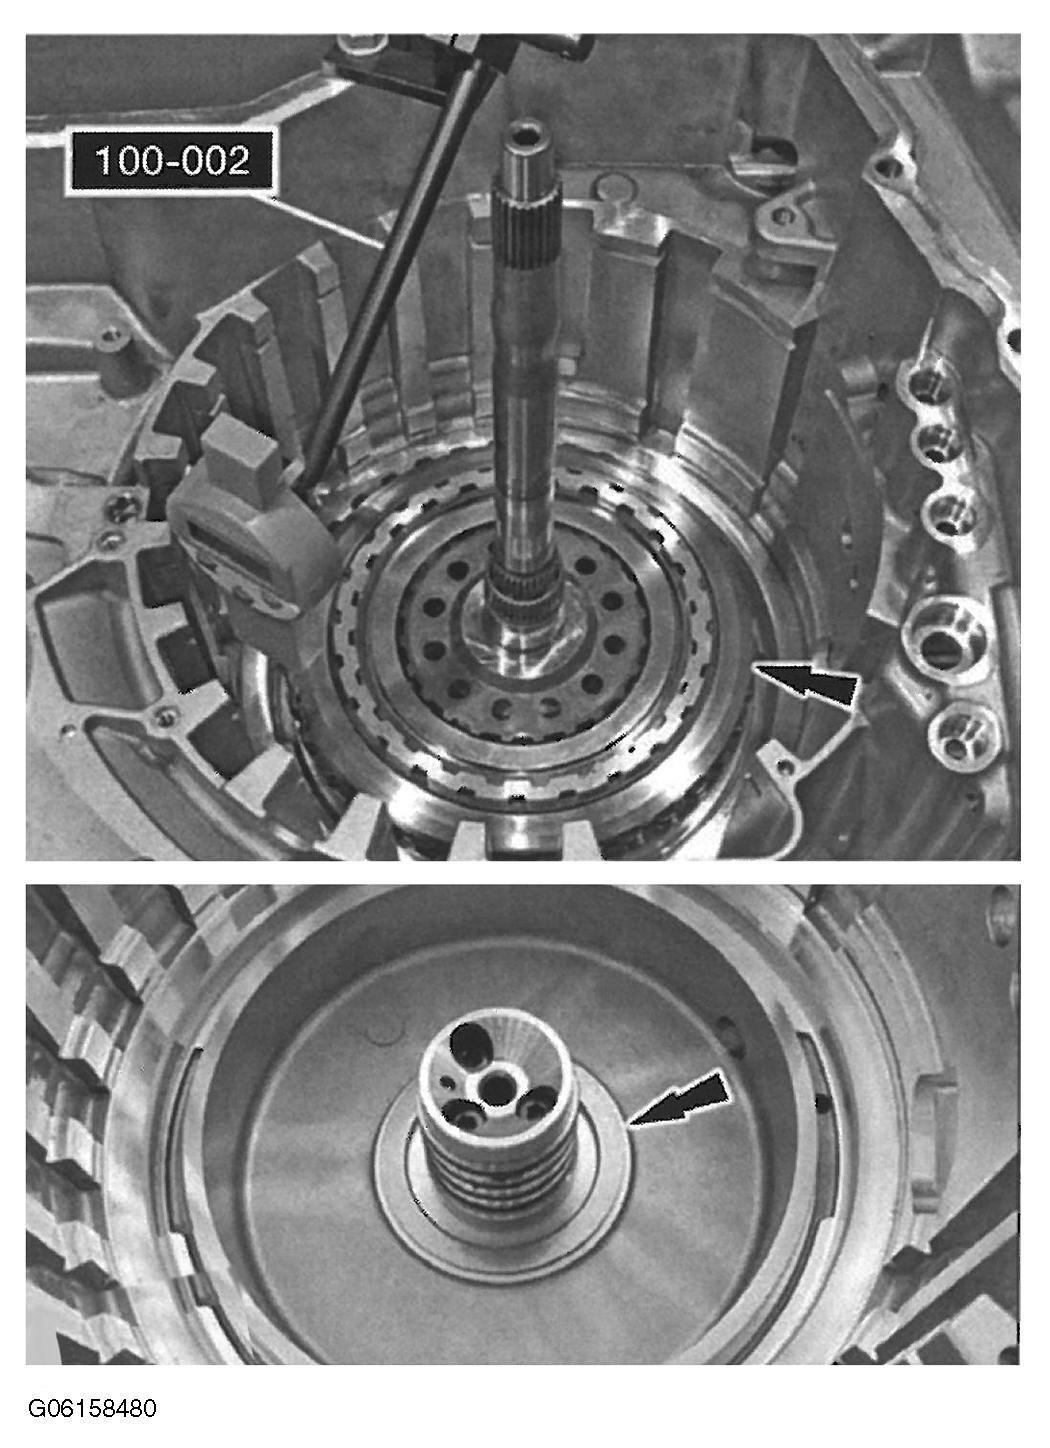 Courtesy of MAZDA MOTORS CORP.