Sliding Door Glass Removal/Installation
- Fully open the sliding door glass.
- Remove the battery cover. (See
BATTERY REMOVAL/INSTALLATION [L3]
.)
- Disconnect the negative battery cable.
- Remove the side door garnish. (See
SIDE DOOR GARNISH REMOVAL/INSTALLATION
.)
- Remove the rear side trim. (See
REAR SIDE TRIM REMOVAL/INSTALLATION
.)
- Remove the sliding door trim. (See
SLIDING DOOR TRIM REMOVAL/INSTALLATION
.)
- Remove the bolt and screw.
 Courtesy of MAZDA MOTORS CORP.
- Remove the rear door glass guide and glass run channel as a single unit.
- Connect the negative battery cable.
- Connect the power window sub switch connector.
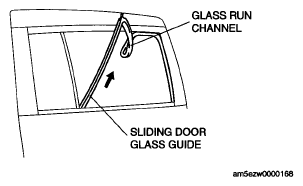 Courtesy of MAZDA MOTORS CORP.
- Adjust the door glass position as shown in the figure.
- Remove the hole cover.
 Courtesy of MAZDA MOTORS CORP.
- Remove the bolt.
- Lift the sliding door glass up and remove it by sliding it to the vehicle rear.
- Install in the reverse order of removal.
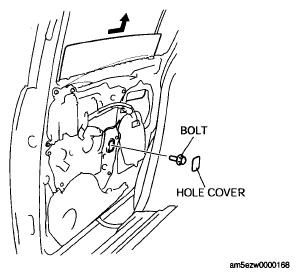 Courtesy of MAZDA MOTORS CORP.