Front Console Removal/Installation
- Remove the battery cover. (See
BATTERY REMOVAL/INSTALLATION [L3]
).
- Disconnect the negative battery cable.
- Remove the side wall. (See
SIDE WALL REMOVAL/INSTALLATION ).
- Remove the selector lever knob (ATX), shift lever knob (MTX).
- Pull the indicator panel (ATX), boot panel (MTX) upward and detach clips A.
- Disconnect the car-navigation control switch connector. (Vehicles with car-navigation system)
- Remove the indicator panel.
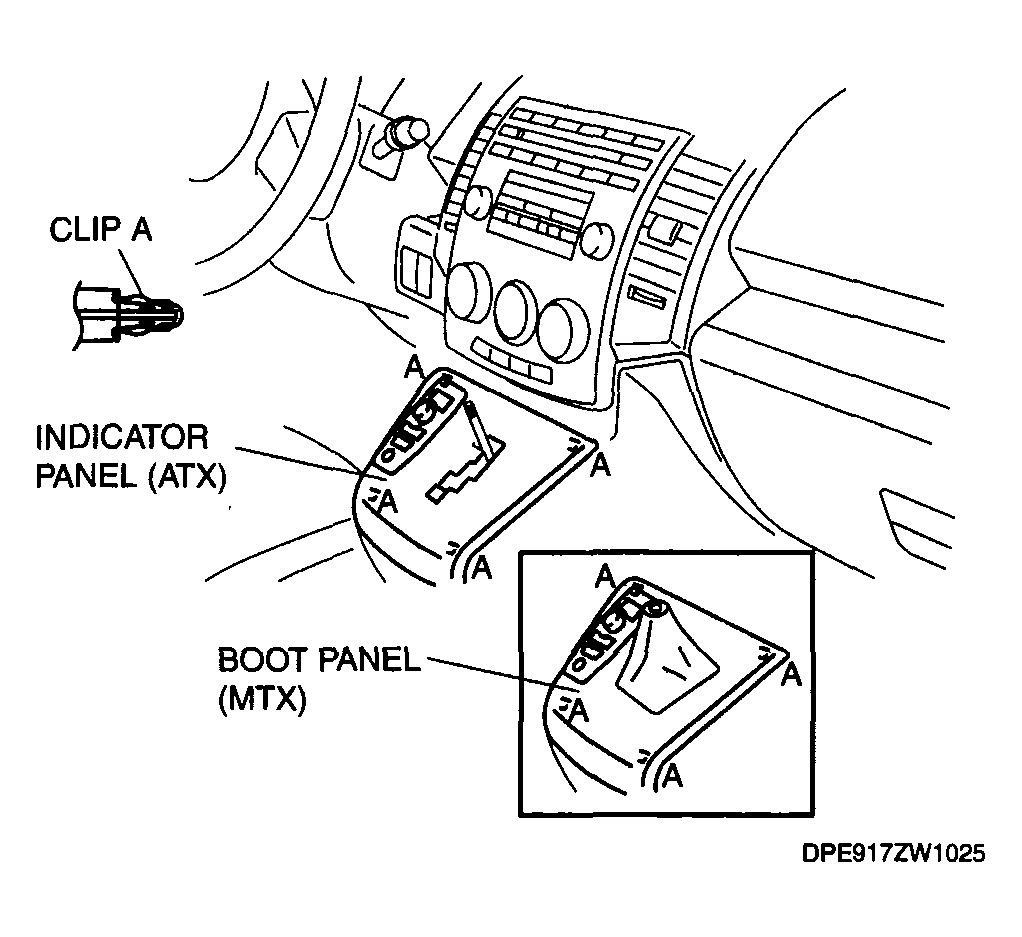 Courtesy of MAZDA MOTORS CORP.
- Remove the screws.
- Pull the front console outward and detach clips A and tabs B.
- Disconnect the cigarette lighter connector.
- Remove the front console.
- Install in the reverse order of removal.
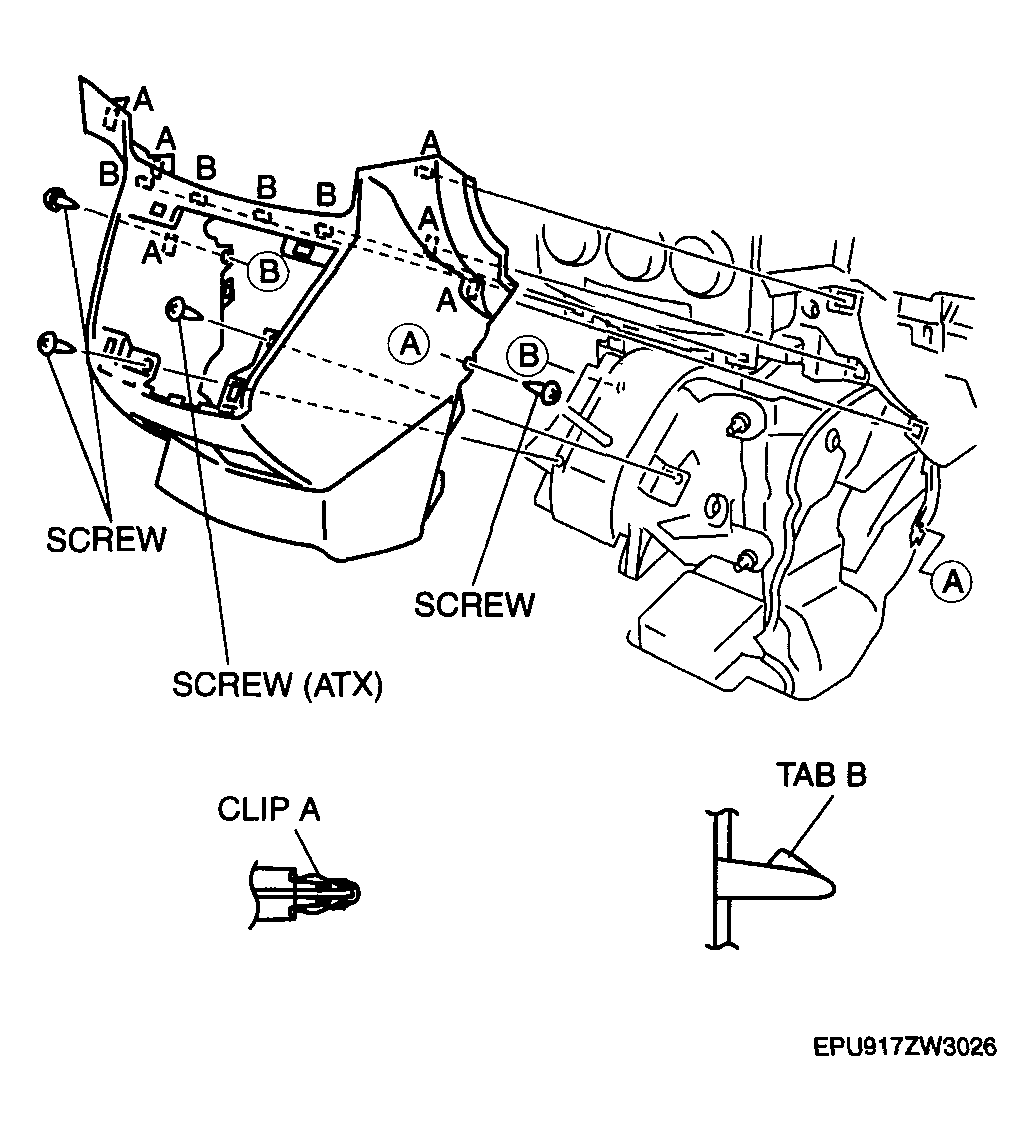 Courtesy of MAZDA MOTORS CORP.