Removal and Installation
- Remove the liftgate trim panel. See
INTERIOR TRIM
.
 Courtesy of MAZDA MOTORS CORP.
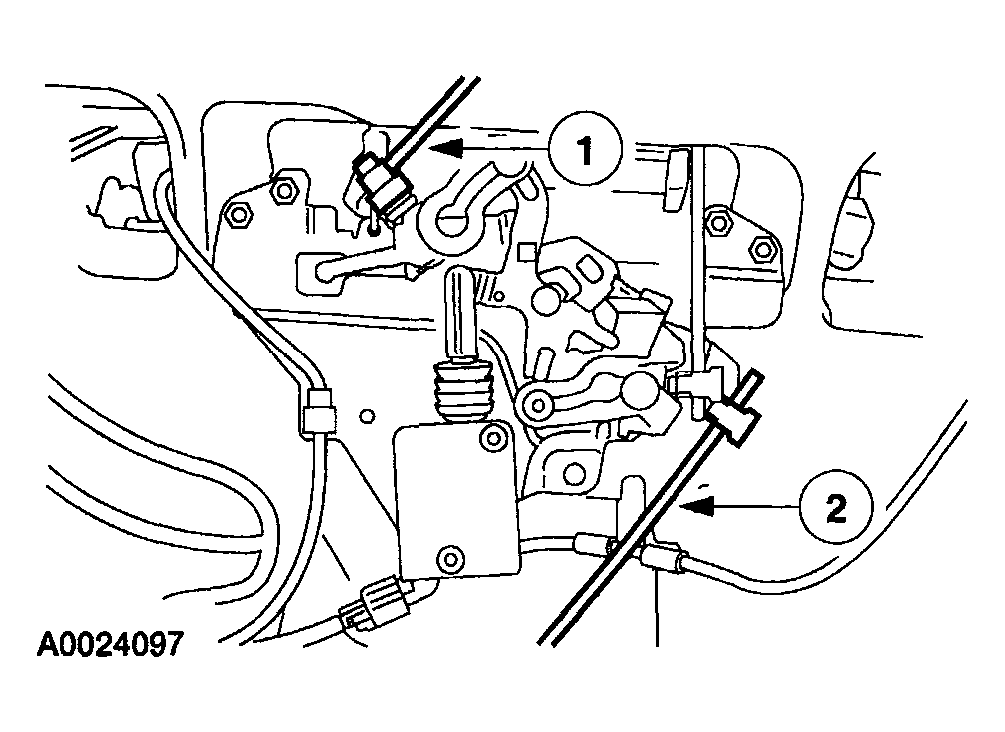
- Disconnect the liftgate latch remote control actuating rods.
- Open the clip and disconnect the liftgate window latch actuating rod.
- Open the clip and disconnect the liftgate latch actuating rod.
 Courtesy of MAZDA MOTORS CORP.
- Open the clip and disconnect the liftgate handle actuating rod.
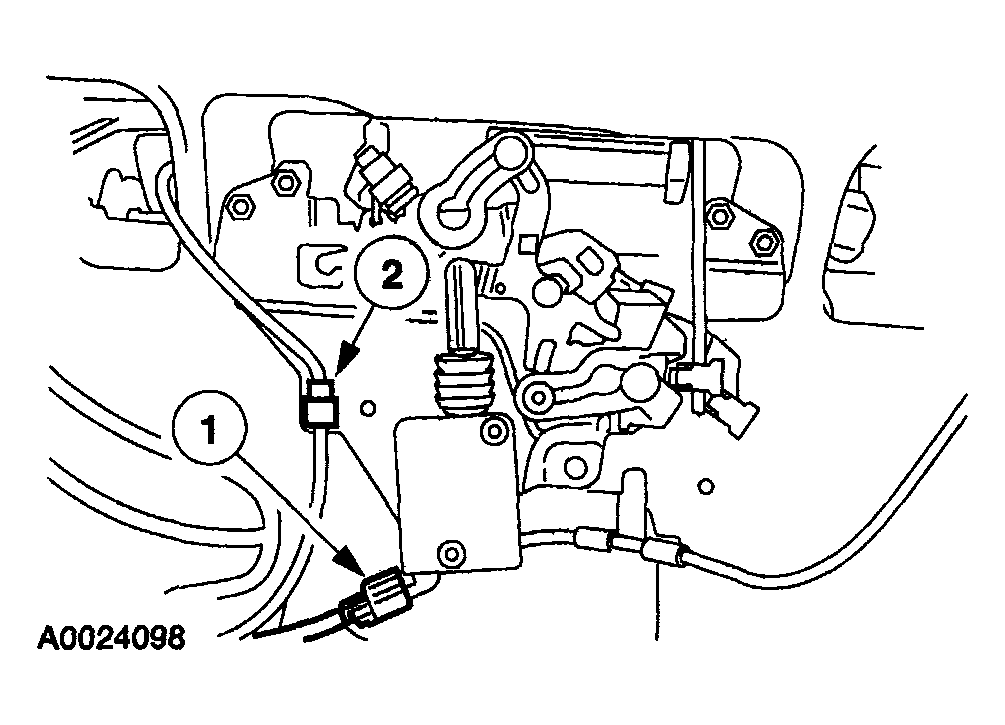
- If equipped, disconnect the liftgate latch actuator electrical connector.
- Release the liftgate window latch ajar switch wiring harness locator.
 Courtesy of MAZDA MOTORS CORP.
- Disconnect the electrical connectors.
- If equipped, disconnect the liftgate latch actuator electrical connector.
- Release the liftgate window latch ajar switch wiring harness locator.
 Courtesy of MAZDA MOTORS CORP.
- Remove the screw, the 2 nuts and the liftgate latch remote control assembly.
- To install, tighten the nuts to:
- 7 N-m (0.7 kgf-m, 62 in-lbf) (vehicles built through 10/2005).
- 5 N-m (0.5 kgf-m, 44 in-lbf) (vehicles built after 10/2005)
- To install, tighten the screw to 3 N-m (0.3 kgf-m 27 in-lbf).
- To install, reverse the removal procedure.
- Transfer all necessary components.