Timing Chain Component (RH) Installation Note
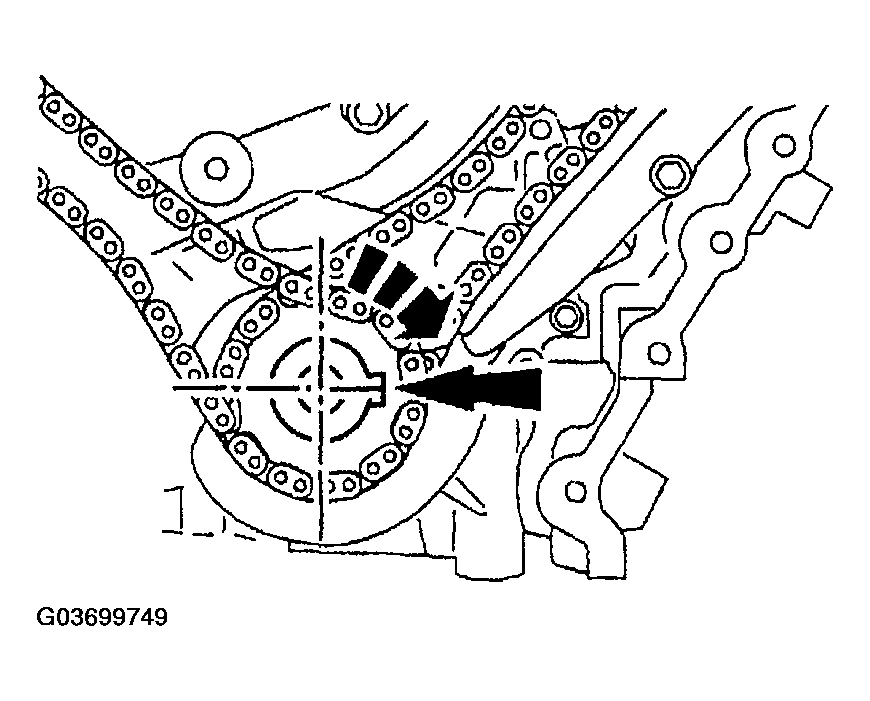
- Rotate the crankshaft clockwise until the keyway is in the 3 o'clock position.
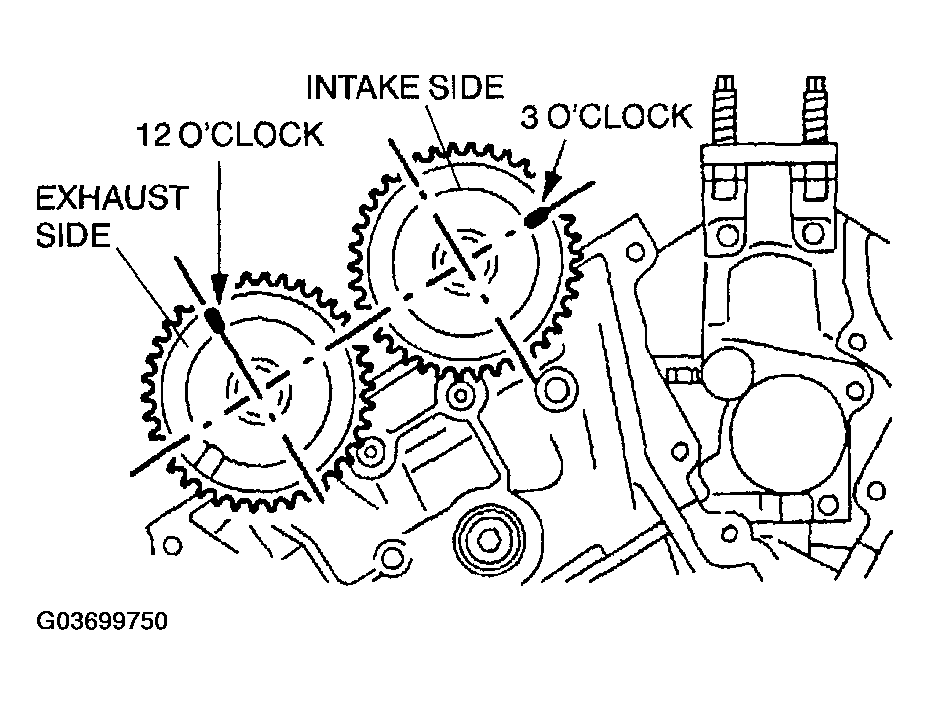
- Position the mark on the exhaust camshaft to 12 o'clock position.
 Courtesy of MAZDA MOTORS CORP.
- Position the mark on the intake camshaft to 3 o'clock position.
NOTE:
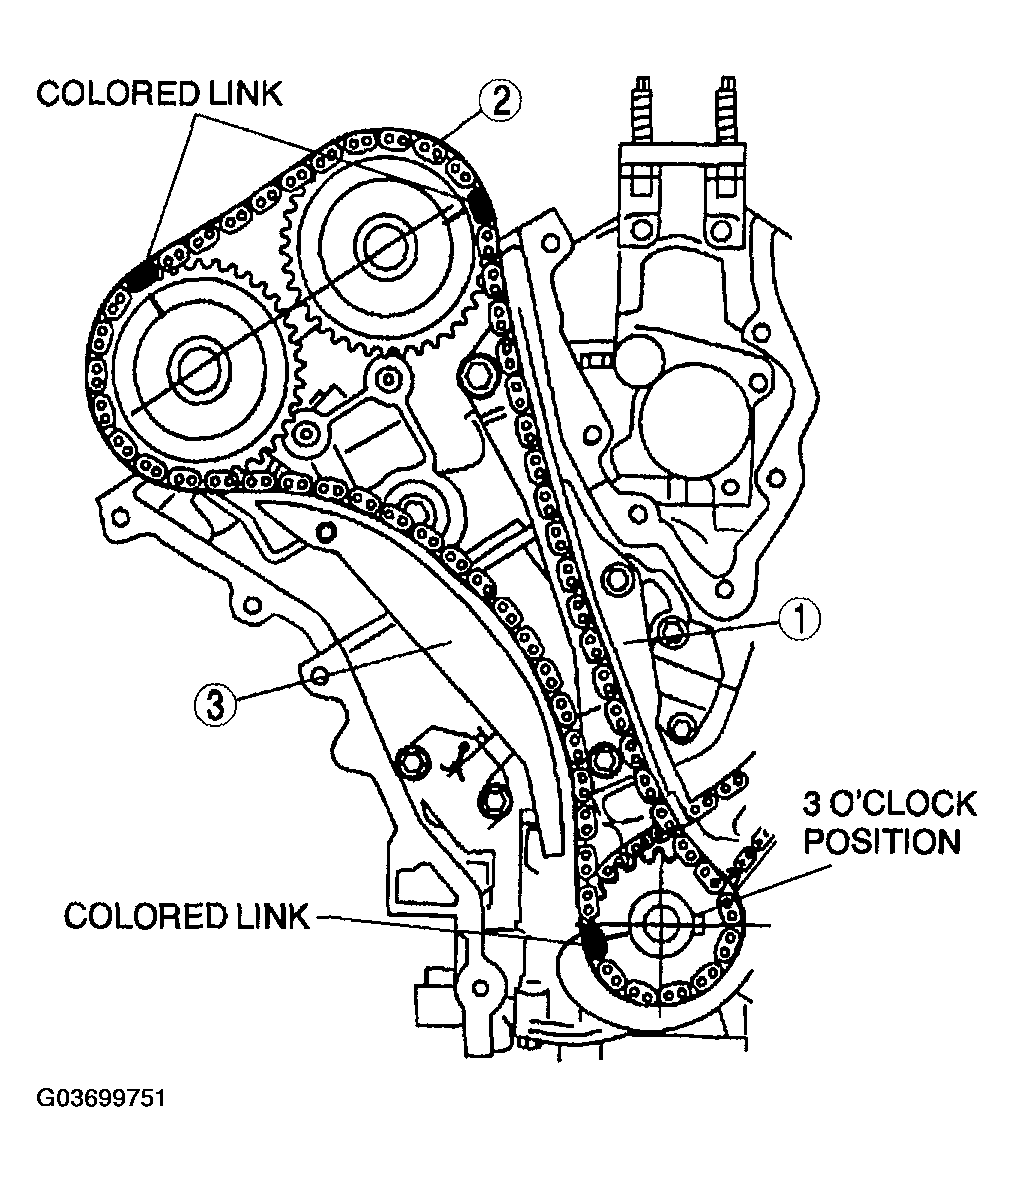
- Install the timing chain (RH) by aligning the colored links on the timing chain (RH) with the marks on the timing sprockets.
 Courtesy of MAZDA MOTORS CORP.
- Install the timing chain (RH) in the following order.
- Chain guide
- Timing chain
- Tensioner arm
NOTE:
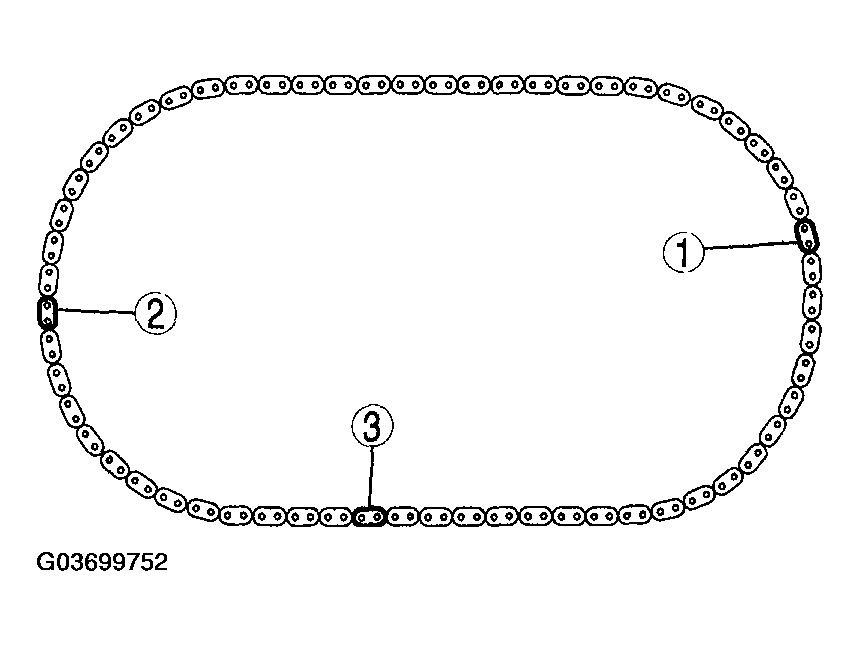
- If timing marks in the timing chains are not evident, use a permanent-type marker to mark the crankshaft and camshaft timing marks on the timing chain.
- Mark any link to use as the crankshaft timing mark.
- Count 29 links from the crankshaft timing mark and mark as the exhaust camshaft sprocket timing mark.
- Continue counting to 42 mark the link as the intake camshaft sprocket timing mark.
CAUTION:
- Install the camshaft journal thrust cap last, or damage to the thrust cap may occur.
 Courtesy of MAZDA MOTORS CORP.
 Courtesy of MAZDA MOTORS CORP.
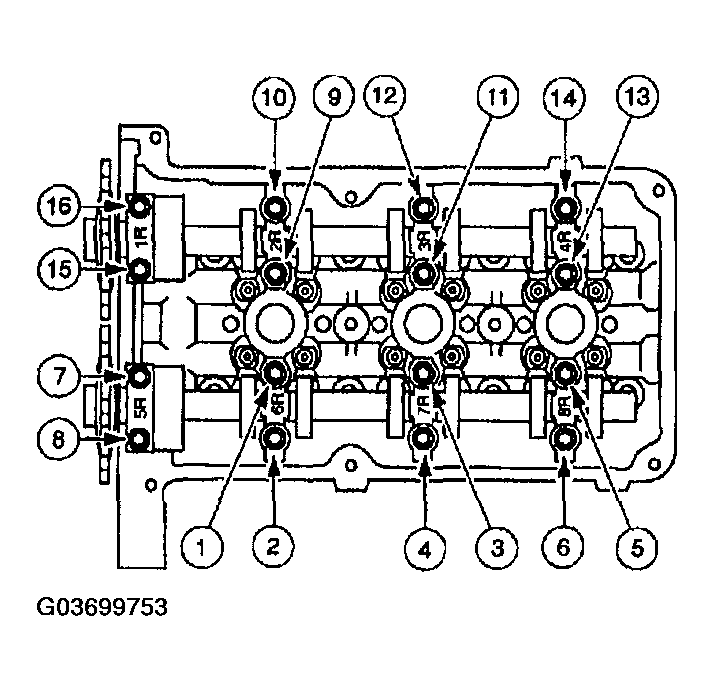
- Tighten the bearing caps evenly in several passes in the order shown.
NOTE:
- After adjusting the camshaft end play using the thrust caps 1R and 5R, tighten the other bearing caps.
 Courtesy of MAZDA MOTORS CORP.