Drive Gear Case Component Disassembly Procedure
- Install the drive gear case component to the SST.
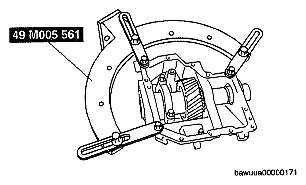 Courtesy of MAZDA MOTORS CORP.
- Tap the drive gear shaft using a suitable rod and hammer.
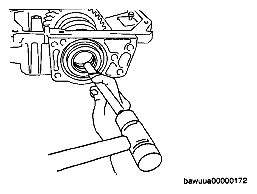 Courtesy of MAZDA MOTORS CORP.
- Take out the drive gear shaft from the drive gear case.
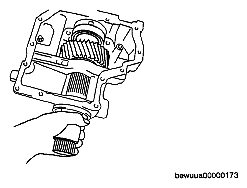 Courtesy of MAZDA MOTORS CORP.
- Make alignment marks on the bearing cap and drive gear case.
- Remove the bearing cap.
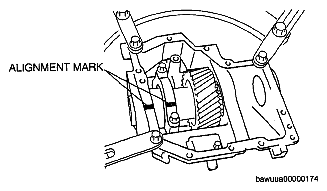 Courtesy of MAZDA MOTORS CORP.
- Insert a flathead screwdriver into spacer notch and remove the adjustment shim.
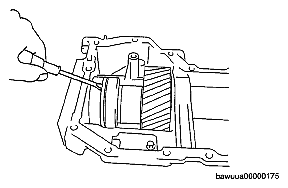 Courtesy of MAZDA MOTORS CORP.
CAUTION:
- Place a rag on the case to protect it from damage.
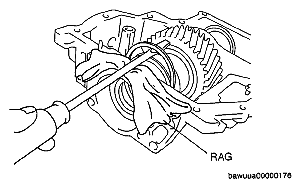 Courtesy of MAZDA MOTORS CORP.
- Remove the spacer.
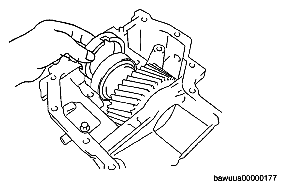 Courtesy of MAZDA MOTORS CORP.
- Remove the drive gear component.
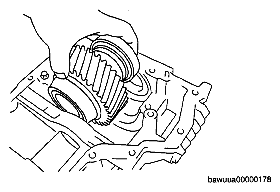 Courtesy of MAZDA MOTORS CORP.
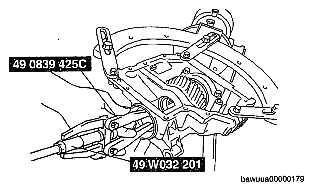
- Using the SST
, remove the oil seal (LH outer).
 Courtesy of MAZDA MOTORS CORP.
- Using the SST
, remove the oil seal (LH inner).
Courtesy of MAZDA MOTORS CORP.
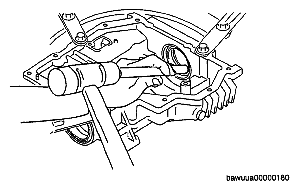
- Using a suitable rod and hammer, remove the oil seal (RH outer).
 Courtesy of MAZDA MOTORS CORP.
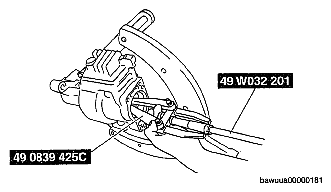
- Using the SST
, remove the oil seal (RH inner).
 Courtesy of MAZDA MOTORS CORP.
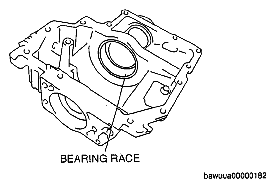
- Using the SST
, remove the bearing outer race (LH).
 Courtesy of MAZDA MOTORS CORP.
- Install the SSTs
(49 W032 202, 49 S019 005).
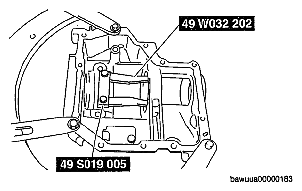 Courtesy of MAZDA MOTORS CORP.
- Connect the SST
(49 T032 316,49 T032 317) to the SSTs
(49 W032 202, 49 S019 005).
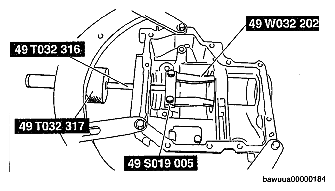 Courtesy of MAZDA MOTORS CORP.
- Remove the baffle plate.
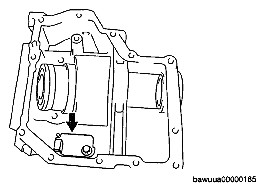 Courtesy of MAZDA MOTORS CORP.
- Using the SST
, remove the bearing (RH).
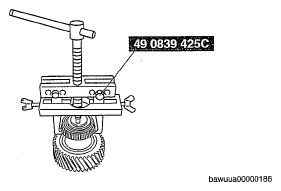 Courtesy of MAZDA MOTORS CORP.
- Using a flathead screwdriver, deform the bearing roller guide (LH) and remove it.
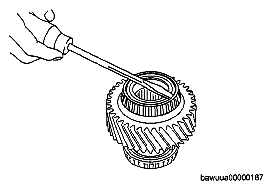 Courtesy of MAZDA MOTORS CORP.
- Using the SST
, remove the bearing inner race (LH).
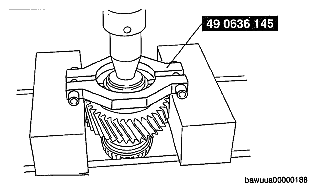 Courtesy of MAZDA MOTORS CORP.