Transaxle Removal: Removal
- Remove the battery tray.
 Courtesy of MAZDA MOTORS CORP.
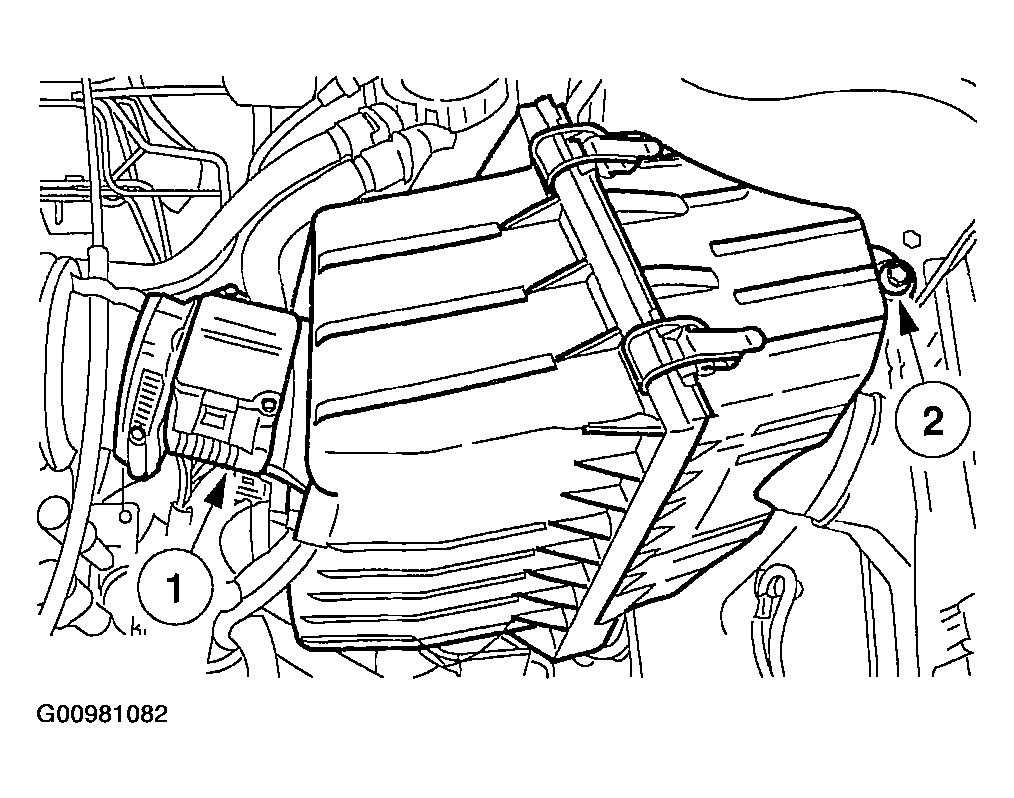
- Remove the engine air cleaner housing bolt.
- Disconnect the mass air flow/ intake air temperature sensor electrical connector.
- Remove the air cleaner housing bolt.
 Courtesy of MAZDA MOTORS CORP.
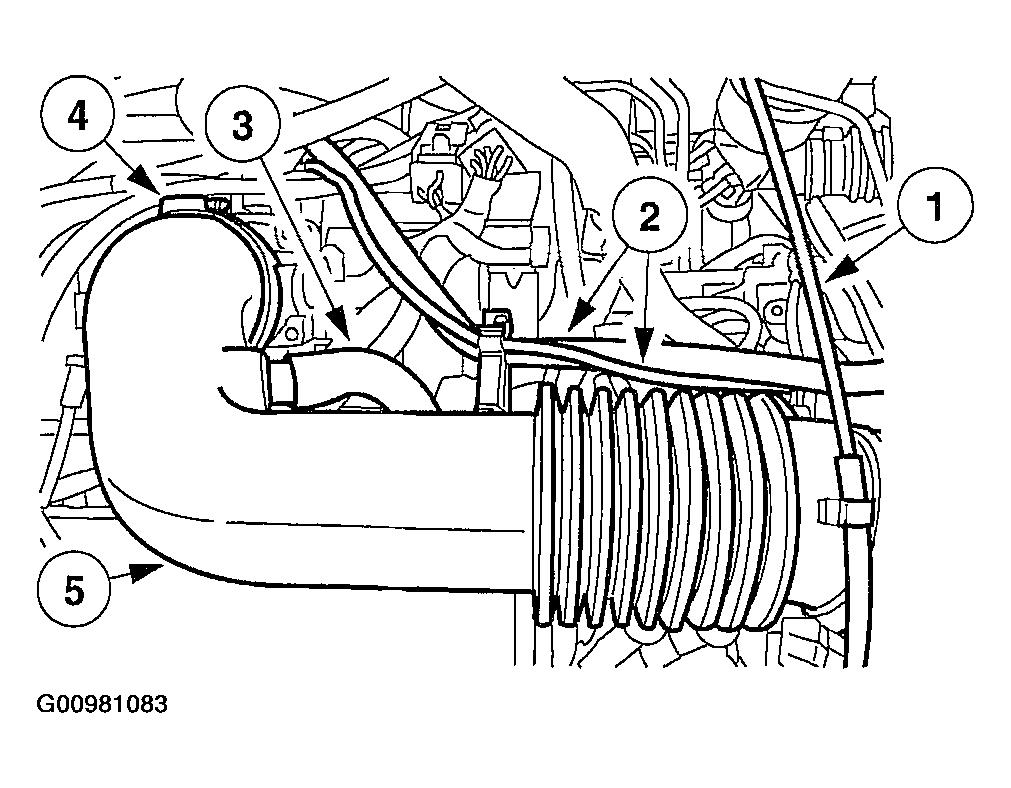
- Remove the engine air cleaner housing and the air cleaner outlet tube.
- Disconnect the accelerator cable from the air cleaner outlet tube.
- Disconnect the emission management tube and hose.
- Disconnect the crankcase ventilation hose.
- Loosen the air cleaner outlet tube clamp.
- Remove the engine air cleaner housing and the air cleaner outlet tube.
 Courtesy of MAZDA MOTORS CORP.
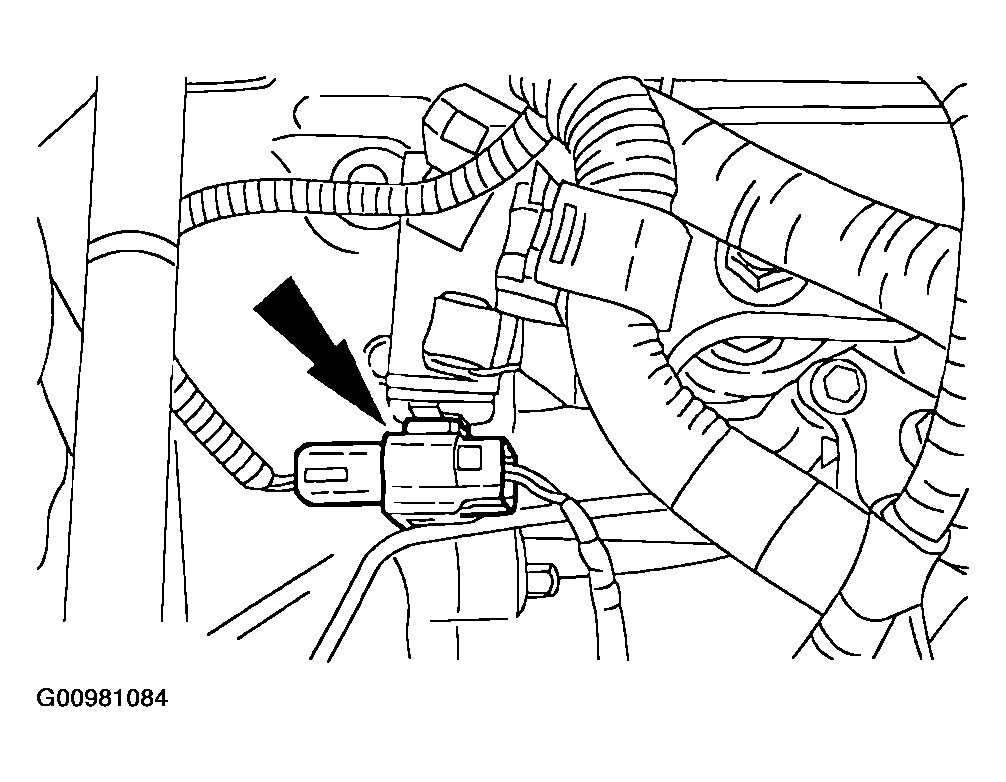
- Disconnect the reversing lamp switch electrical connector.
 Courtesy of MAZDA MOTORS CORP.
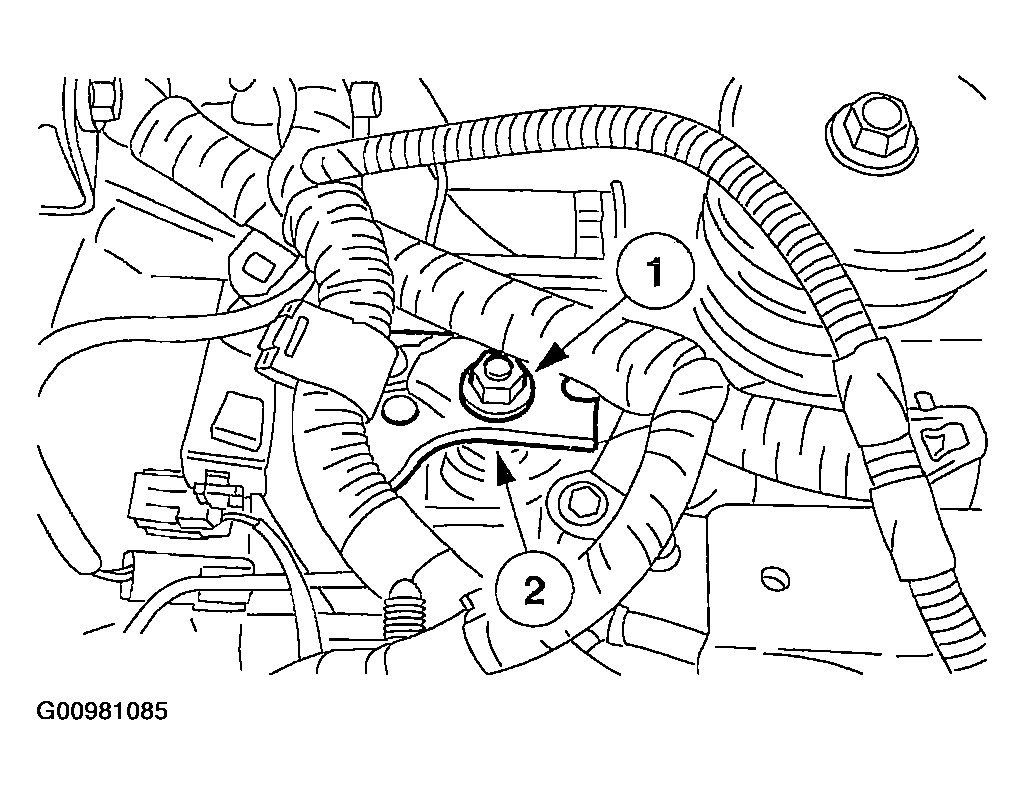
- Position the front wire harness bracket aside.
- Remove the nut.
- Position the front wire harness bracket aside.
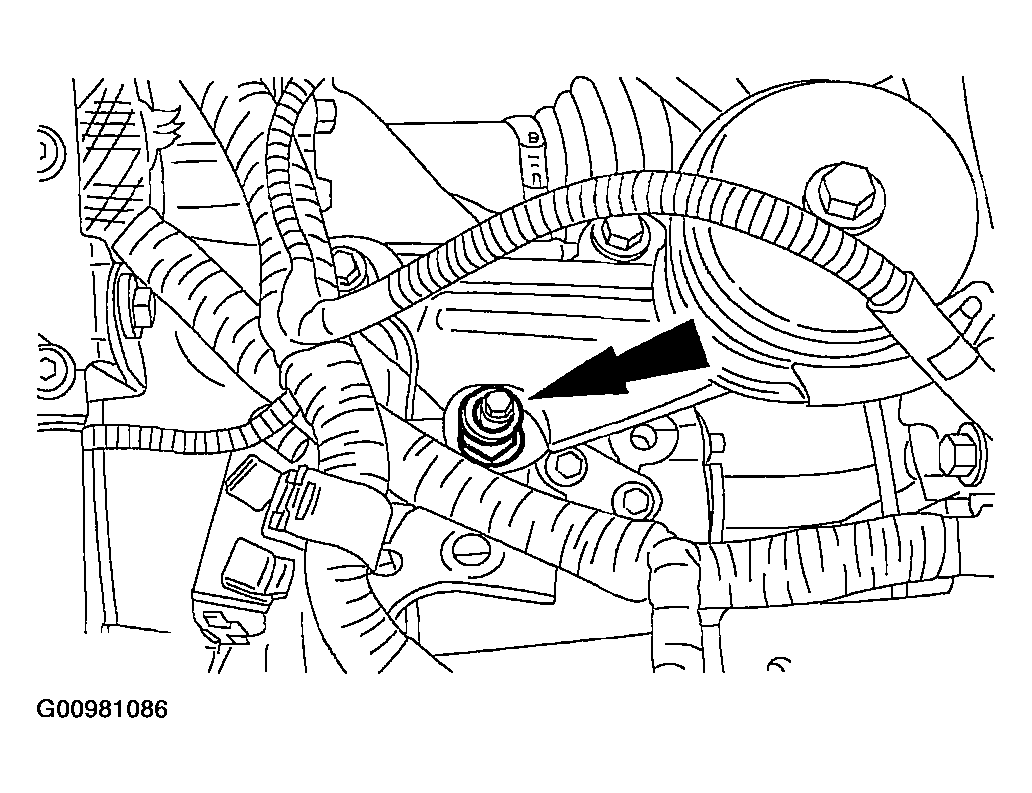 Courtesy of MAZDA MOTORS CORP.
- Remove the front wire harness bracket spacer.
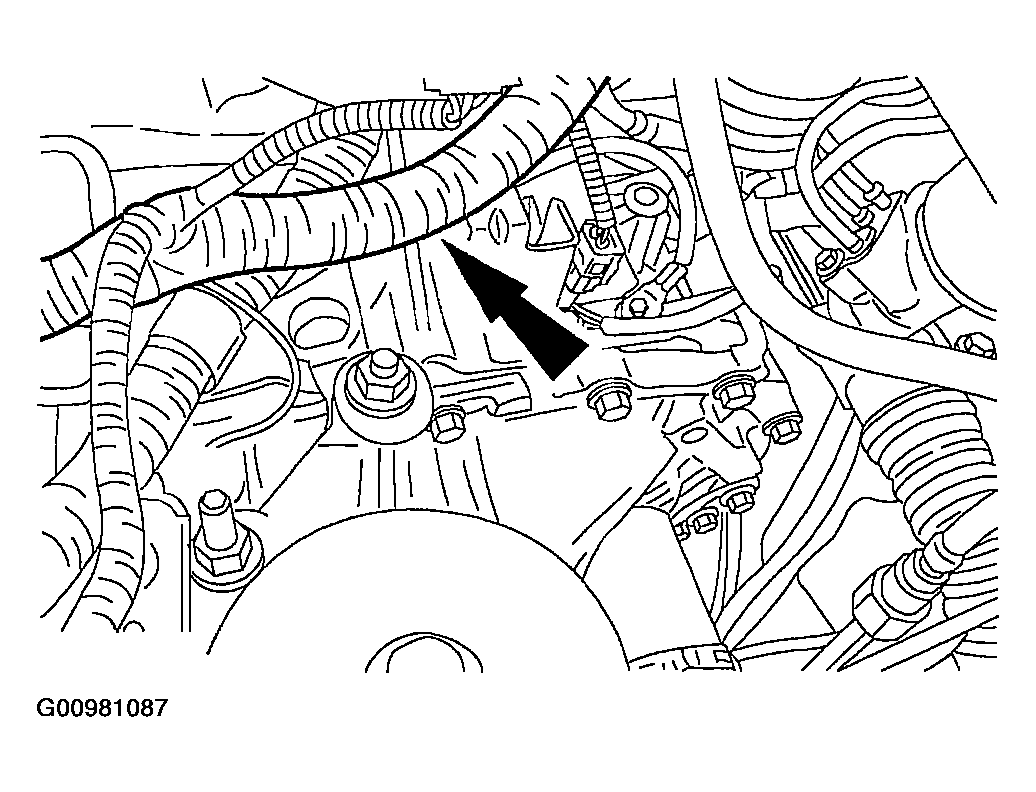 Courtesy of MAZDA MOTORS CORP.
- Disconnect the wire harness from the rear wire harness bracket.
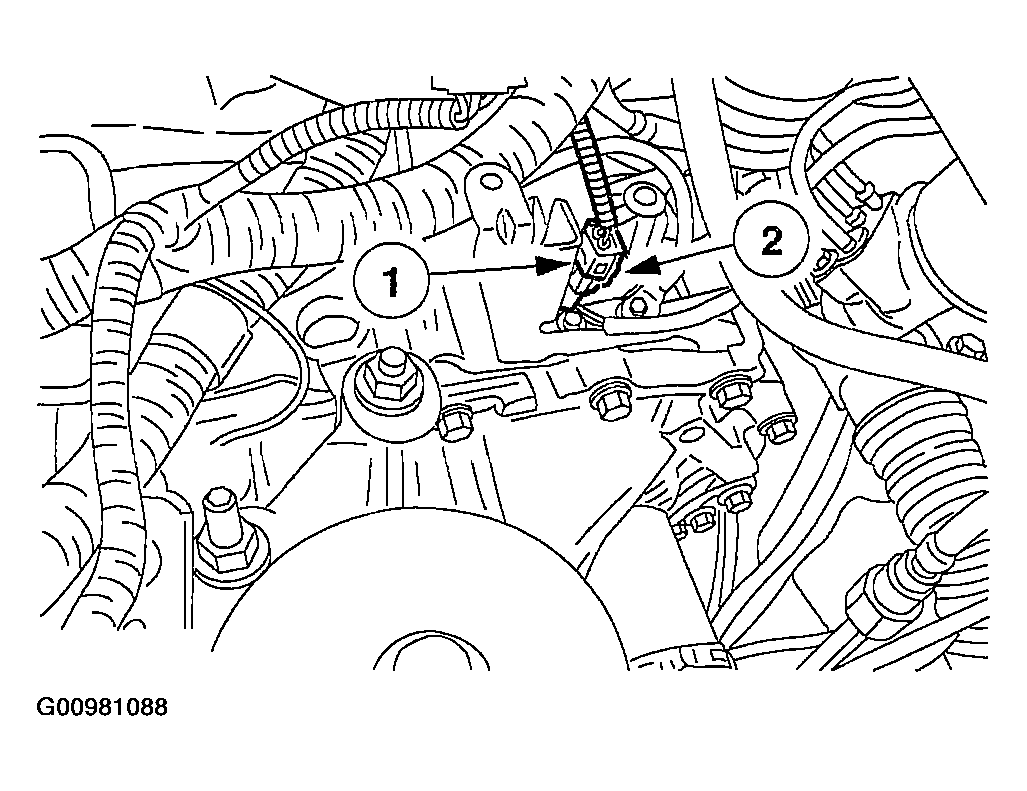 Courtesy of MAZDA MOTORS CORP.
- Disconnect the park/neutral position (PNP) electrical connector.
- Disconnect the electrical connector from the rear wire harness bracket.
- Disconnect the PNP electrical connector.
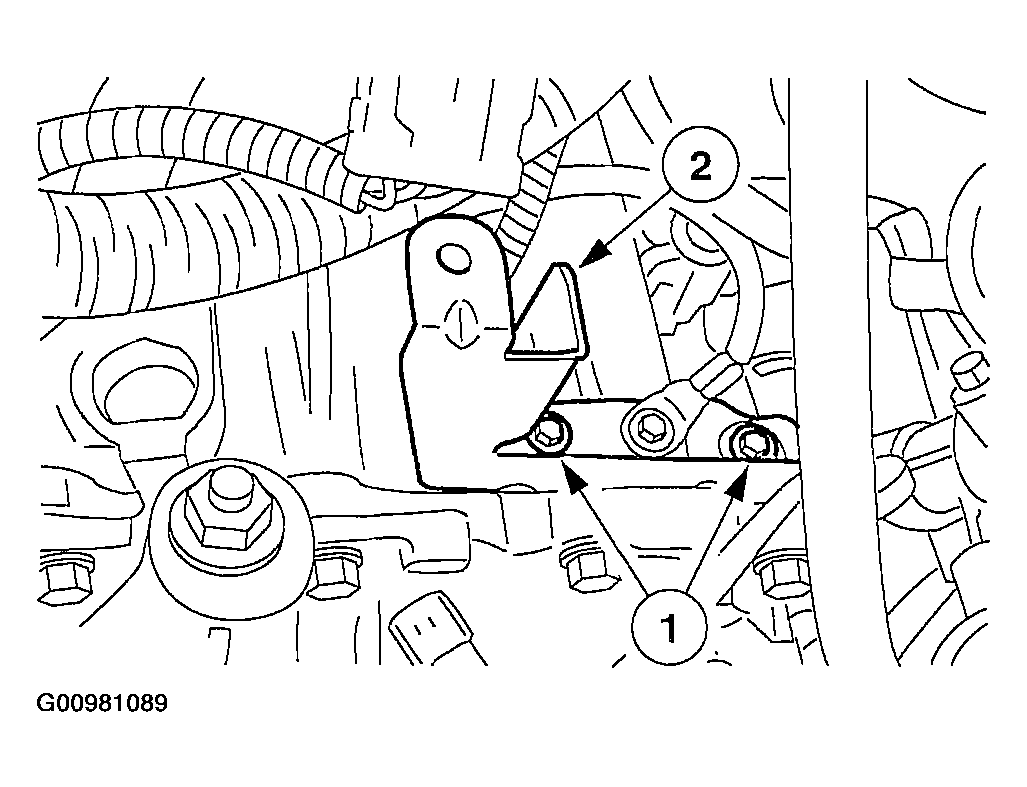 Courtesy of MAZDA MOTORS CORP.
- Position the rear wire harness bracket aside.
- Remove the bolts.
- Position the rear wire harness bracket aside.
 Courtesy of MAZDA MOTORS CORP.
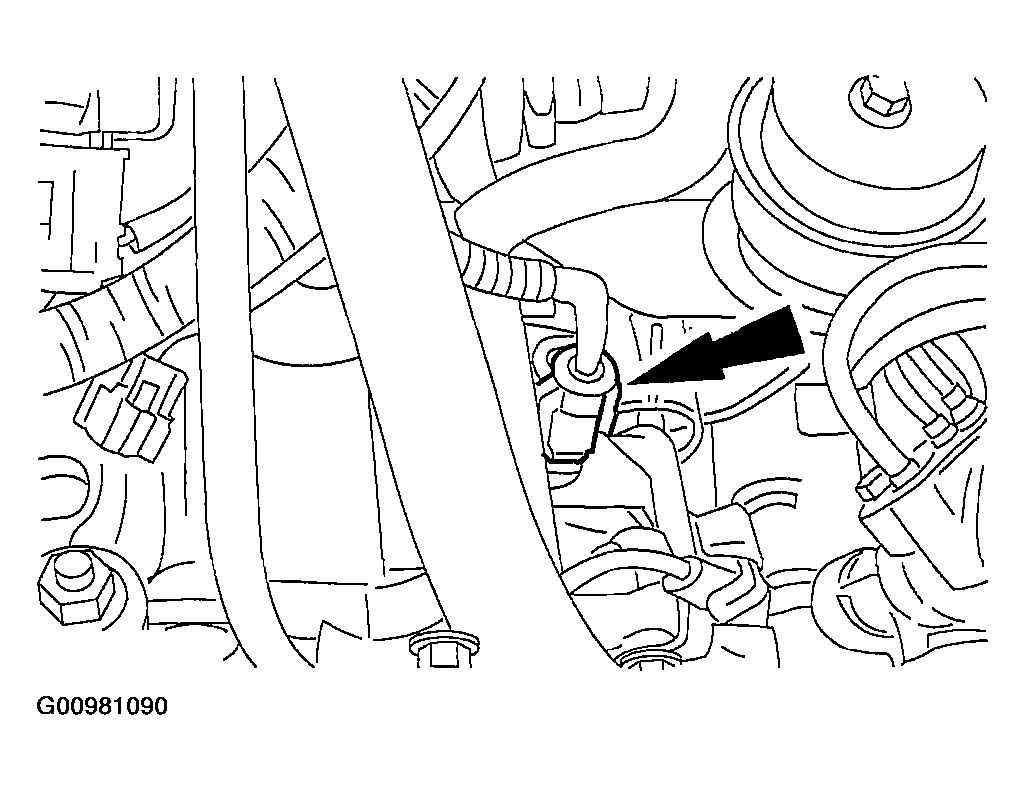
- Disconnect the vehicle speed sensor (VSS) electrical connector.
 Courtesy of MAZDA MOTORS CORP.
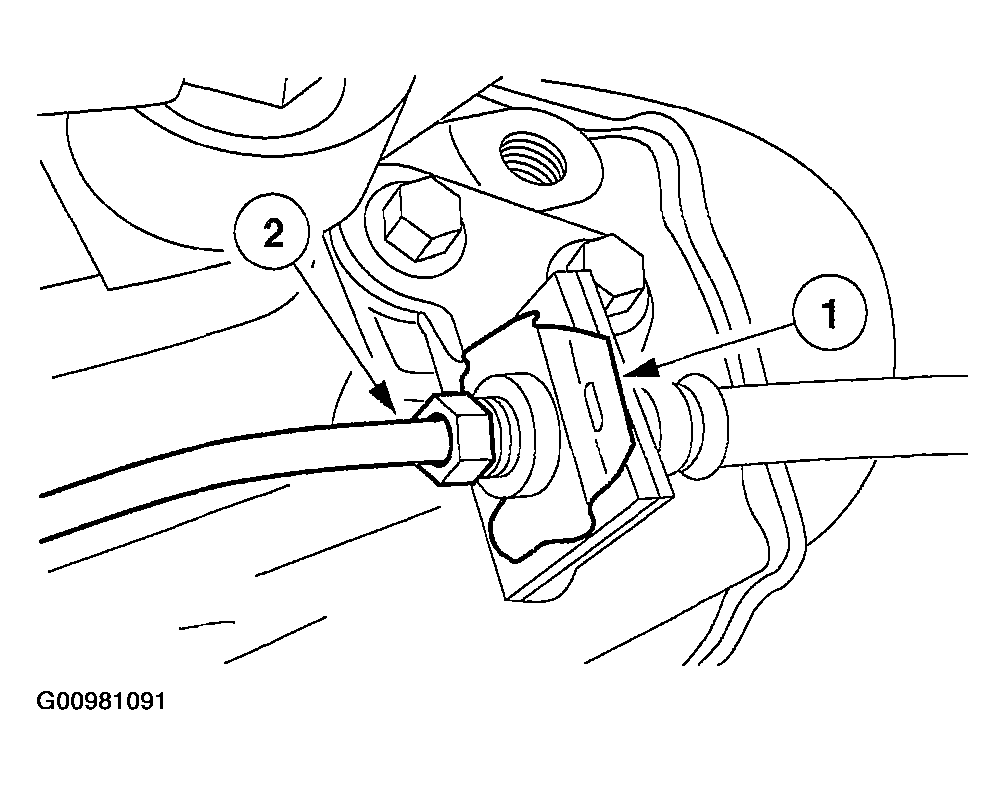
- Disconnect the clutch slave cylinder line from the bracket.
- Remove the clip.
- Disconnect the clutch slave cylinder line from the bracket.
 Courtesy of MAZDA MOTORS CORP.
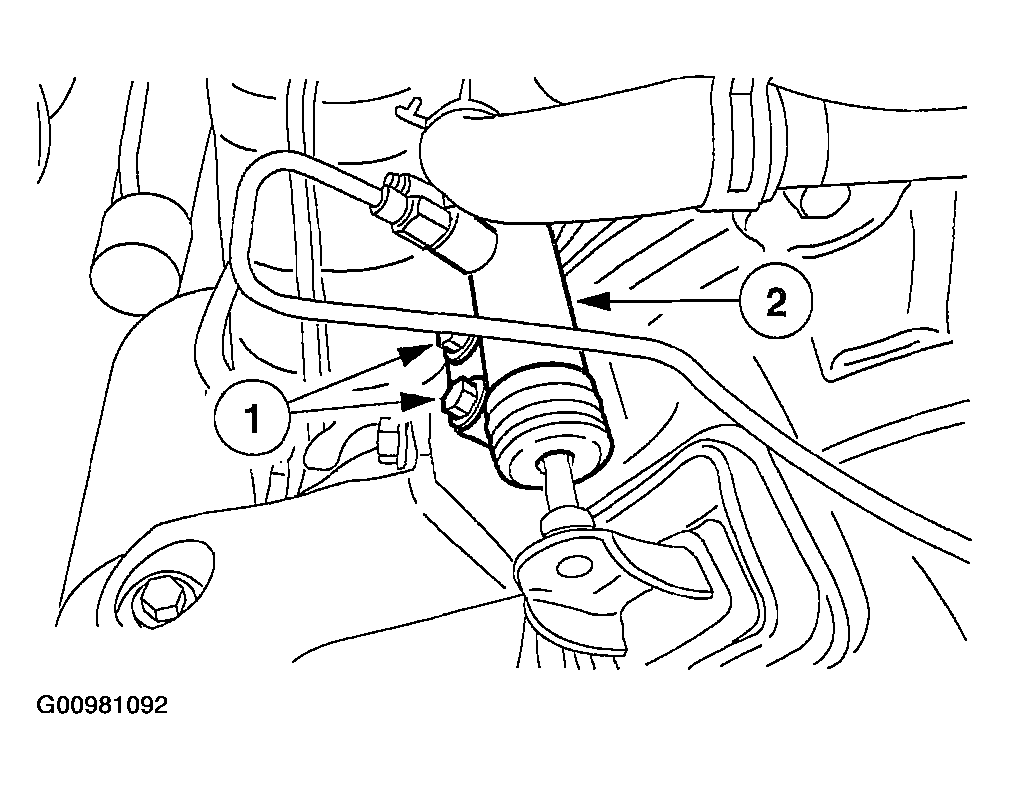
- Position the clutch slave cylinder aside.
- Remove the bolts.
- Position the clutch slave cylinder aside.
 Courtesy of MAZDA MOTORS CORP.
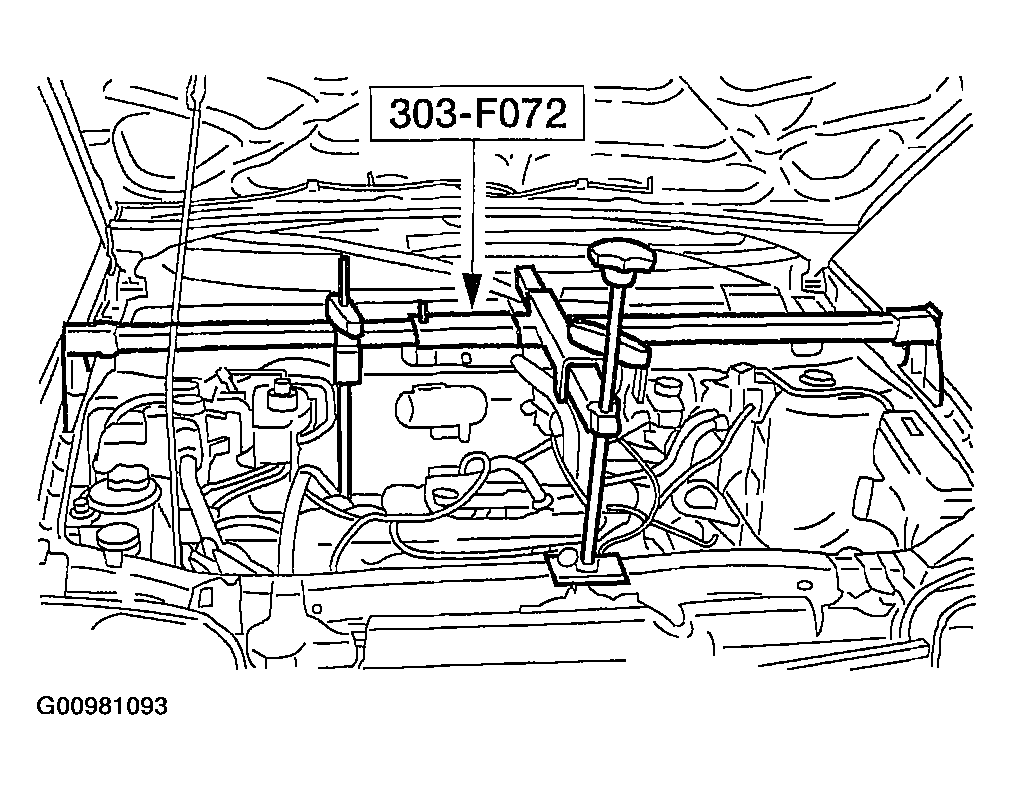
- Using the special tool, support the engine.
 Courtesy of MAZDA MOTORS CORP.
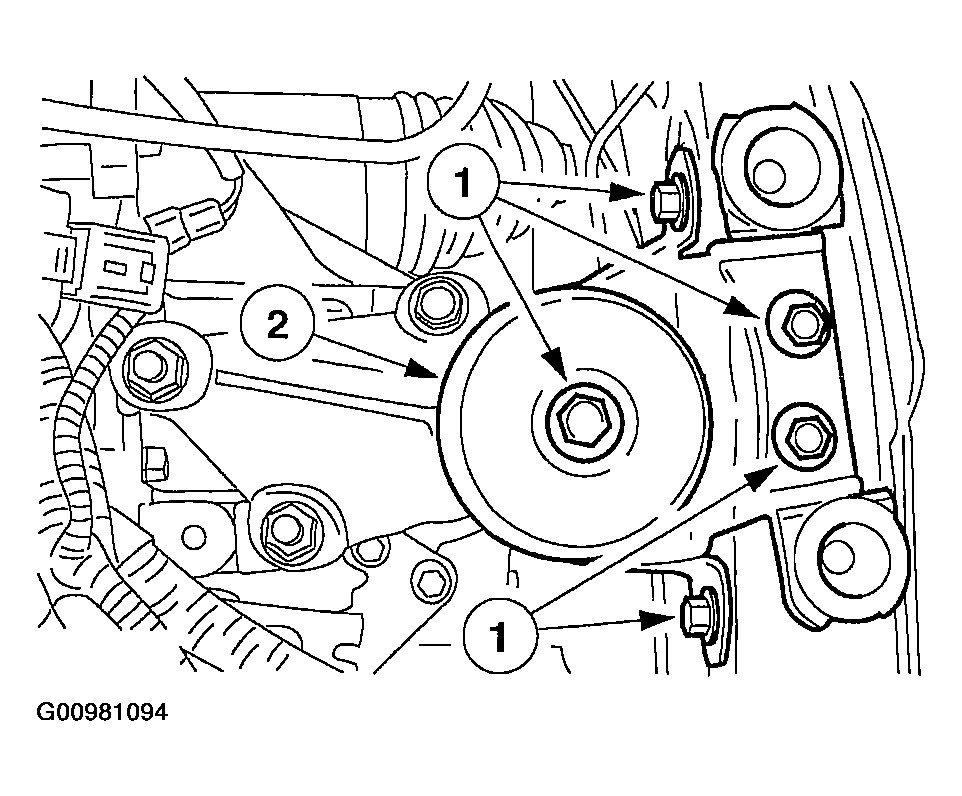
- Remove the LH transaxle support insulator.
- Remove the five bolts.
- Remove the LH transaxle support insulator.
 Courtesy of MAZDA MOTORS CORP.
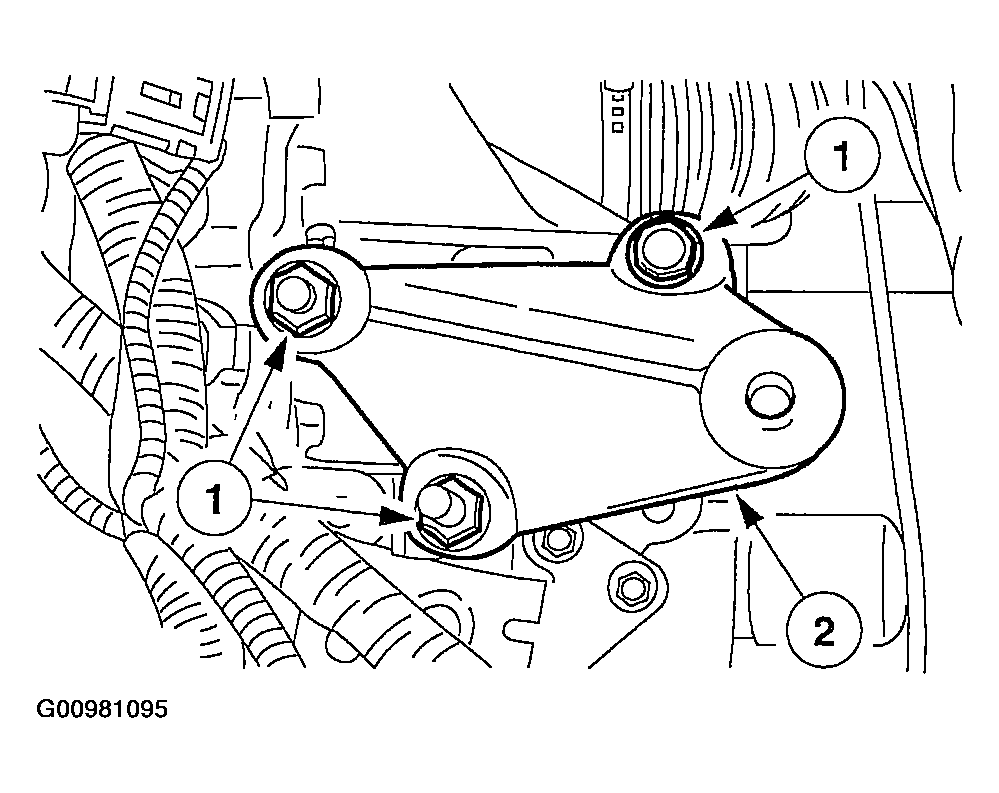
- Remove the LH transaxle support insulator bracket.
- Remove the nuts and the bolt.
- Remove the LH transaxle support insulator bracket.
 Courtesy of MAZDA MOTORS CORP.
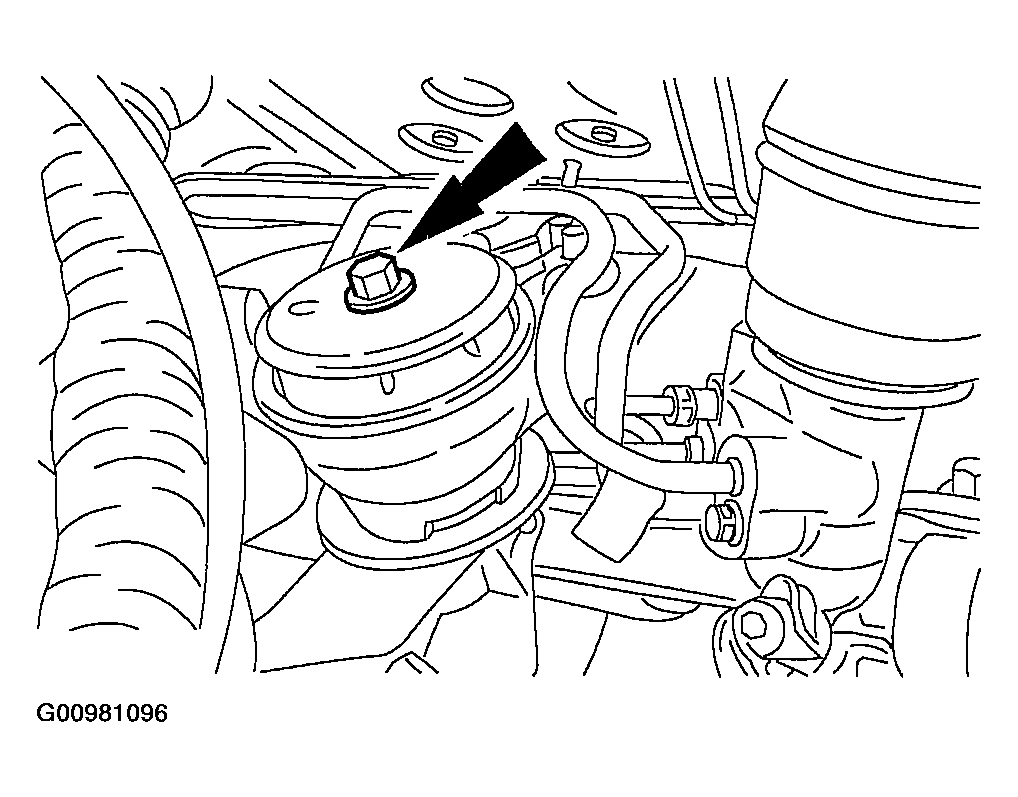
- Remove the rear transaxle support insulator bolt.
 Courtesy of MAZDA MOTORS CORP.
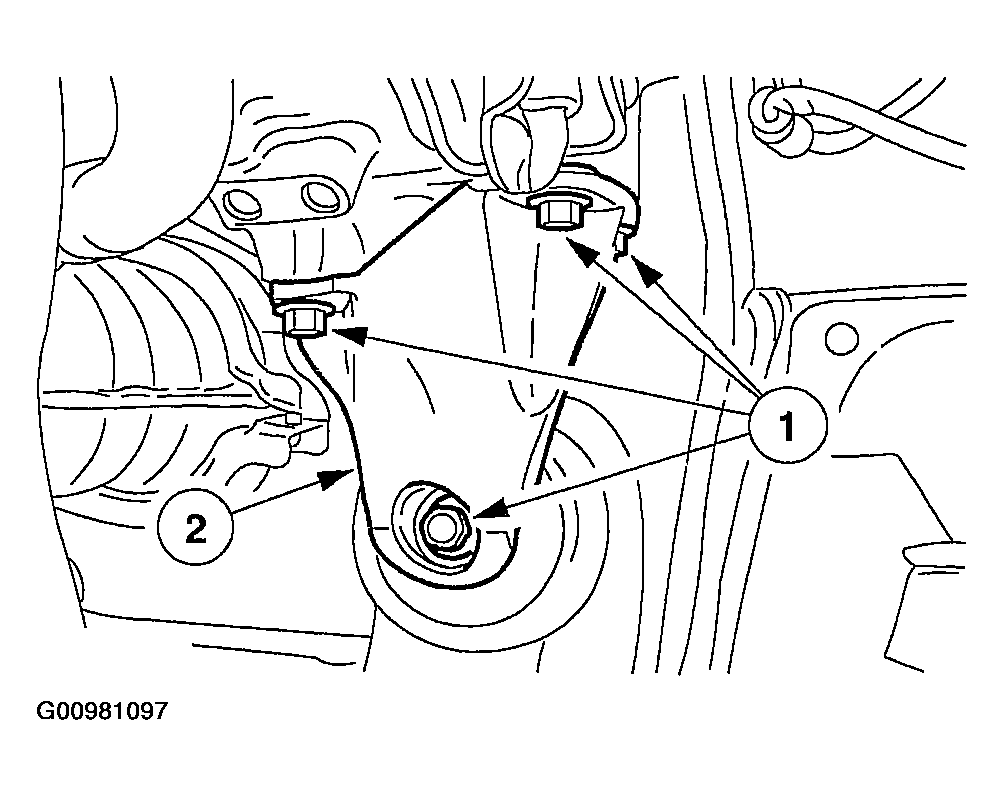
- Remove the front transaxle support insulator and bracket.
- Remove the five bolts.
- Remove the front transaxle support insulator and bracket.
 Courtesy of MAZDA MOTORS CORP.
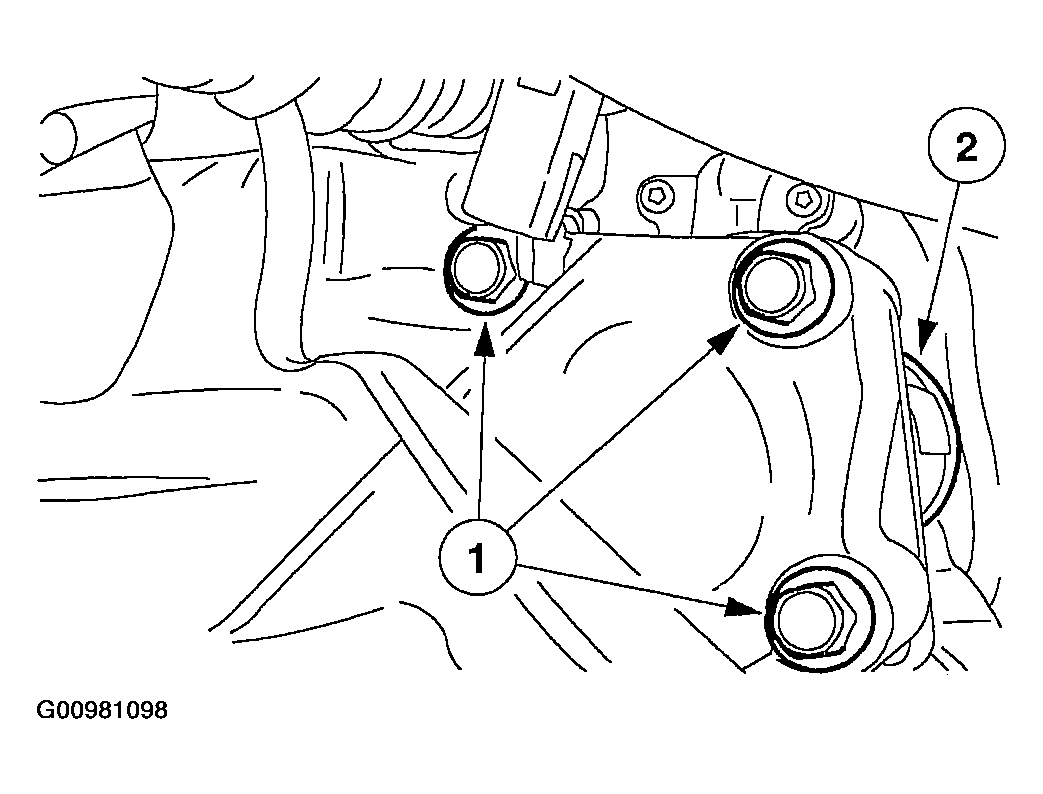
- Position the starter motor aside.
- Remove the bolts.
- Position the starter motor aside.
 Courtesy of MAZDA MOTORS CORP.
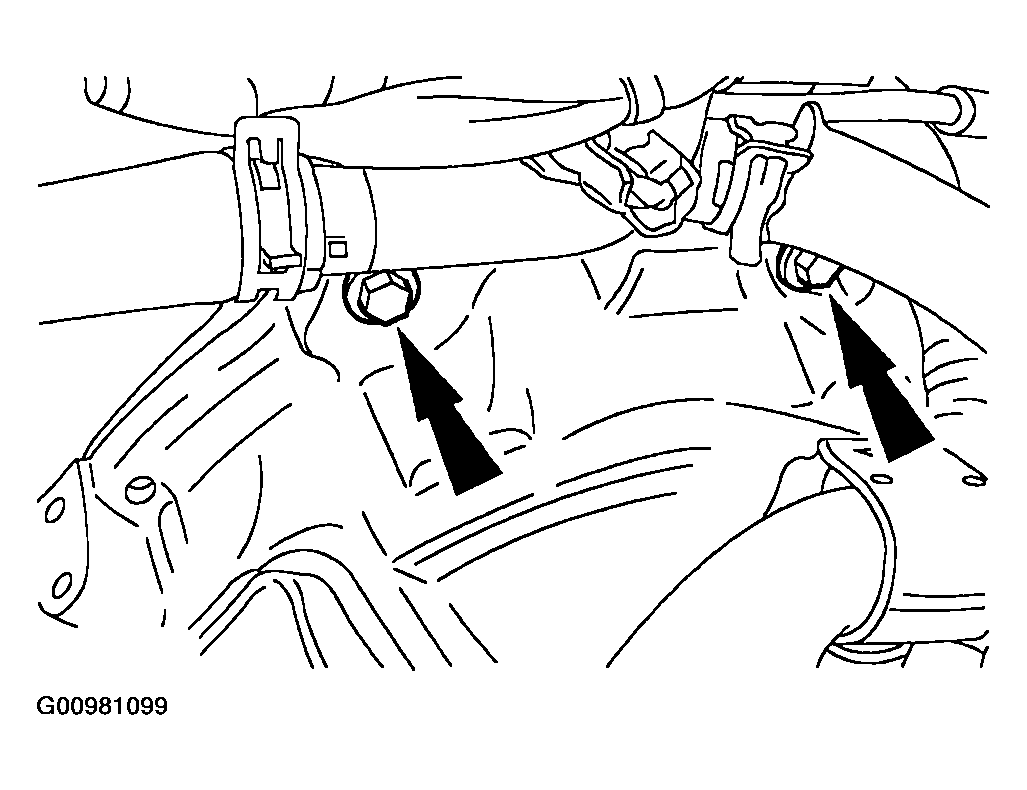
- Remove the top transaxle flywheel housing bolts.
 Courtesy of MAZDA MOTORS CORP.
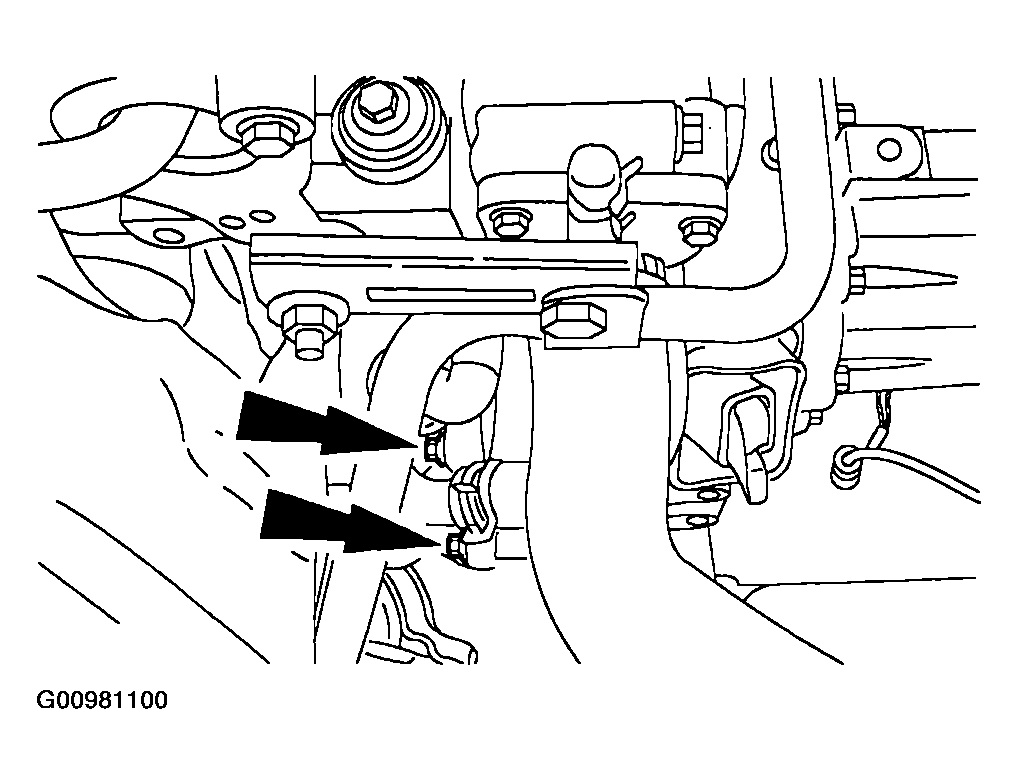
- Remove the front transaxle flywheel housing bolts.
- Remove the LH halfshaft. Refer to HALFSHAFT - FRONT
.
 Courtesy of MAZDA MOTORS CORP.
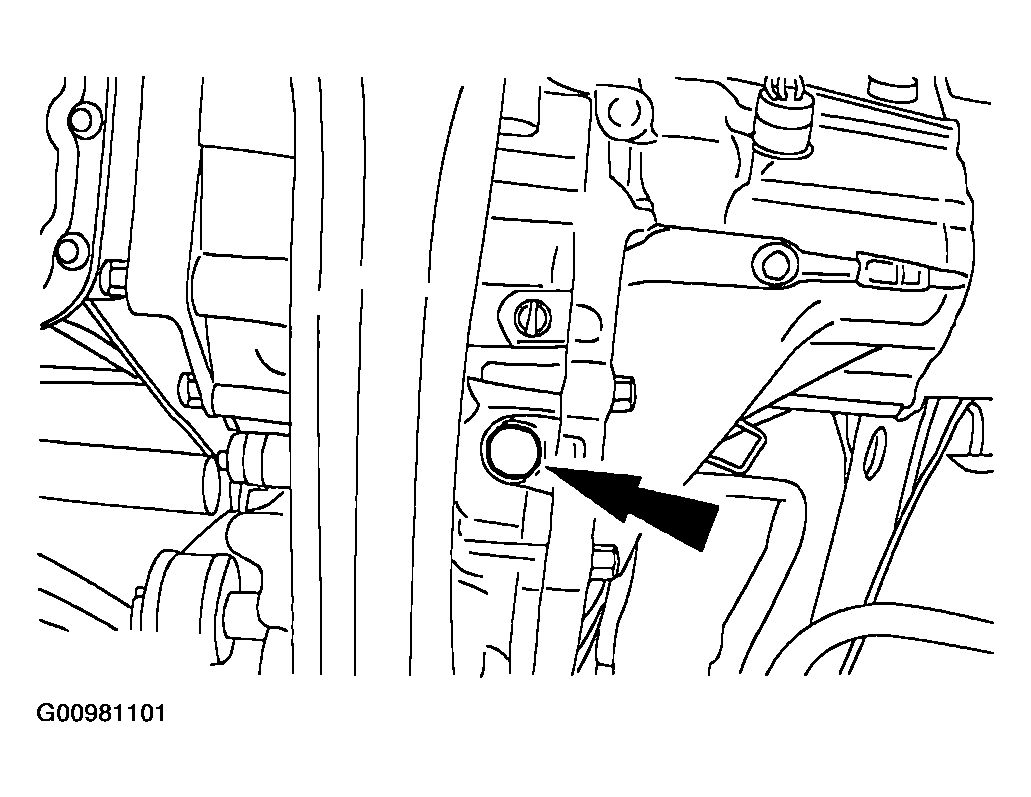
- Drain the transaxle fluid.
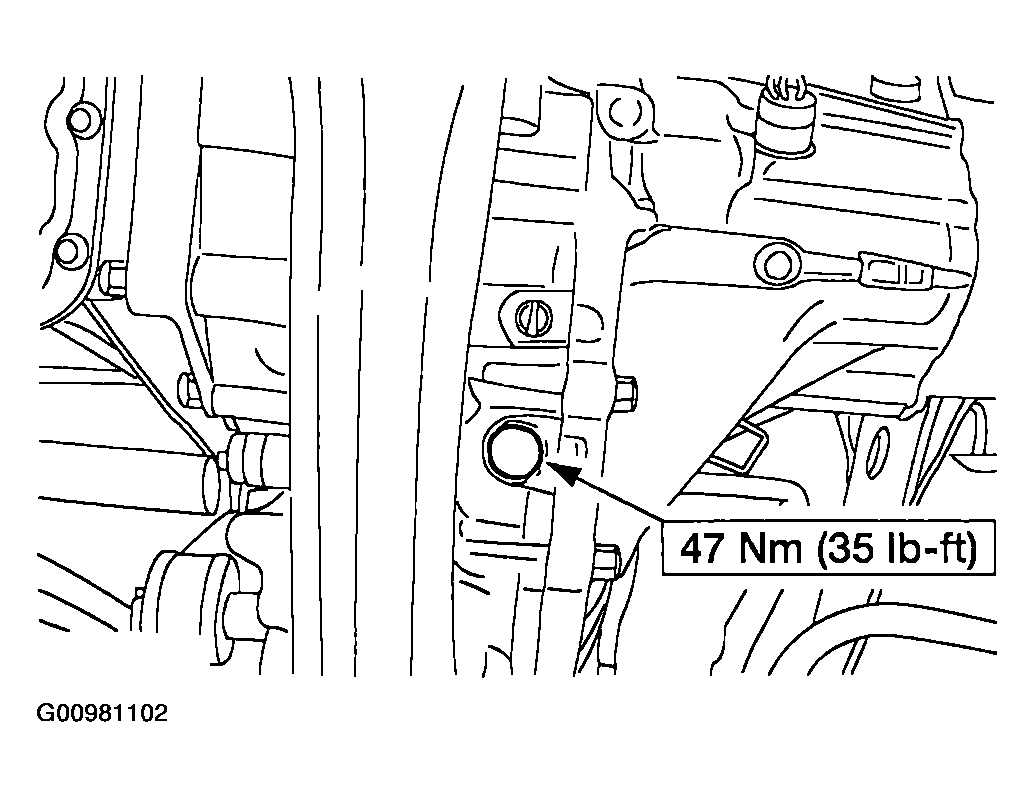 Courtesy of MAZDA MOTORS CORP.
- Install the drain plug.
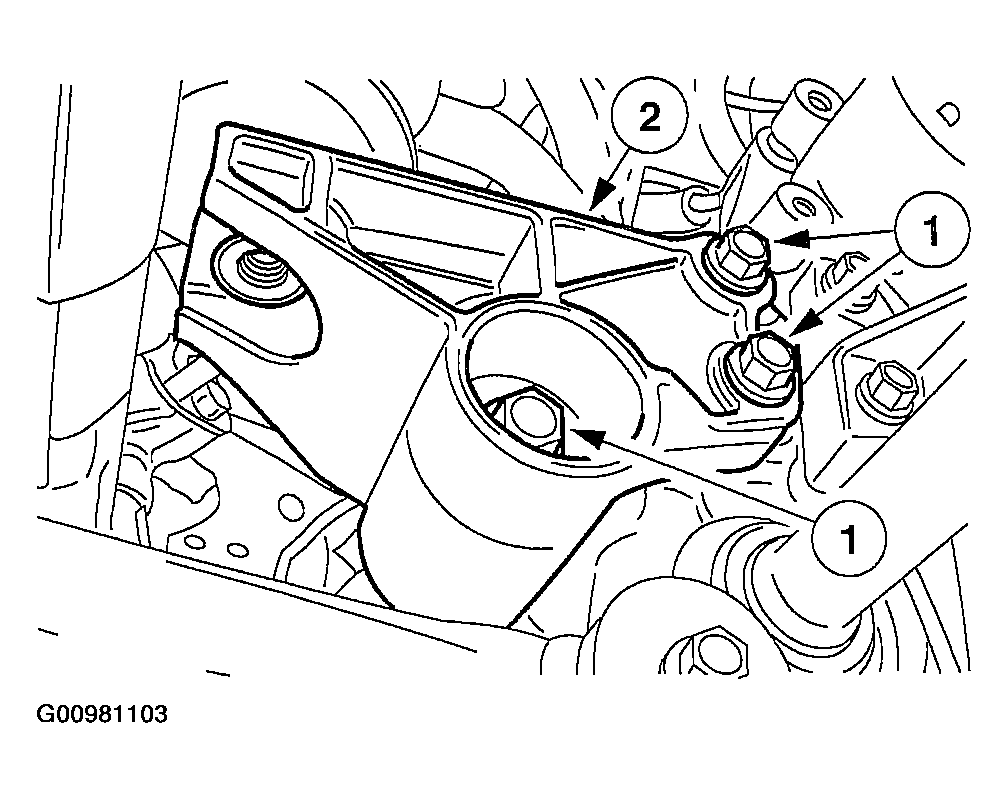 Courtesy of MAZDA MOTORS CORP.
- Remove the rear transaxle support insulator bracket.
- Remove the bolts.
- Remove the rear transaxle support insulator bracket.
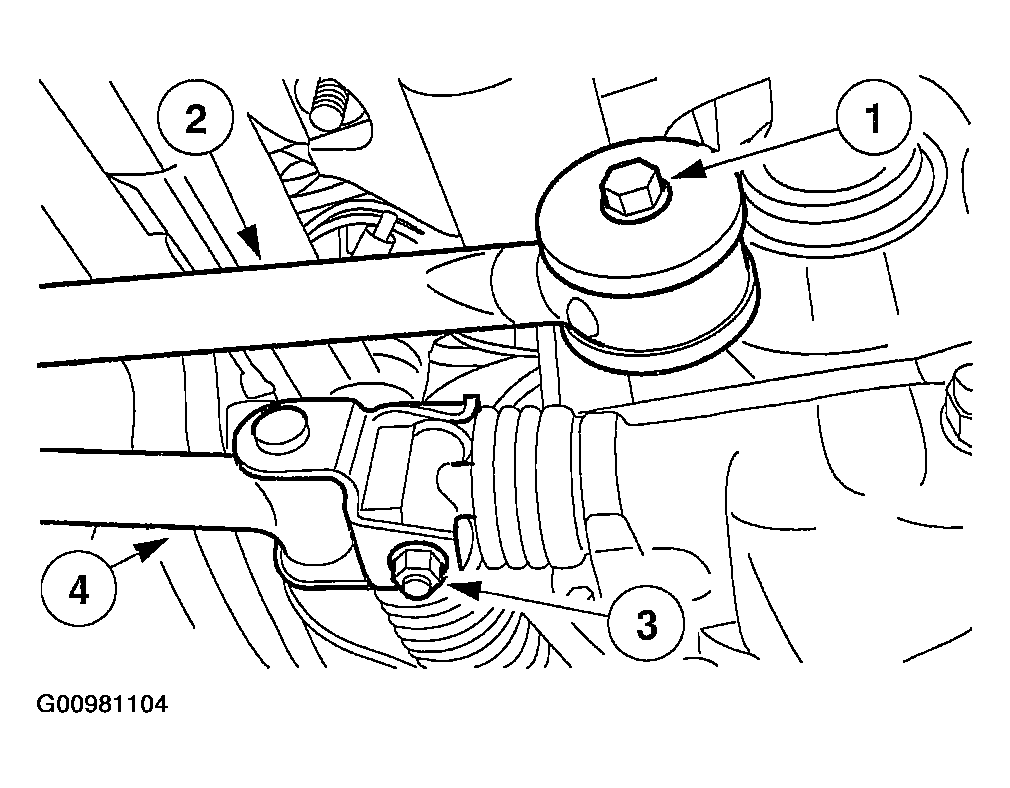 Courtesy of MAZDA MOTORS CORP.
- Disconnect the shifter linkage and stabilizer bar.
- Remove the bolt.
- Position the stabilizer bar aside.
- Remove the bolt and nut.
- Position the shifter linkage aside.
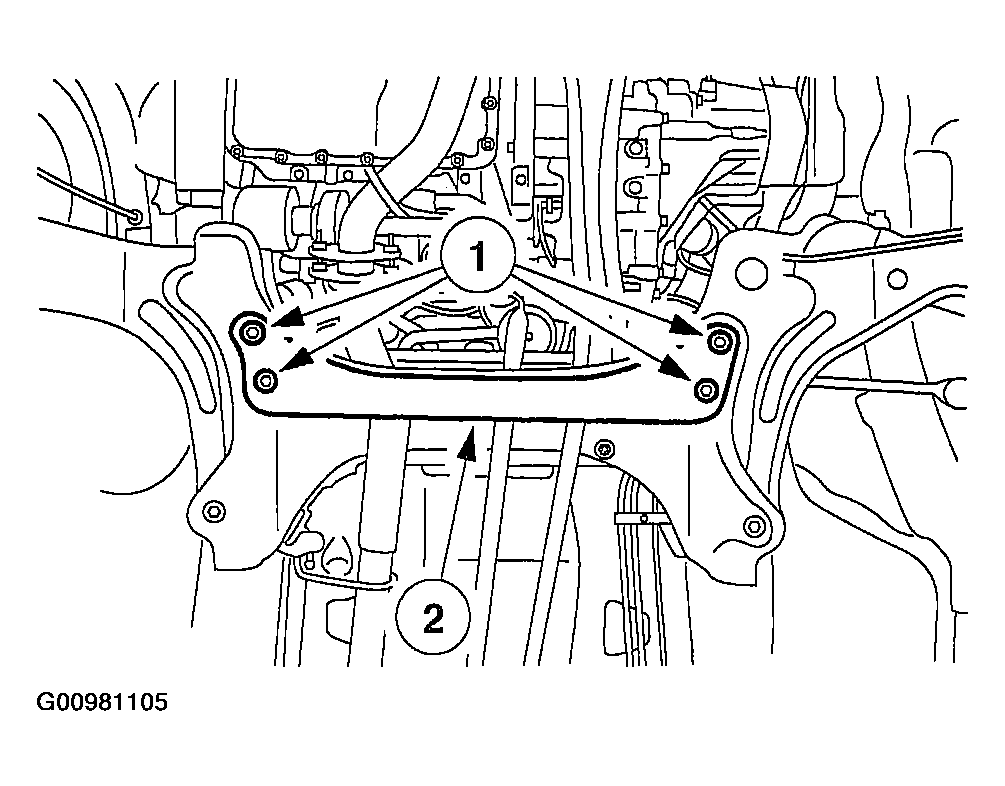 Courtesy of MAZDA MOTORS CORP.
- Remove the transverse crossmember.
- Remove the bolts.
- Remove the transverse crossmember.
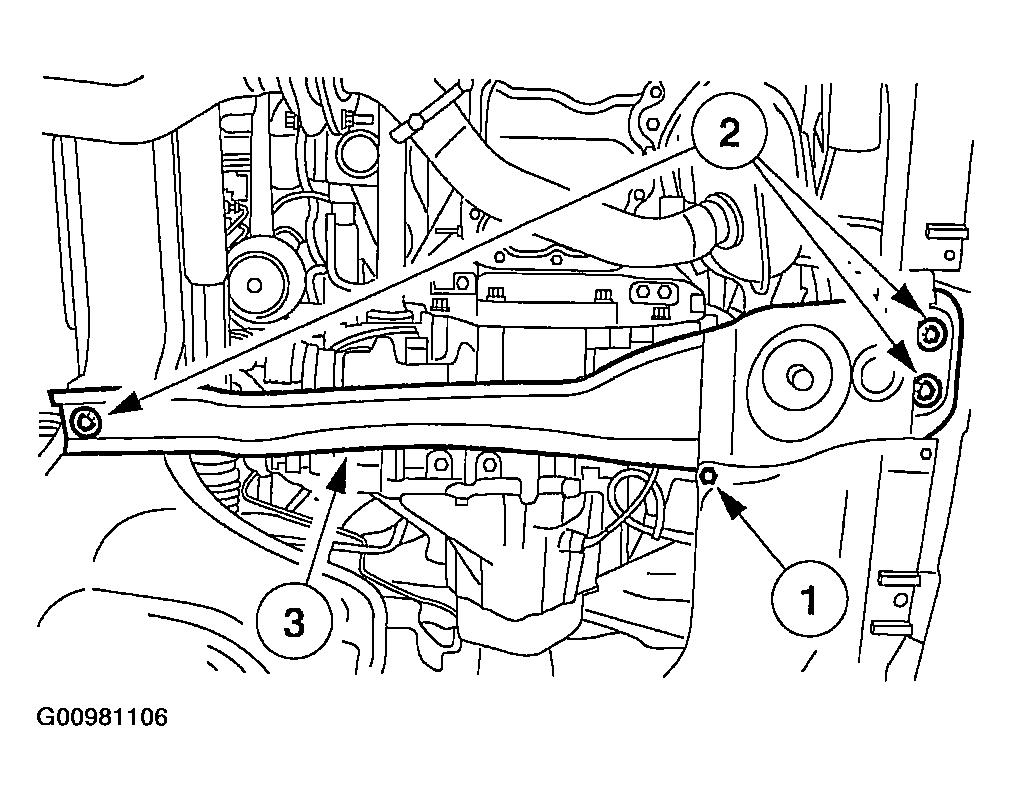 Courtesy of MAZDA MOTORS CORP.
- Remove the front-to-aft crossmember.
- Remove the splash shield screw.
- Remove the bolts and the nut.
- Remove the front-to-aft crossmember.
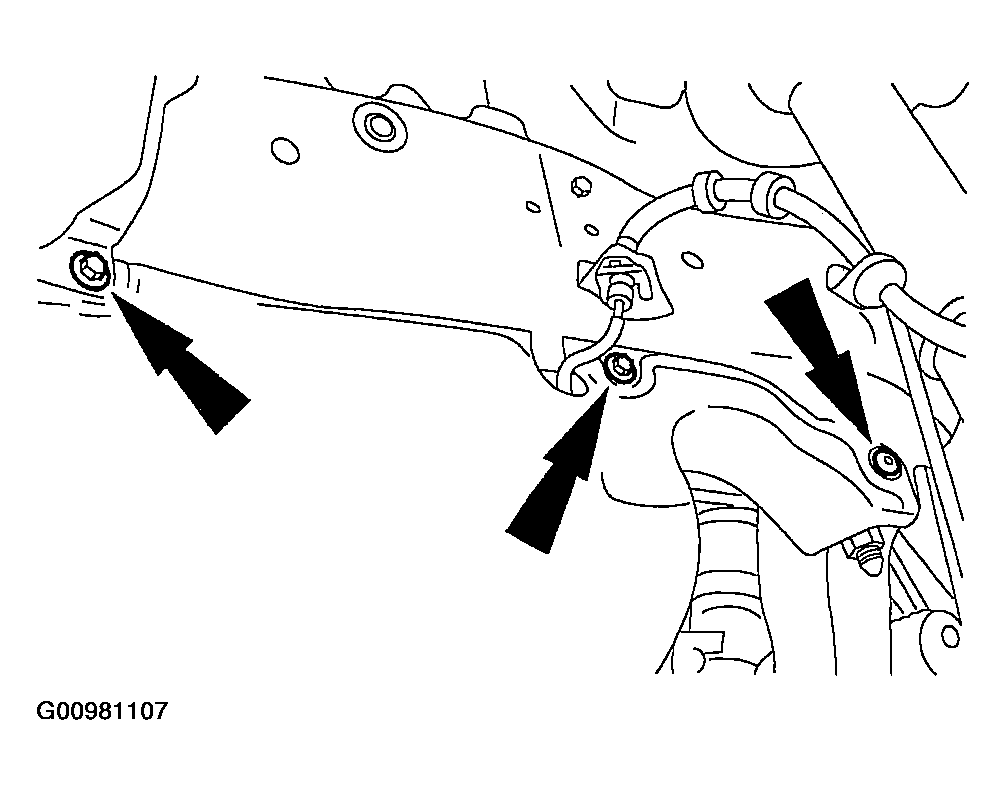 Courtesy of MAZDA MOTORS CORP.
- Remove the LH side splash shield screws and the pin-type retainer.
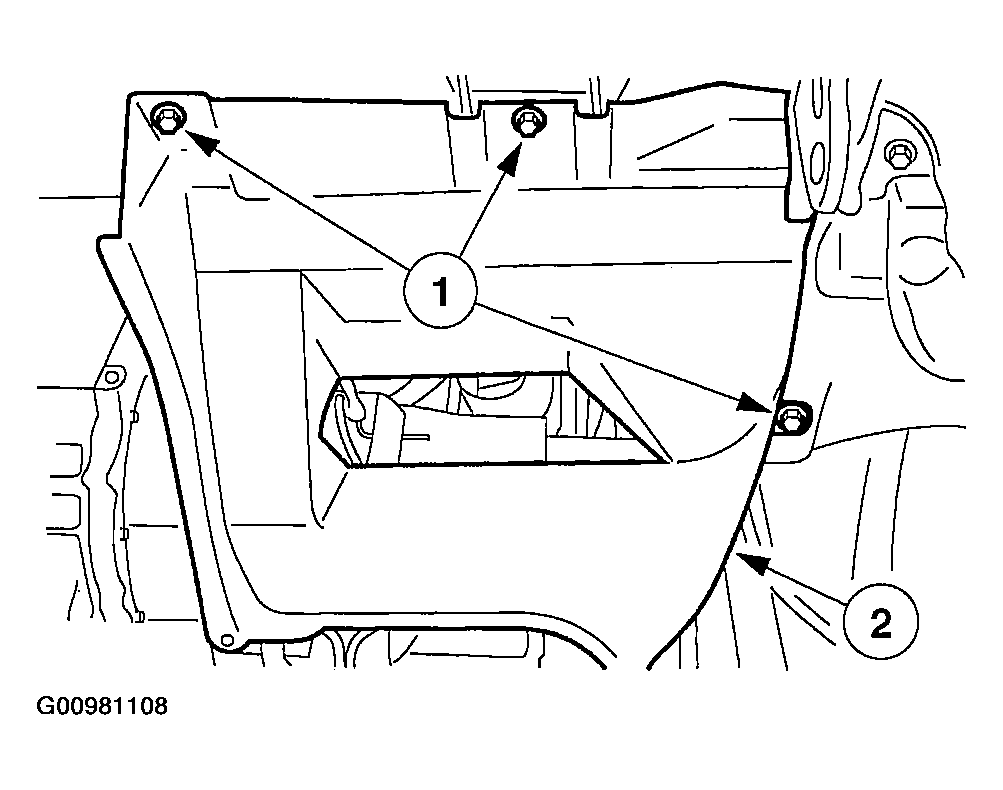 Courtesy of MAZDA MOTORS CORP.
- Remove the LH side splash shield.
- Remove the screws.
- Remove the LH side splash shield.
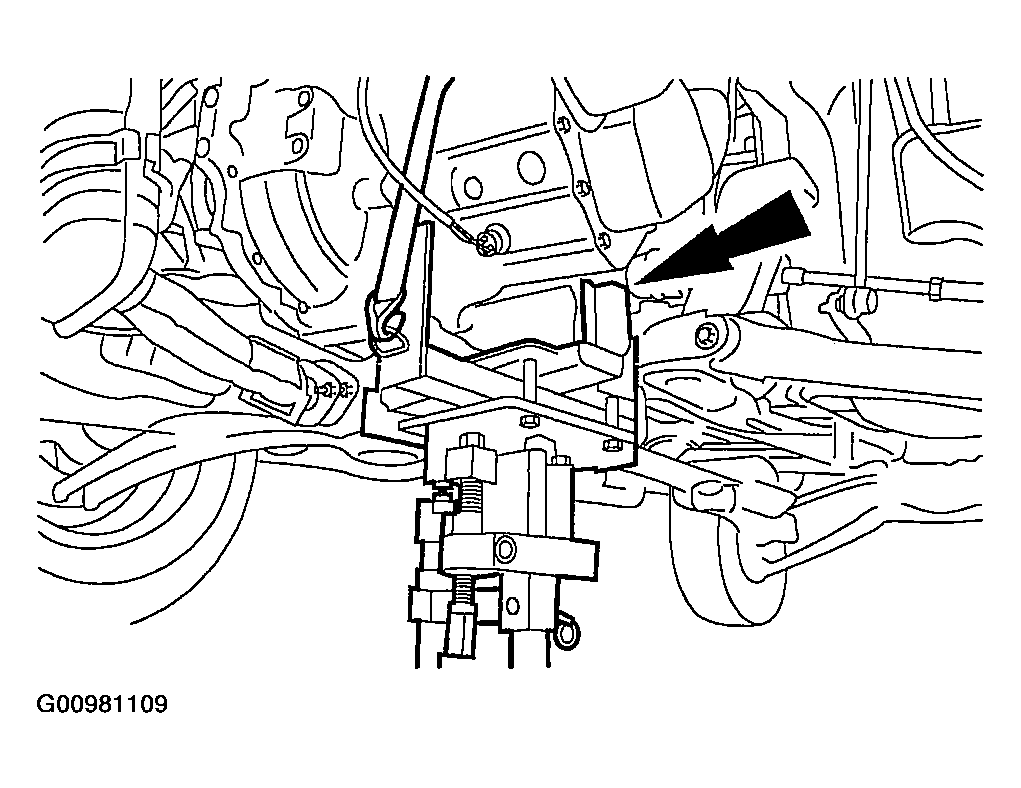 Courtesy of MAZDA MOTORS CORP.
- Support the transaxle.
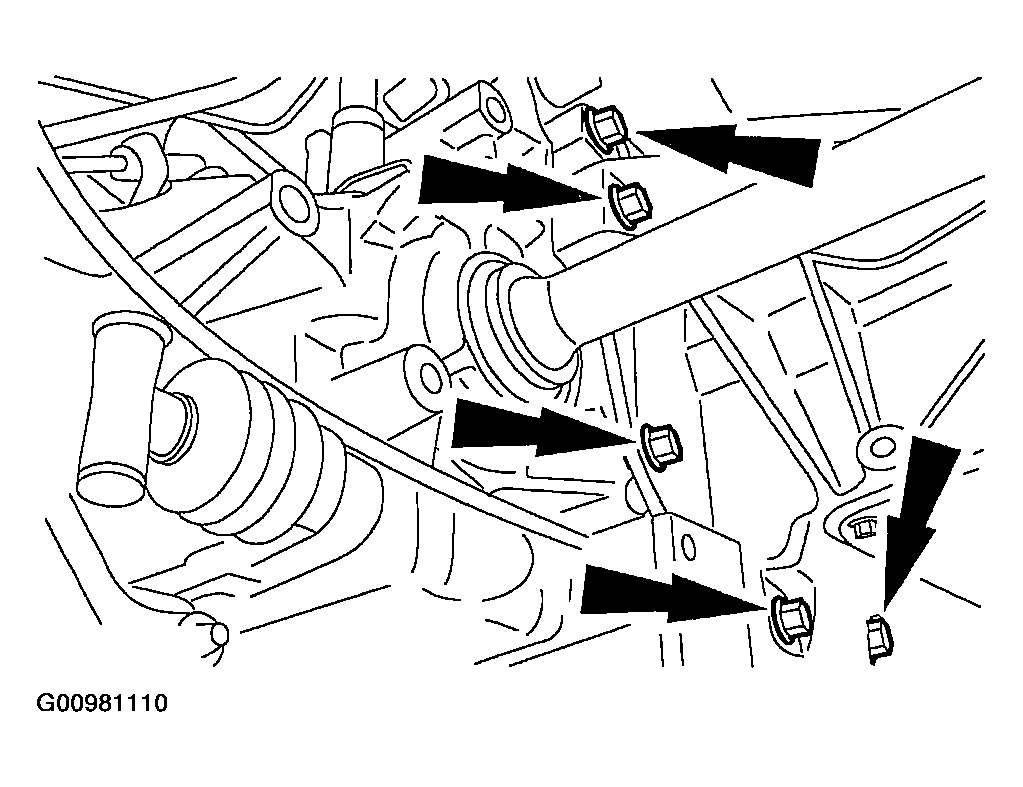 Courtesy of MAZDA MOTORS CORP.
NOTE:
- Front wheel drive shown, all wheel drive similar.
- Remove the seven transaxle flywheel housing bolts.
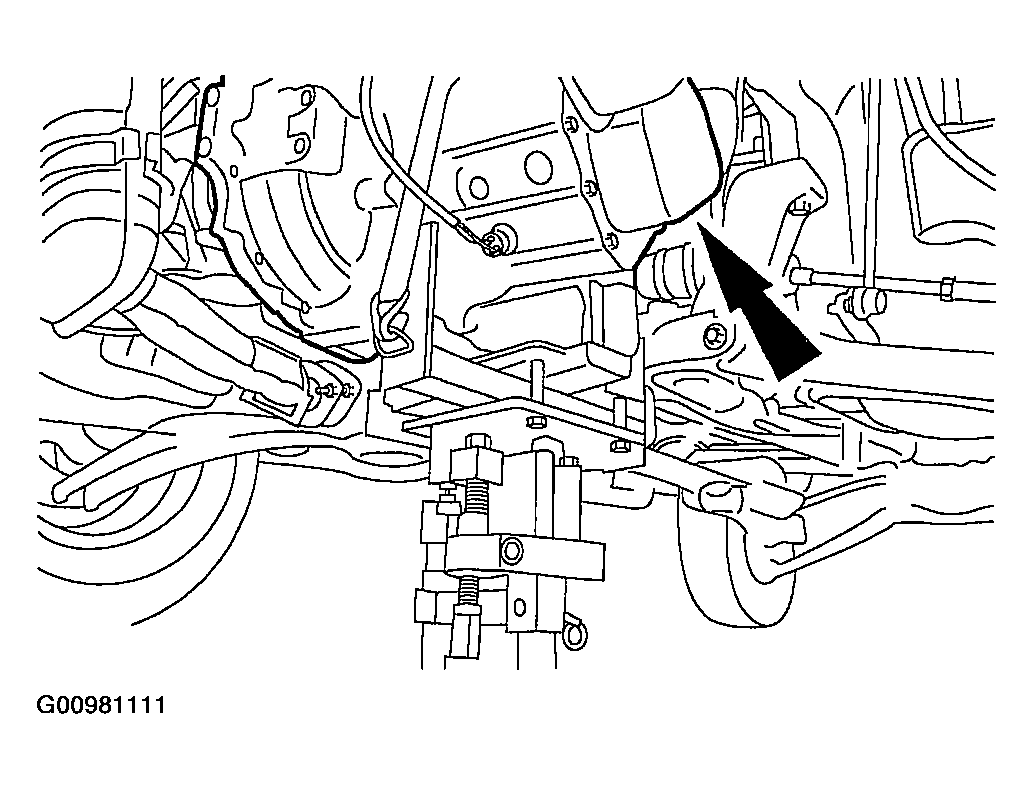 Courtesy of MAZDA MOTORS CORP.
- Remove the transaxle.
- Separate the RH halfshaft from the transaxle before lowering transaxle.