Installation Note
- On 4x4 models install the vent tube assembly.
WARNING:
- Secure the transmission to the transmission jack with a safety chain.
- Raise and position the transmission.
- Remove the SST
or equivalent.
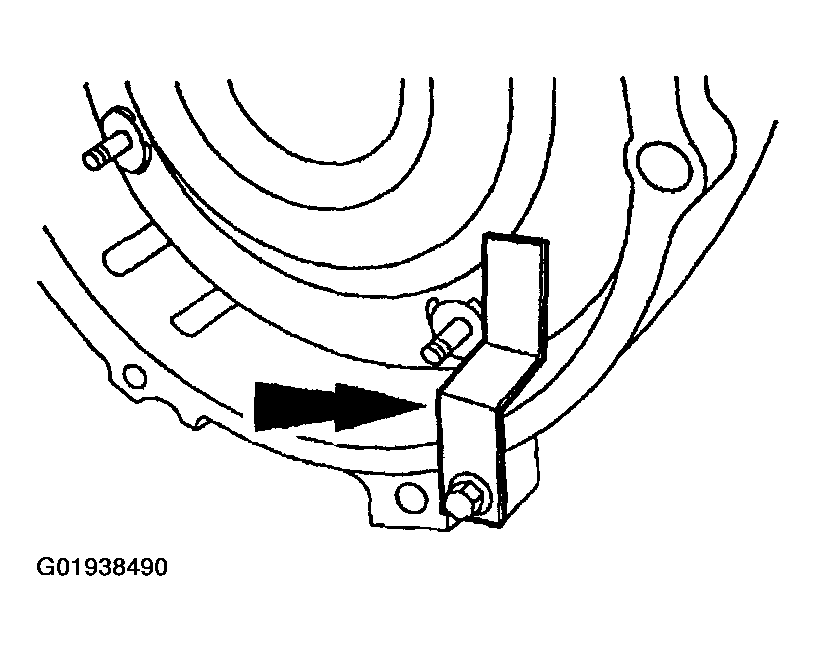 Courtesy of MAZDA MOTORS CORP.
NOTE:
- Align the flexplate to converter marks made at removal.
- Install six transmission to engine bolts.
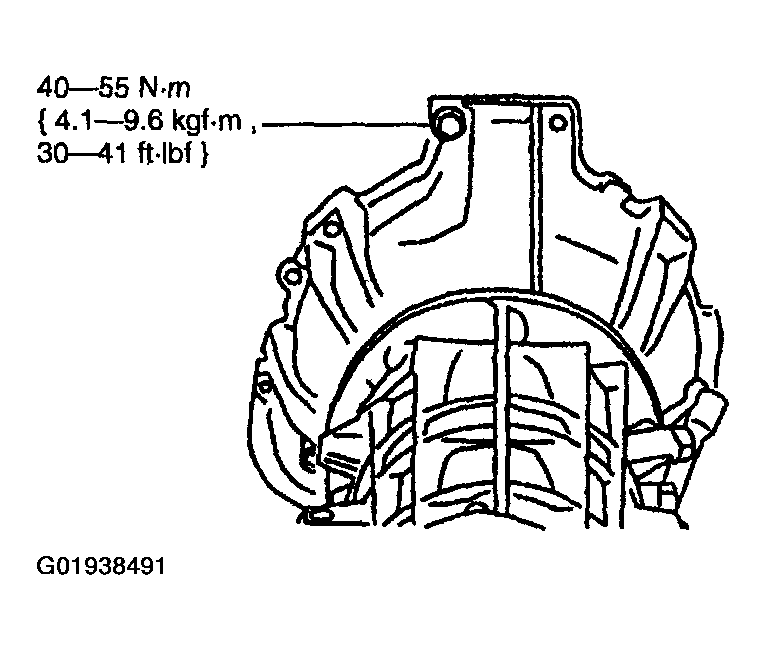 Courtesy of MAZDA MOTORS CORP.
- Install the upper fluid filler tube and bracket bolt.
- Install the upper filler tube.
- Install the bracket bolt.
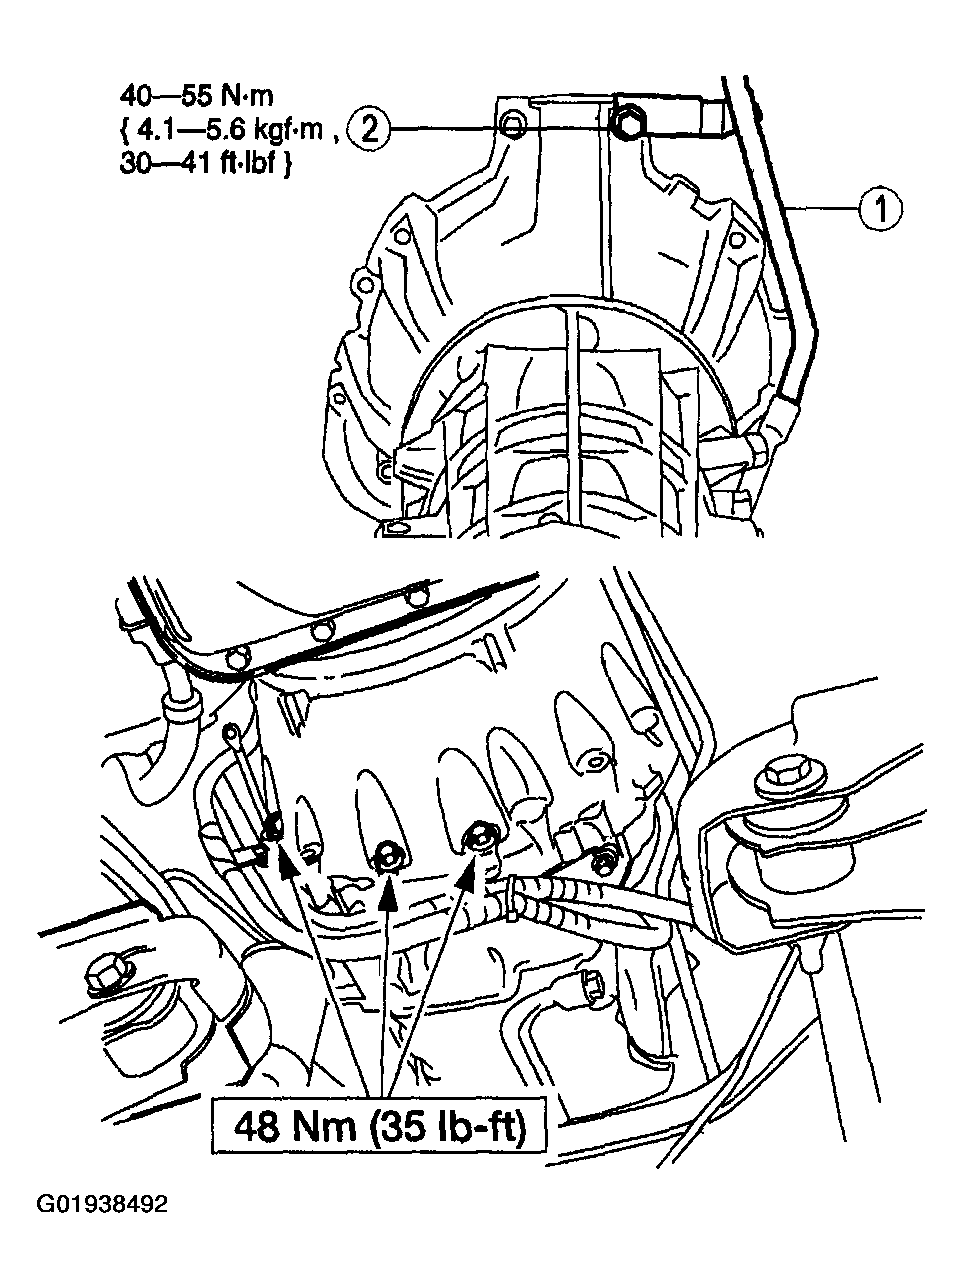 Courtesy of MAZDA MOTORS CORP.
- Install the lower transmission to engine screws.
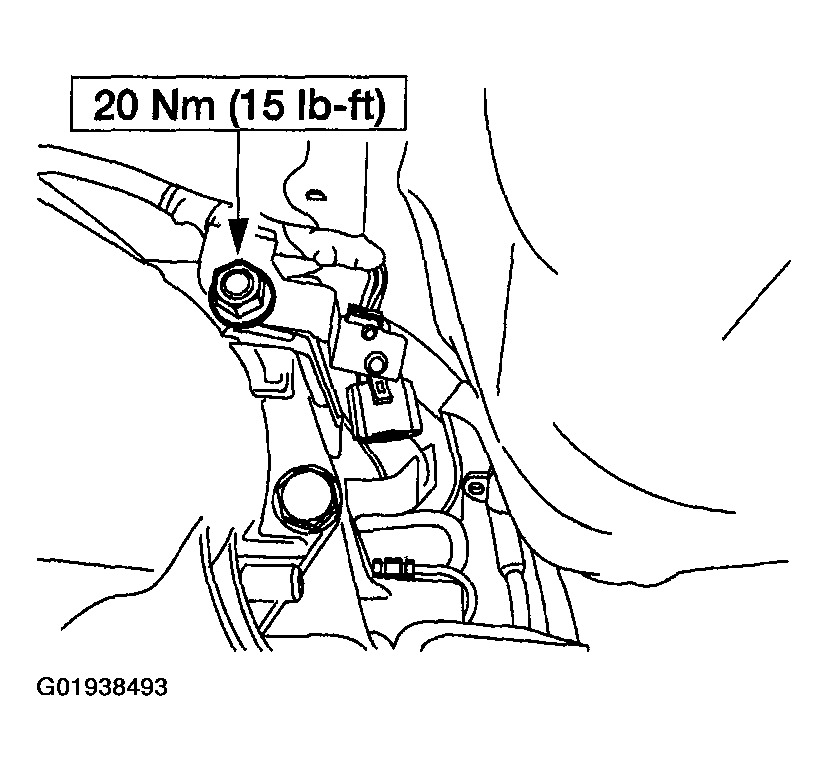 Courtesy of MAZDA MOTORS CORP.
- Install the HO2S connector bracket.
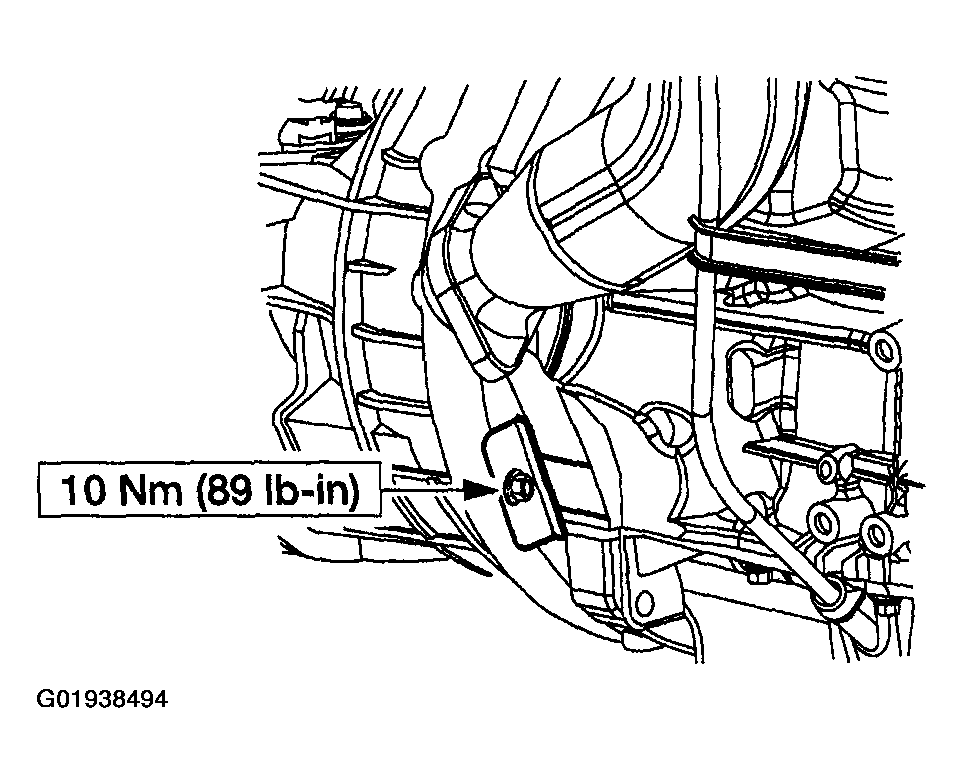 Courtesy of MAZDA MOTORS CORP.
- Install the rear engine cover plate.
- If equipped, install the transfer case; see TRANSFER CASE REMOVAL/INSTALLATION
.
- Install the catalytic converter assembly; see THREE-WAY CATALYTIC CONVERTER REMOVAL/INSTALLATION - 2.3L
for 2.3L engine or THREE-WAY CATALYTIC CONVERTER REMOVAL/INSTALLATION - 3.0L
for 3.0L engine or THREE-WAY CATALYTIC CONVERTER REMOVAL/INSTALLATION - 4.0L
for 4.0L engine.
- Install the (RH) transmission mount bolts.
- Reposition the exhaust bracket.
- Install the bolts.
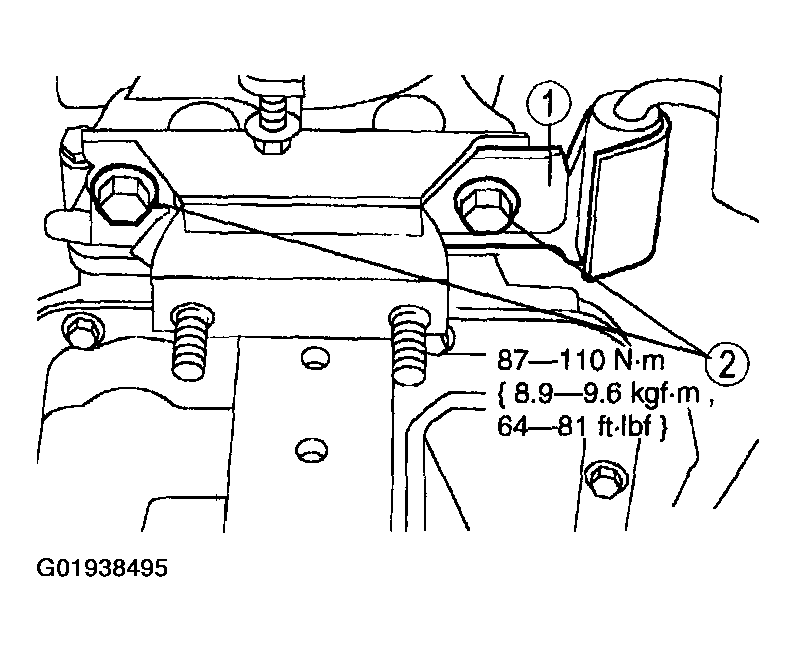 Courtesy of MAZDA MOTORS CORP.
- Install the crossmember.
- Position the crossmember.
- Install the eight crossmember bolts (four each side).
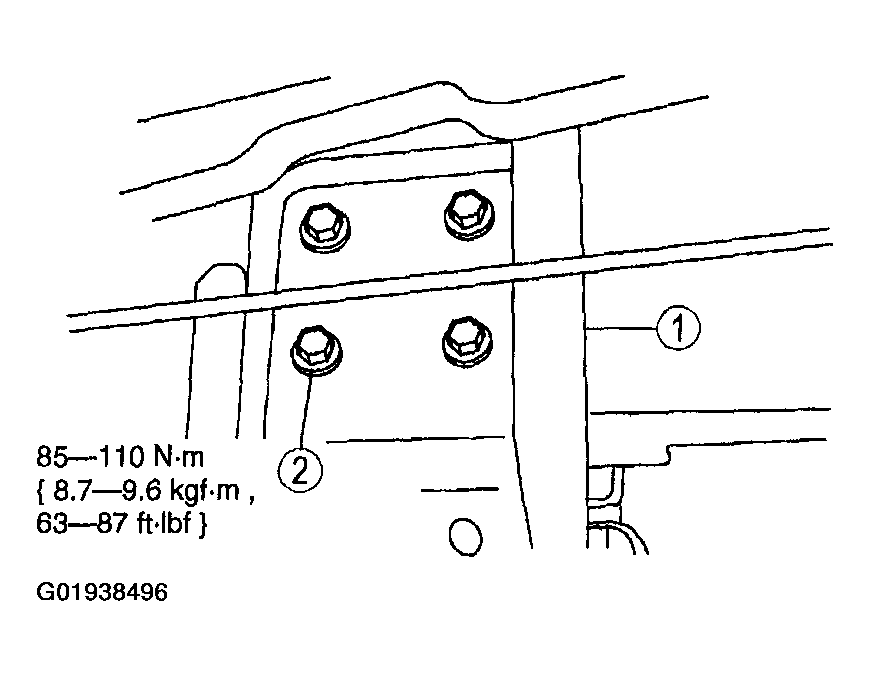 Courtesy of MAZDA MOTORS CORP.
- Install the transmission mount into the crossmember and tighten the transmission mount nuts.
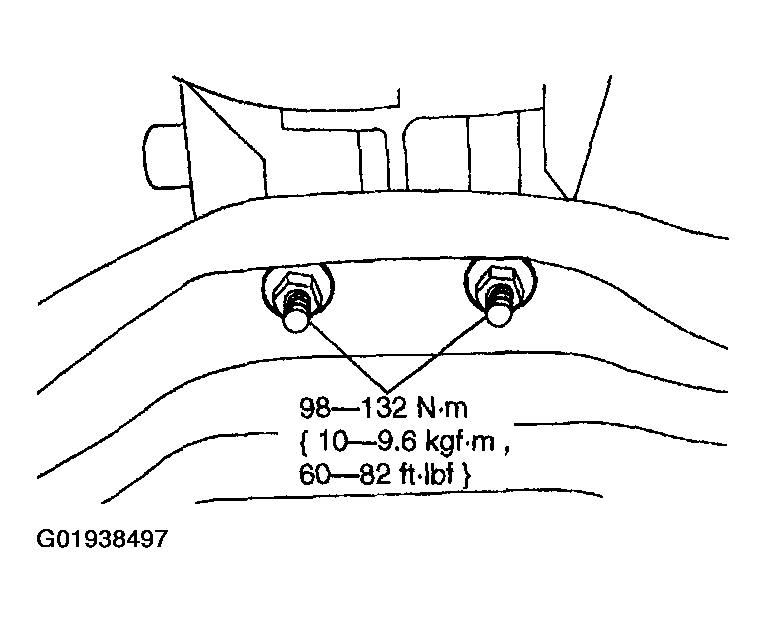 Courtesy of MAZDA MOTORS CORP.
- Remove the jack.
CAUTION:
- Use care not to bend or otherwise damage the cooler lines.
- Install the transmission cooler lines.
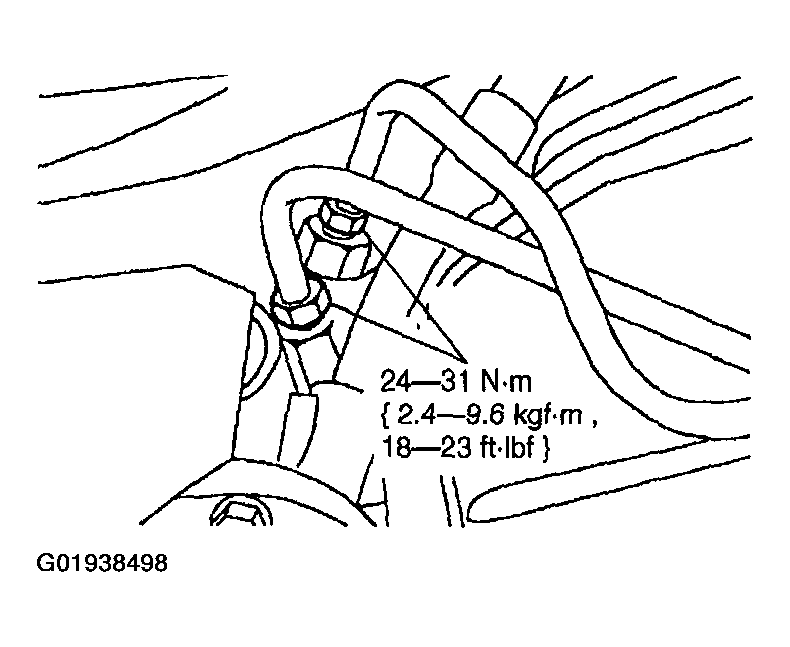 Courtesy of MAZDA MOTORS CORP.
- Install the four torque converter to flywheel nuts.
- Rotate the crankshaft as needed to gain access to all the flywheel nuts.
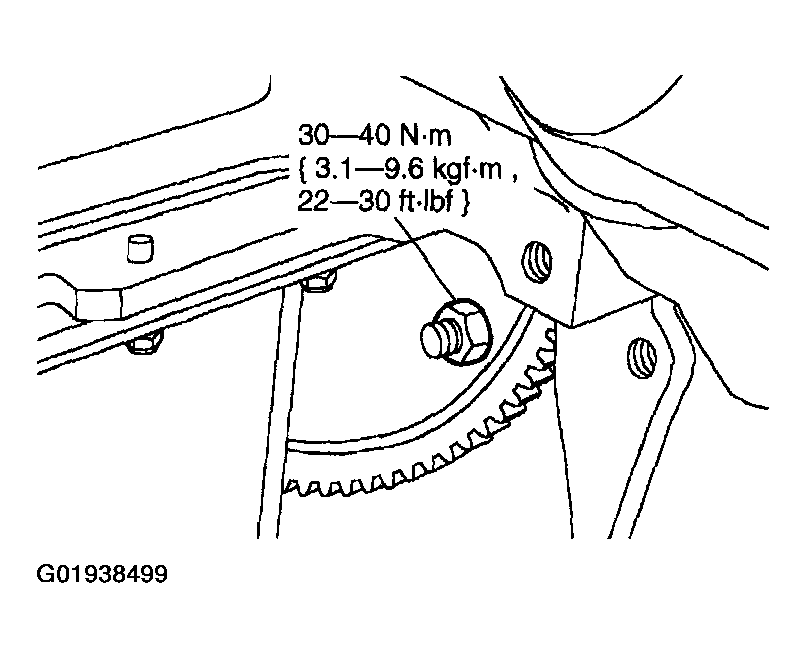 Courtesy of MAZDA MOTORS CORP.
- Install the starter motor; under REMOVAL & INSTALLATION see STARTER MOTOR -- 2.3L
, STARTER MOTOR -- 3.0L
or STARTER MOTOR -- 4.0L
.
- Install the transmission wiring harnesses.
- Connect the heated oxygen sensor (HO2S) connector.
- Connect the digital transmission range (TR) sensor connector.
- Connect the transmission connector.
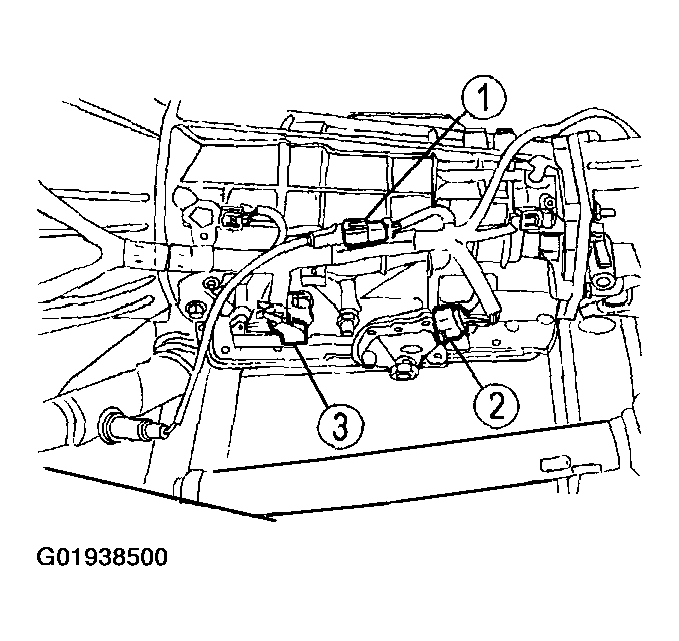 Courtesy of MAZDA MOTORS CORP.
- Install the shift cable.
- Connect the shift cable to manual control lever.
- Connect the shift cable to the bracket.
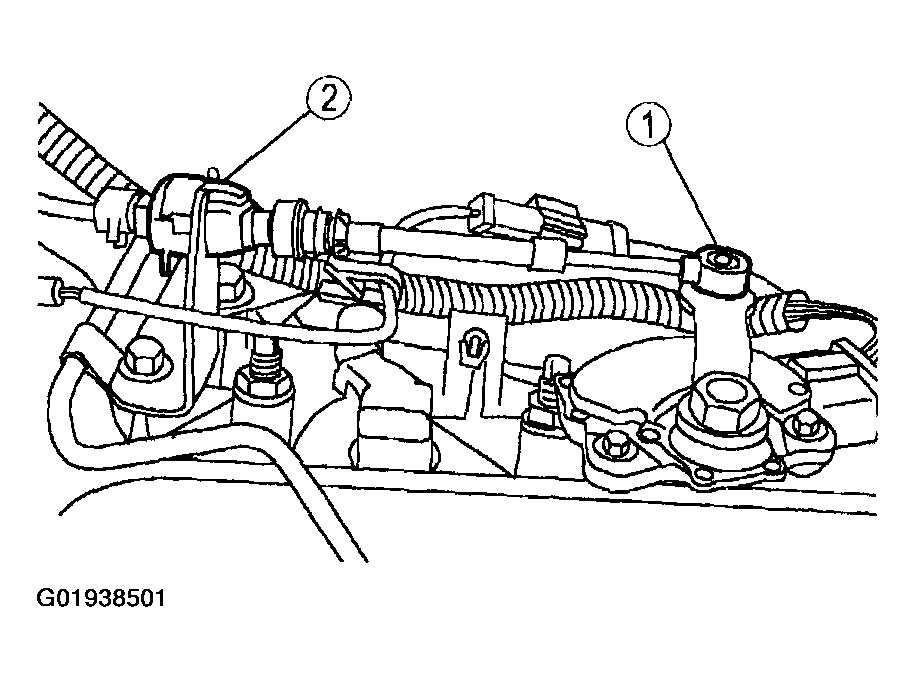 Courtesy of MAZDA MOTORS CORP.
NOTE:
- Align the propeller shaft yoke and the axle shaft marks made at removal to maintain driveline balance.
- Align and install the rear propeller shaft; see PROPELLER SHAFT REAR (4X2) REMOVAL/INSTALLATION
or PROPELLER SHAFT REAR (4X4) REMOVAL/INSTALLATION
.
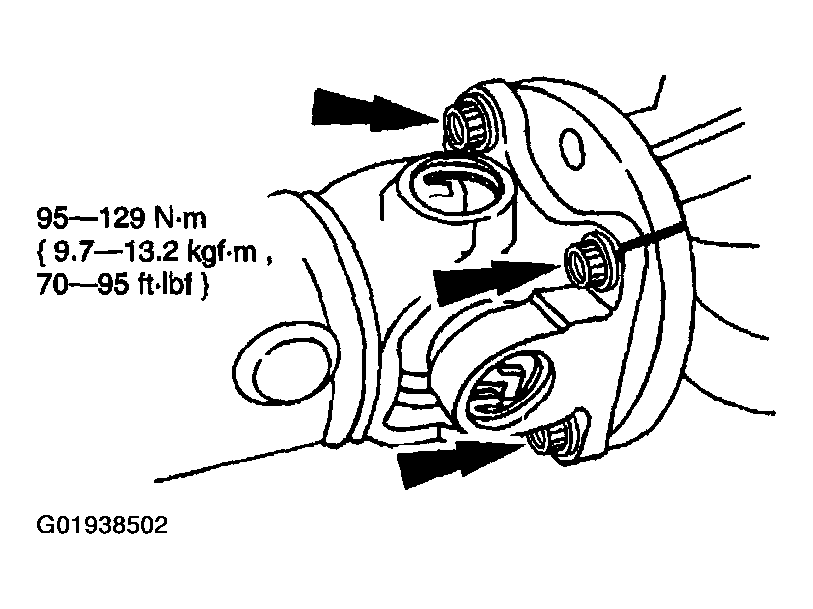 Courtesy of MAZDA MOTORS CORP.
- Lower the vehicle.
NOTE:
- When the battery has been disconnected and reconnected, some abnormal drive symptoms can occur while the vehicle relearns its adaptive strategy. The customer needs to be notified that they may experience slightly different upshifts either soft or firm and this is a temporary condition and will eventually return to normal operating condition.
- Connect the negative battery cable.
- Fill the transmission with fluid and inspect for proper operation.