Selector Cable Installation Note (FN4A-EL automatic transaxle models)
- Install the selector cable to the selector lever securely.
- Install the selector cable to the bracket securely.
NOTE:
- Steps 3 and 4 are for the selector cable replacement only.
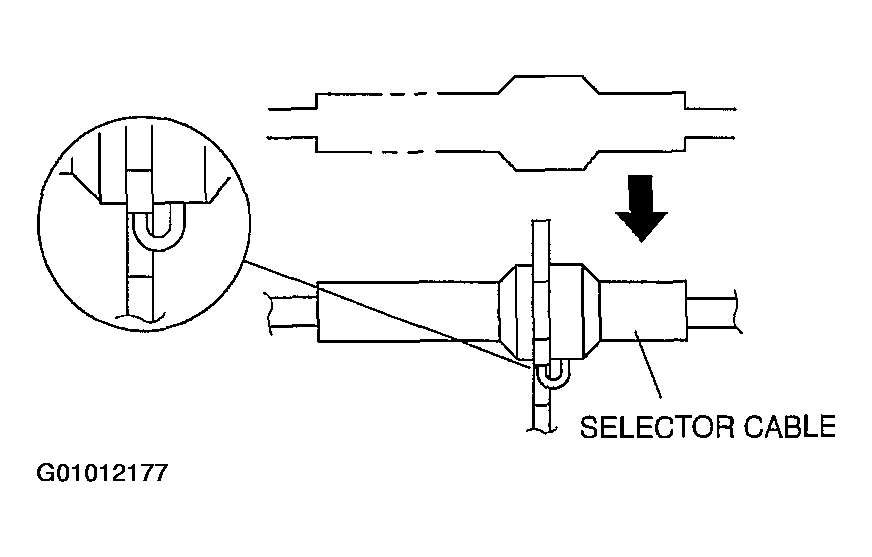
- Verify that the selector lever is in the P position.
 Courtesy of MAZDA MOTORS CORP.
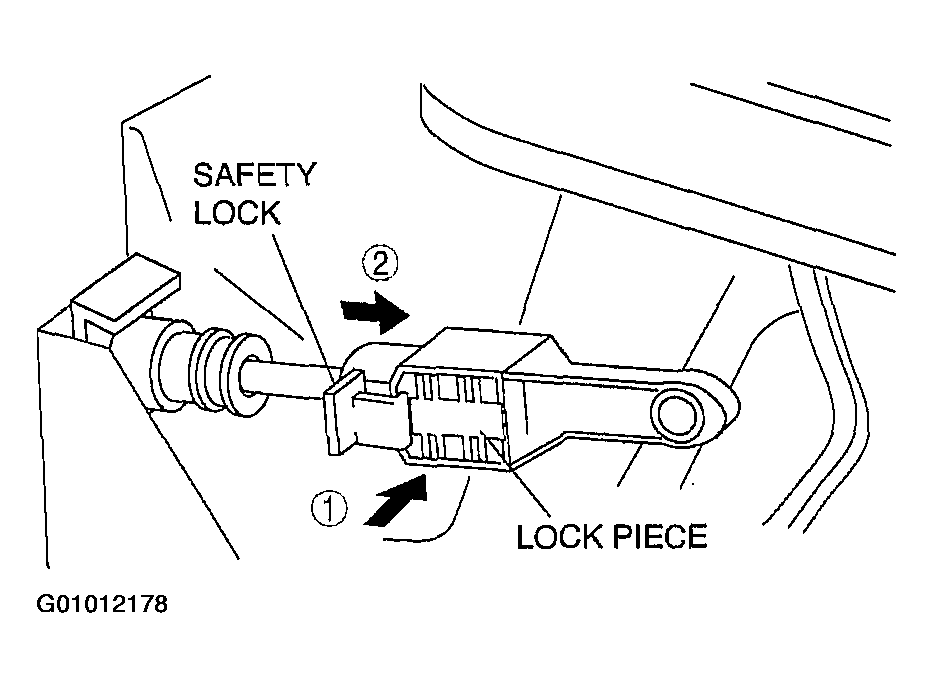
- Lock the lock piece of the selector cable (selector lever side) in the order shown in Fig 2.
- Verify that the manual shaft is in the P position.
 Courtesy of MAZDA MOTORS CORP.
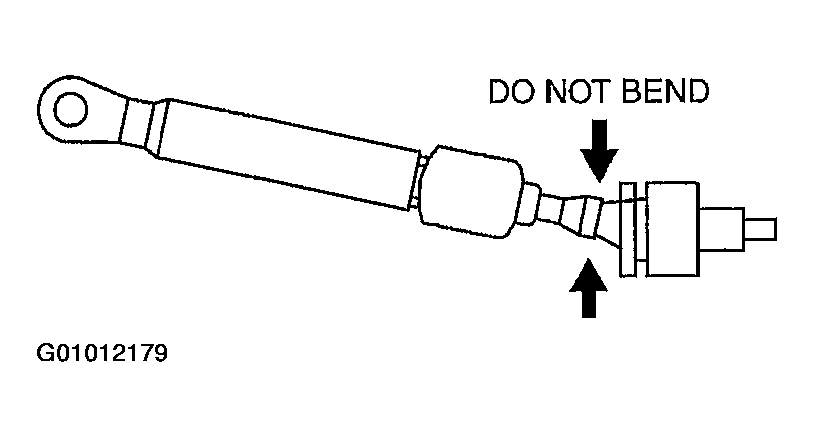
CAUTION:
- Bending the selector cable in the manner shown in the figure will damage the cable and it may become loose when shifted. When installing the selector cable, hold it straight.
 Courtesy of MAZDA MOTORS CORP.
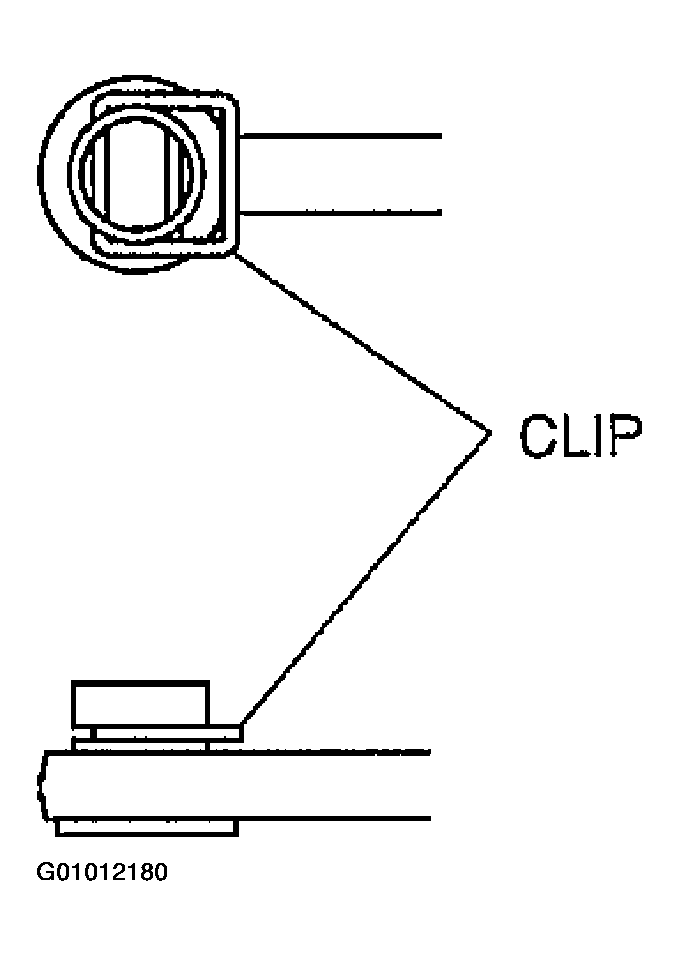
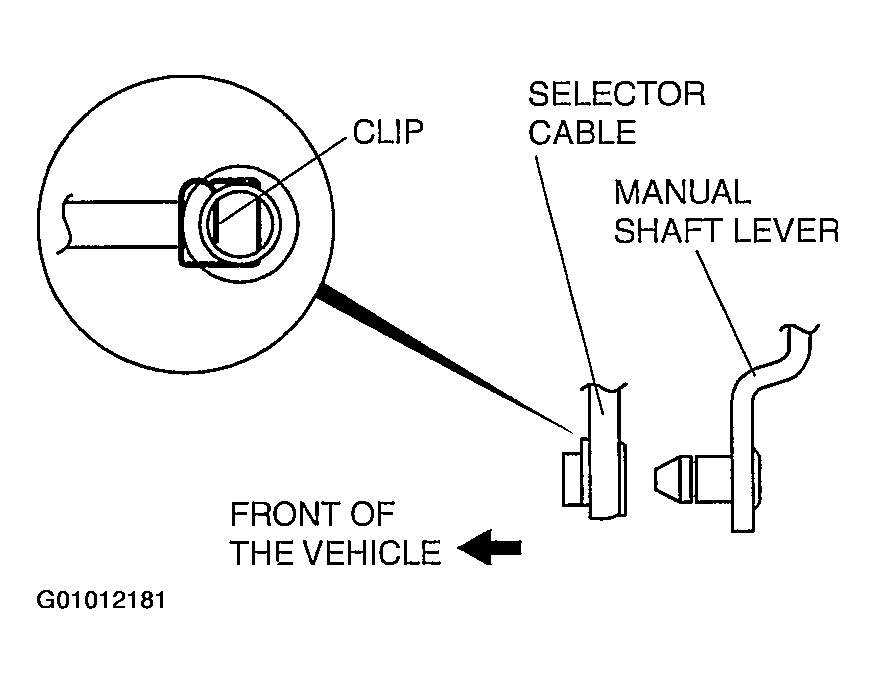
- Install the clip as shown in Fig 4.
 Courtesy of MAZDA MOTORS CORP.
NOTE:
- Install the selector lever to the manual shaft lever with the clip side of the selector cable end facing the front of the vehicle.
 Courtesy of MAZDA MOTORS CORP.
- Install the selector lever to the manual shaft lever so that no load acts on the selector cable.
- Confirm that the tip of the manual shaft lever projects out of the end of the selector cable.
- Securely install the selector cable to the selector cable bracket.