Dashboard Removal/Installation
- Remove the passenger-side air bag module if equipped. (See
PASSENGER-SIDE AIR BAG MODULE
.)
- Remove the combination switch. (See
COMBINATION SWITCH REMOVAL/INSTALLATION
.)
- Remove the installation bolts then shift the assembled steering shaft in the dashboard. (See
STEERING WHEEL AND COLUMN REMOVAL/INSTALLATION
.
- Remove the instrument cluster. (See
INSTRUMENT CLUSTER REMOVAL/INSTALLATION
.)
- Remove the console. (See
CONSOLE REMOVAL/INSTALLATION
.)
- Remove the glove compartment.
- Remove the lower panel.
- Remove the hood release cable installation nut.
- Remove the side wall.
- Remove the A-pillar trim. (See
A-PILLAR TRIM REMOVAL/INSTALLATION
.)
- Remove the side panel.
- Disconnect the antenna plug.
- For vehicles equipped with the semi-logic type climate control unit, disconnect the wires for the heater unit. (See
CLIMATE CONTROL UNIT INSTALLATION
.) (See
CLIMATE CONTROL UNIT INSTALLATION
.)
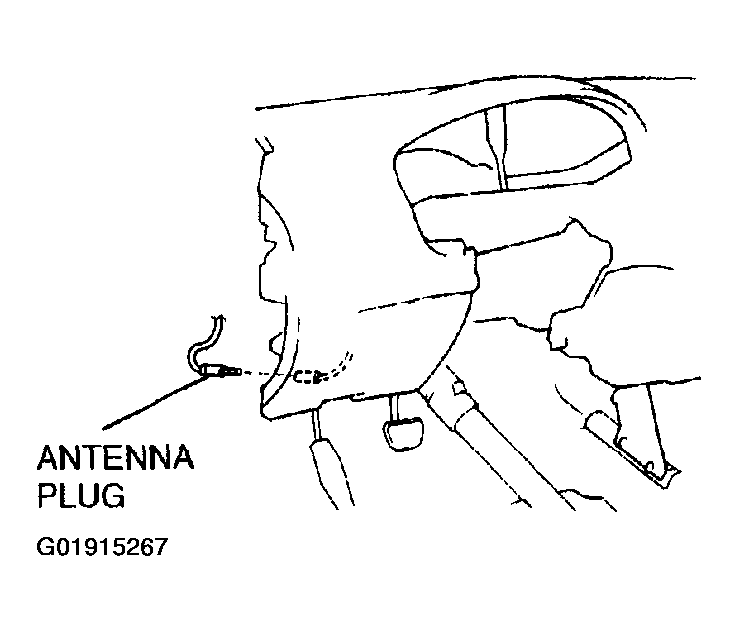 Courtesy of MAZDA MOTORS CORP.
- Disconnect the connectors.
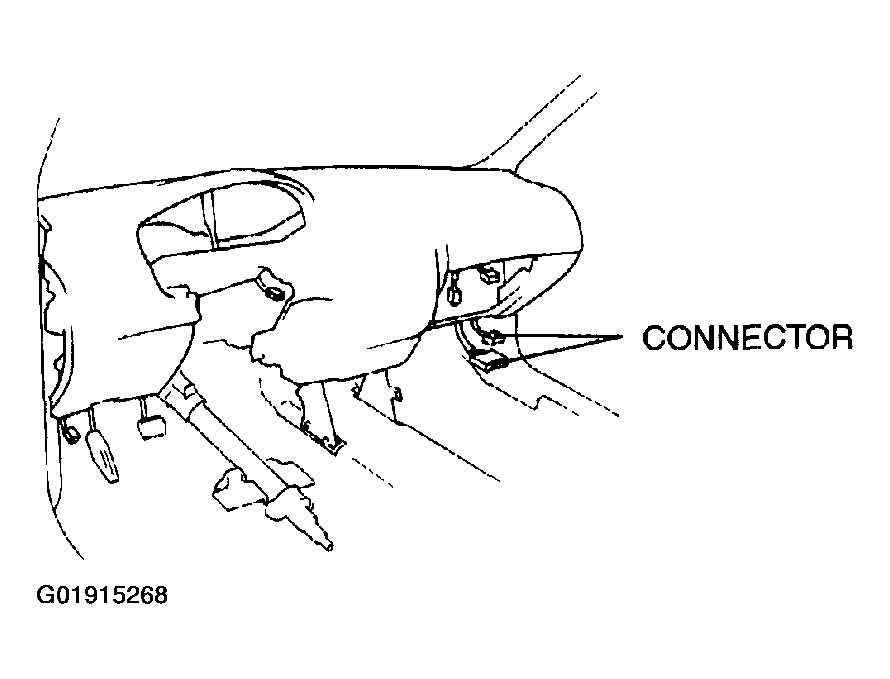 Courtesy of MAZDA MOTORS CORP.
- Remove the bolts.
- Remove the dashboard from the vehicle.
WARNING:
- Removing the dashboard without supporting it can be dangerous. The dashboard may fall and injure you. Always perform these procedures together with at least another person.
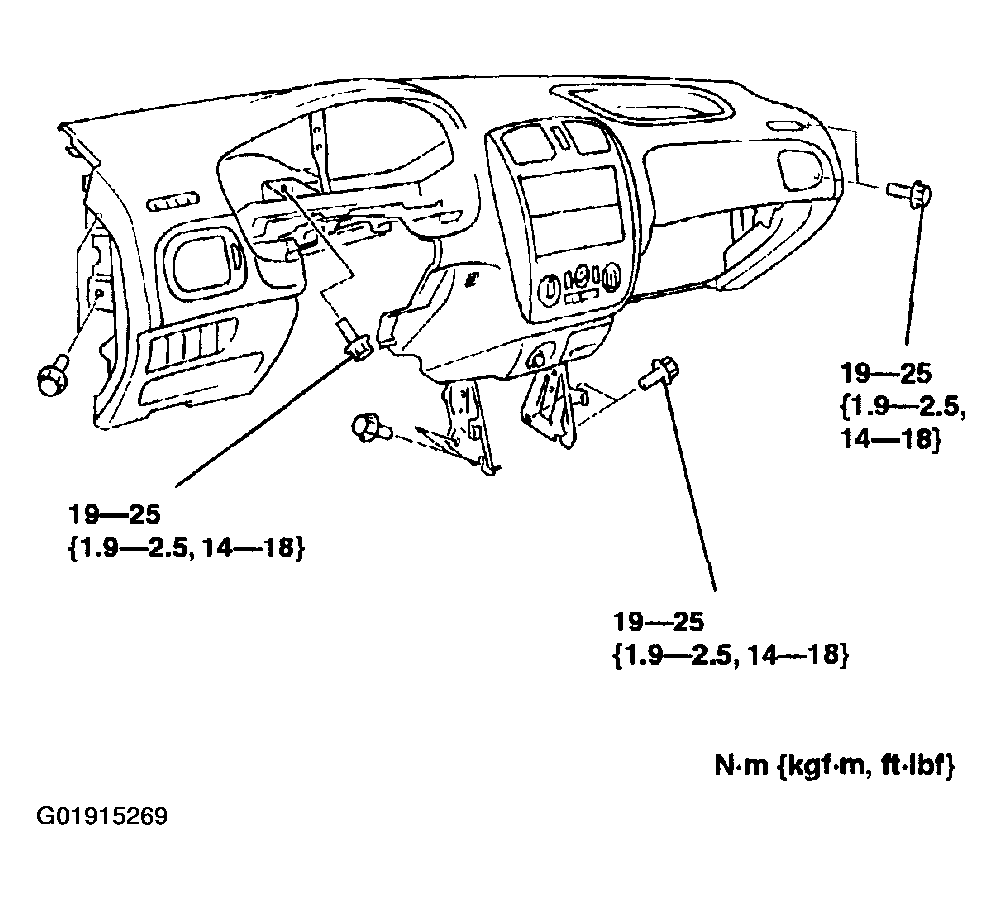 Courtesy of MAZDA MOTORS CORP.
- Incline the dashboard slowly forward.
- Lift up the dashboard while it is inclined forward.
- Remove the dashboard from the vehicle through the passenger-side front door.
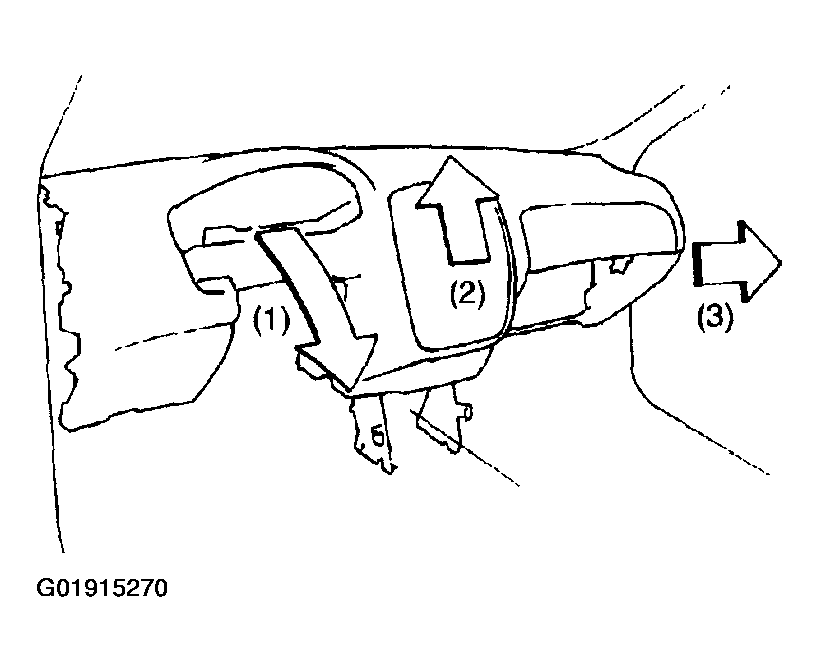 Courtesy of MAZDA MOTORS CORP.
- Install in the reverse order of removal.