Diagnosis & Repair Procedure
- Turn ignition off. Connect scan tool to DLC-2. Turn ignition on, engine off. Check service bulletins for repair information related to this DTC. If repair information is not available, go to next step. If repair information is available, perform diagnosis and repair as necessary. After repair, go to step 10.
- Turn ignition switch off and then start engine. Check for DTCs. See RETRIEVING DIAGNOSTIC TROUBLE CODES under SELF-DIAGNOSTIC SYSTEM. If DTC P0443 is present, go to next step. If DTC P0443 is not present, problem is intermittent. See INTERMITTENTS
in TROUBLE SHOOTING - NO CODES article.
- With ignition switch on, disconnect intake manifold vacuum hose from purge solenoid valve. Connect vacuum pump to purge solenoid valve. Apply vacuum to valve. If valve does not hold vacuum, go to next step. If valve holds vacuum, go to step 5.
- With vacuum pump still connected. Turn ignition switch off. Disconnect purge solenoid valve harness connector. Pump vacuum pump several times and wait a few seconds. If valve does not hold vacuum, replace purge solenoid valve. After repair, go to step 10. If valve holds vacuum, repair short to ground in Brown/Red wire between purge solenoid valve harness connector and PCM 104-pin harness connector terminal No. 67. After repair, go to step 10.
- Turn ignition switch off. Disconnect purge solenoid valve harness connector. Check harness connector and purge solenoid valve for loose or damaged terminals, poor contact or corrosion. Repair as necessary. After repair, go to step 10. If no problems are found, go to next step.
- Check resistance between purge solenoid valve terminals. If resistance is 22-26 ohms, go to next step. If resistance is not 22-26 ohms, replace purge solenoid valve. After repair, go to step 10.
- Turn ignition switch on, engine off. Measure voltage between ground and purge solenoid valve harness connector terminal "A" (White/Red wire). If battery voltage is present, go to next step. If battery voltage is not present, check for open in White/Red wire between purge solenoid valve and main relay. Repair as necessary. After repair, go to step 10.
- Turn ignition switch off. Disconnect PCM 104-pin harness connector. Check for loose or damaged terminals, poor contact or corrosion. Repair as necessary. After repair, go to step 10. If no problems are found, go to next step.
- Connect 104-pin Breakout Box (49-UN01-130) to PCM 104-pin harness connector only. See Fig 1. Turn ignition switch on, engine off. Measure voltage between ground and purge solenoid valve harness connector terminal "B" (Brown/Red wire). If battery voltage is present, repair short to power in Brown/Red wire between purge solenoid valve harness connector and PCM 104-pin harness connector terminal No. 67. After repair, go to next step. If battery voltage is not present, check continuity in Brown/Red wire between purge solenoid valve harness connector terminal "B" and 104-pin breakout box terminal No. 67. See Figure. If continuity is present, go to next step. If continuity is not present, repair open in Brown/Red wire between purge solenoid valve harness connector terminal "B" and PCM harness connector terminal No. 67. After repair, go to next step.
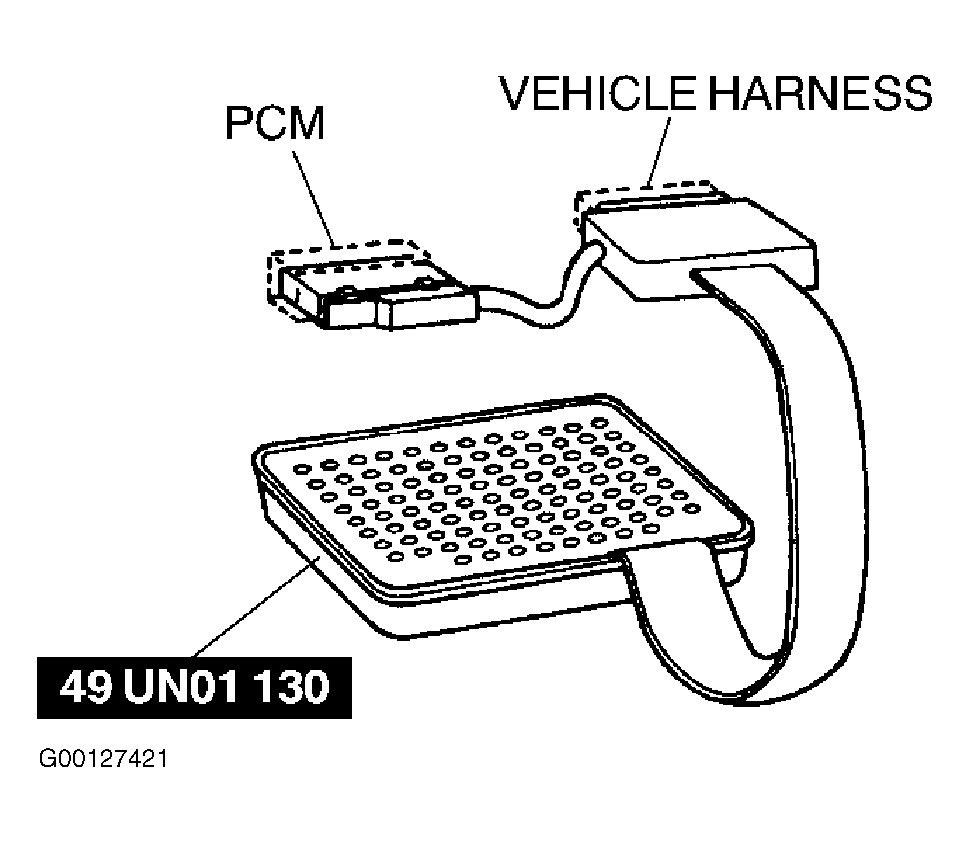 Courtesy of MAZDA MOTORS CORP.
- Reconnect all connectors. Turn ignition switch on. Clear DTCs. See CLEARING DIAGNOSTIC TROUBLE CODES under SELF-DIAGNOSTIC SYSTEM. Check for DTCs. See RETRIEVING DIAGNOSTIC TROUBLE CODES under SELF-DIAGNOSTIC SYSTEM. If DTC P0443 is present, replace PCM and go to next step. If DTC P0443 is not present, go to next step.
- Cycle ignition switch from off to on. Check for DTCs. See RETRIEVING DIAGNOSTIC TROUBLE CODES under SELF-DIAGNOSTIC SYSTEM. If no other DTCs are present, testing is complete. If any other DTC is present, go to applicable test and repair.