Removal & Installation: Engine
- Relieve fuel pressure. See FUEL PRESSURE RELEASE under REMOVAL & INSTALLATION. Disconnect negative battery cable. Raise vehicle, and remove engine undercover and side covers. See Fig 1. Drain engine, transaxle and cooling system fluids.
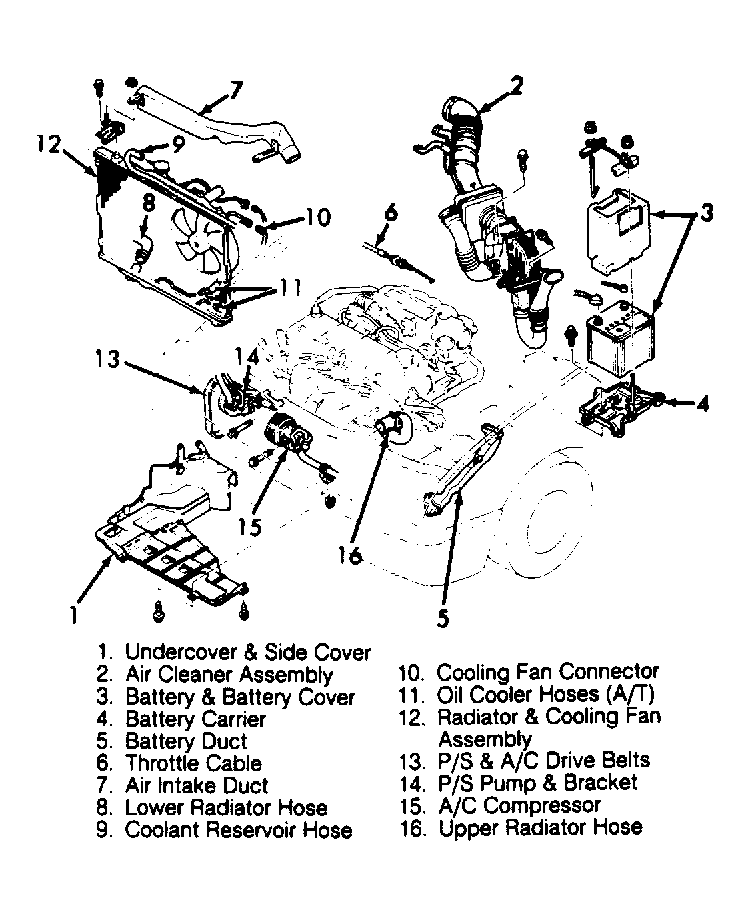 Courtesy of MAZDA MOTORS CORP.
- Remove air cleaner assembly. Remove battery/carrier assembly and ducting. Remove throttle cable and air intake duct across radiator. Remove radiator/cooling fan assembly.
- Remove all drive belts. DO NOT disconnect P/S hoses or A/C compressor hoses. Remove P/S pump and A/C compressor from engine, and secure units away from engine.
- Note locations and disconnect all necessary electrical connectors, ground wires, vacuum hoses, fuel hoses, coolant hoses and control cables for engine removal.
- Plug all fuel hoses to avoid leakage. Attach engine support bar or engine hoist to secure engine. Raise vehicle. Disconnect exhaust manifold downpipe and exhaust brackets from engine. On A/T models, remove shift control cable.
- On M/T models, remove shift control linkage and extension bar. Remove clutch release cylinder and fluid line bracket from transaxle housing. Leaving fluid line connected to cylinder, secure cylinder away from transaxle.
- On all models, remove transmission wiring harness connectors and speedometer cable. Remove tire/wheel assemblies and axle shaft nuts from hubs. Disconnect stabilizer bar from lower control arms. Separate lower ball joints and steering tie-rod ends from steering knuckles.
- Pry axle shafts out of transaxle. Remove and discard circlip from axle shafts. For further information on axle shafts, see appropriate article in the DRIVE AXLES Section. On 4WD models, disconnect rear drive shaft from transaxle.
- Remove transaxle mount nuts from crossmember, and loosen crossmember bolts. See Fig 2. Lower vehicle, and attach engine hoist for engine removal. Remove engine front mount and transaxle top mount from inner fender panels. Remove transaxle crossmember. Remove engine and transaxle assembly from top of vehicle.
- To install, reverse removal procedure. Tighten bolts and nuts to specifications. See TORQUE SPECIFICATIONS . Add all fluids and oils to specification.
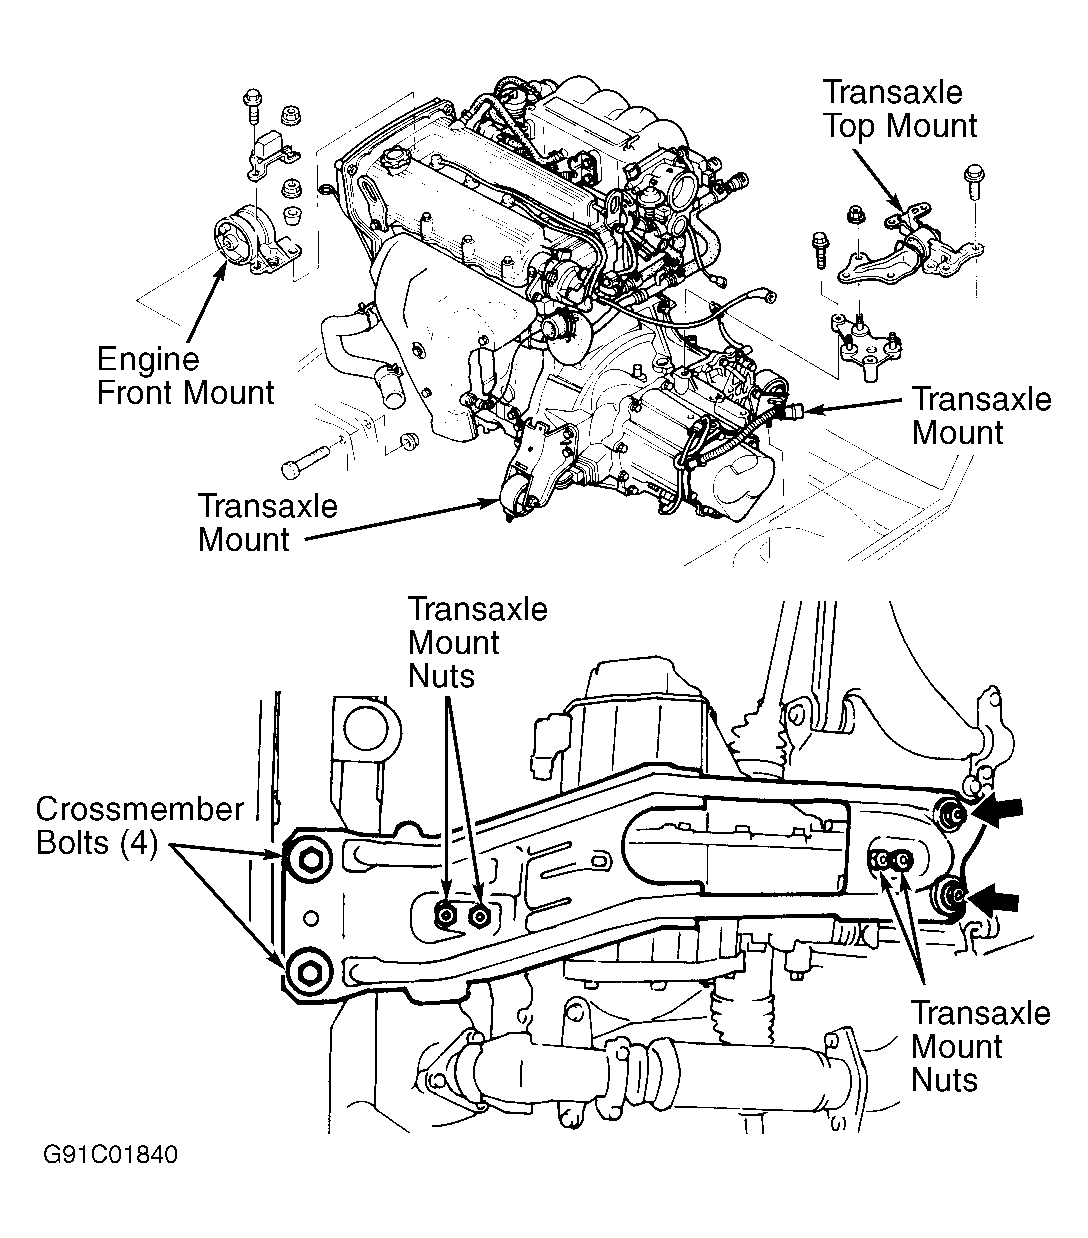 Courtesy of MAZDA MOTORS CORP.