Cigarette Lighter Assembly: Removal
- REMOVE NO. 2 CONSOLE UPPER PANEL GARNISH (See
REMOVAL
)
- REMOVE NO. 1 CONSOLE UPPER PANEL GARNISH (See
REMOVAL
)
- REMOVE INSTRUMENT PANEL GARNISH SUB-ASSEMBLY LH (See
REMOVAL
)
- REMOVE INSTRUMENT PANEL GARNISH SUB-ASSEMBLY RH
- REMOVE LOWER CENTER INSTRUMENT CLUSTER FINISH PANEL (See
REMOVAL
)
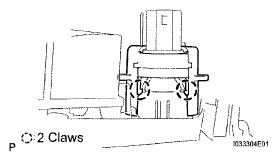
- REMOVE CIGARETTE LIGHTER COVER
- Release the 2 claws, and remove the cigarette lighter cover.
 Courtesy of © TOYOTA, LICENSE AGREEMENT TMS1002
- REMOVE CIGARETTE LIGHTER ASSEMBLY
- Remove the cigarette lighter knob and element assembly.
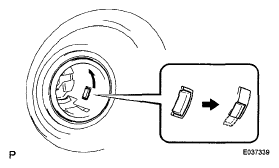
- Turn the socket counterclockwise as shown in the illustration, disengage the claw between the socket and the cigarette lighter bezel stay, and push out the socket to the room side.
- Align the socket with the notch on the cigarette lighter bezel stay, and remove the cigarette lighter assembly to the room side.
 Courtesy of © TOYOTA, LICENSE AGREEMENT TMS1002