Air Conditioning Unit: Disassembly
- REMOVE AIR CONDITIONING TUBE AND ACCESSORY ASSEMBLY
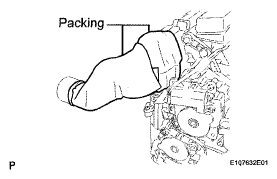
- Remove the packing from the A/C tube.
 Courtesy of © TOYOTA, LICENSE AGREEMENT TMS1002
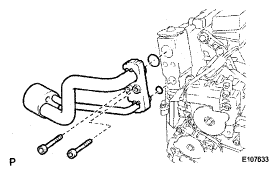
- Using a 4 mm hexagon wench, remove the 2 hexagon bolts and A/C tube.
- Remove the 2 O-rings from the A/C tube.
 Courtesy of © TOYOTA, LICENSE AGREEMENT TMS1002
- REMOVE COOLER EXPANSION VALVE
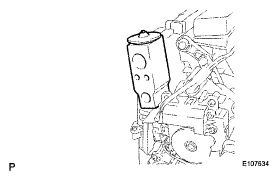
- Remove the cooler expansion valve from the cooler evaporator.
 Courtesy of © TOYOTA, LICENSE AGREEMENT TMS1002
- REMOVE AIR OUTLET CONTROL SERVOMOTOR RH
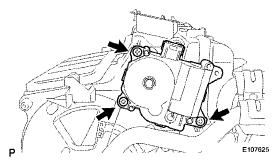
- Disconnect the connector.
- Remove the 3 screws and servomotor.
 Courtesy of © TOYOTA, LICENSE AGREEMENT TMS1002
- REMOVE AIR MIX CONTROL SERVOMOTOR RH
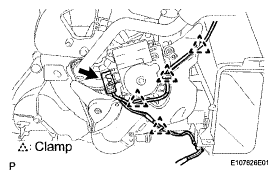
- Remove the 3 clamps and connector and disconnect the wire harness.
 Courtesy of © TOYOTA, LICENSE AGREEMENT TMS1002
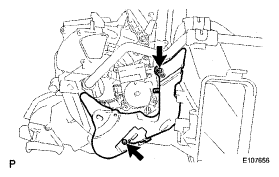
- Remove the 2 screws and heater piping cover.
 Courtesy of © TOYOTA, LICENSE AGREEMENT TMS1002
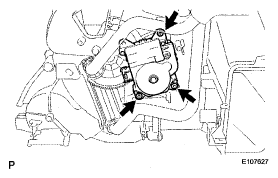
- Remove the 3 screws and air servomotor.
 Courtesy of © TOYOTA, LICENSE AGREEMENT TMS1002
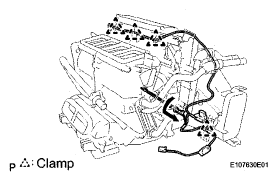
- REMOVE AIR CONDITIONING HARNESS ASSEMBLY
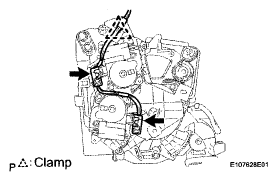
- Disconnect the 2 connectors and detach the 2 clamps.
 Courtesy of © TOYOTA, LICENSE AGREEMENT TMS1002
- Detach the 4 clamps and then disconnect the wire harness.
- Remove the A/C harness as shown in the illustration.
 Courtesy of © TOYOTA, LICENSE AGREEMENT TMS1002
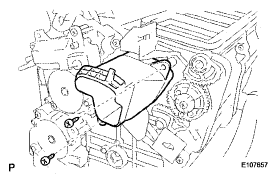
- REMOVE AIR OUTLET CONTROL SERVOMOTOR LH
- Remove the 2 screws and air duct.
 Courtesy of © TOYOTA, LICENSE AGREEMENT TMS1002
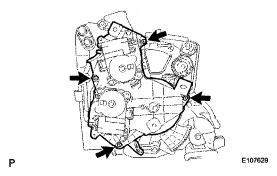
- Remove the 4 screws and servomotors.
 Courtesy of © TOYOTA, LICENSE AGREEMENT TMS1002
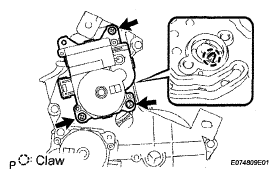
- Remove the 3 screws.
- Detach the claw and remove the air outlet control servomotor.
 Courtesy of © TOYOTA, LICENSE AGREEMENT TMS1002
- REMOVE AIR MIX CONTROL SERVOMOTOR LH
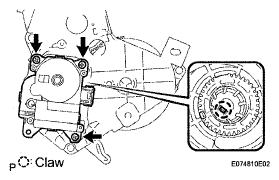
- Remove the 3 screws.
- Release the claw and remove the servomotor.
 Courtesy of © TOYOTA, LICENSE AGREEMENT TMS1002
- REMOVE HEATER RADIATOR UNIT SUB-ASSEMBLY
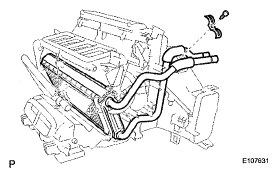
- Remove the screw and clamp.
- Remove the radiator unit.
 Courtesy of © TOYOTA, LICENSE AGREEMENT TMS1002
- REMOVE NO. 1 COOLER EVAPORATOR SUB-ASSEMBLY
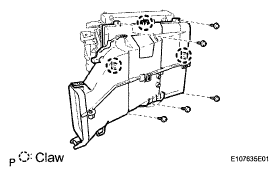
- Remove the 5 screws.
- Release the 3 claws and remove the air duct case.
 Courtesy of © TOYOTA, LICENSE AGREEMENT TMS1002
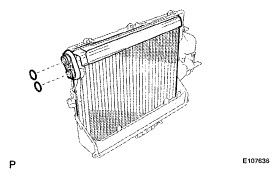
- Remove the cooler evaporator from the heater case.
- Remove the 2 O-rings from the cooler evaporator.
 Courtesy of © TOYOTA, LICENSE AGREEMENT TMS1002