- Set the front tires straight-ahead before removing the steering wheel.
CAUTION:
If the steering wheel and the front tires are not set straight ahead together, it may affect the number of circulation of steering wheel and damage the cable inside the clock spring.
- Disconnect the battery negative cable.
NOTE:
After disconnecting the battery negative cable, wait for at least 30 seconds.
- With the steering wheel centered, insert a 6 inch hex (5mm) driver (A) into the small hole on the bottom of the steering wheel (B) first by pushing the internal clip until air bag comes loose, and then proceed with the side holes to remove the air bag as shown on (C and D).
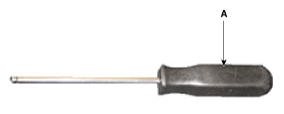 Courtesy of KIA MOTORS AMERICA, INC.
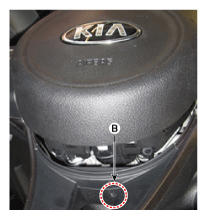 Courtesy of KIA MOTORS AMERICA, INC.
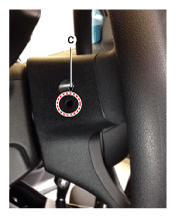 Courtesy of KIA MOTORS AMERICA, INC.
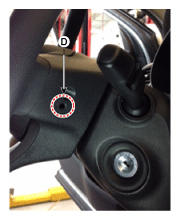 Courtesy of KIA MOTORS AMERICA, INC.
- Align the front wheel to face forward.
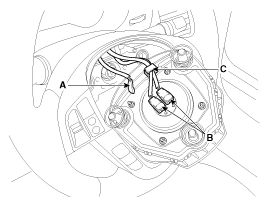
- Remove the wiring fixing clip (C) and disconnect the horn connector (A).
 Courtesy of KIA MOTORS AMERICA, INC.
- Release the connector locking pin, then disconnect the driver airbag module connector (B).
CAUTION:
The removed airbag module should be stored in a clean, dry place with the pad cover facing up.
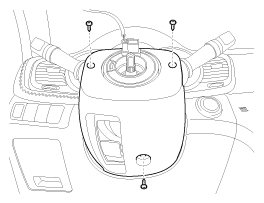
- Remove the steering wheel and steering wheel column shroud. (Refer to the STEERING COLUMN AND SHAFT
)
 Courtesy of KIA MOTORS AMERICA, INC.
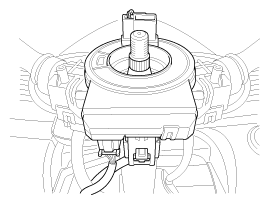
- Disconnect the clock spring and horn connector, then remove the clock spring.
 Courtesy of KIA MOTORS AMERICA, INC.